[gtranslate]
Summer is the harvesting time for fresh corn. This is the children’s favorite crispy corn pancake with a sweet flavor. With this method, you can make crispy, sweet, or savory corn pancakes with no mess.
When I was a child, we grew lots of corn on the mountain behind our house. Some of the corn was for pigs and chickens. The sweet and sticky corn was for me. Some corn stalks taste sweet. Every time my dad returned from the farm, he’d bring me a sweet one. That’s one of the sweet memories from my childhood. So this crisp corn pancake always reminds me of those wonderful times. Although I am quite busy with work, I make time to cook for my little daughter because I want her to grow up with memories of mom’s home cooking.
Cook’s Note
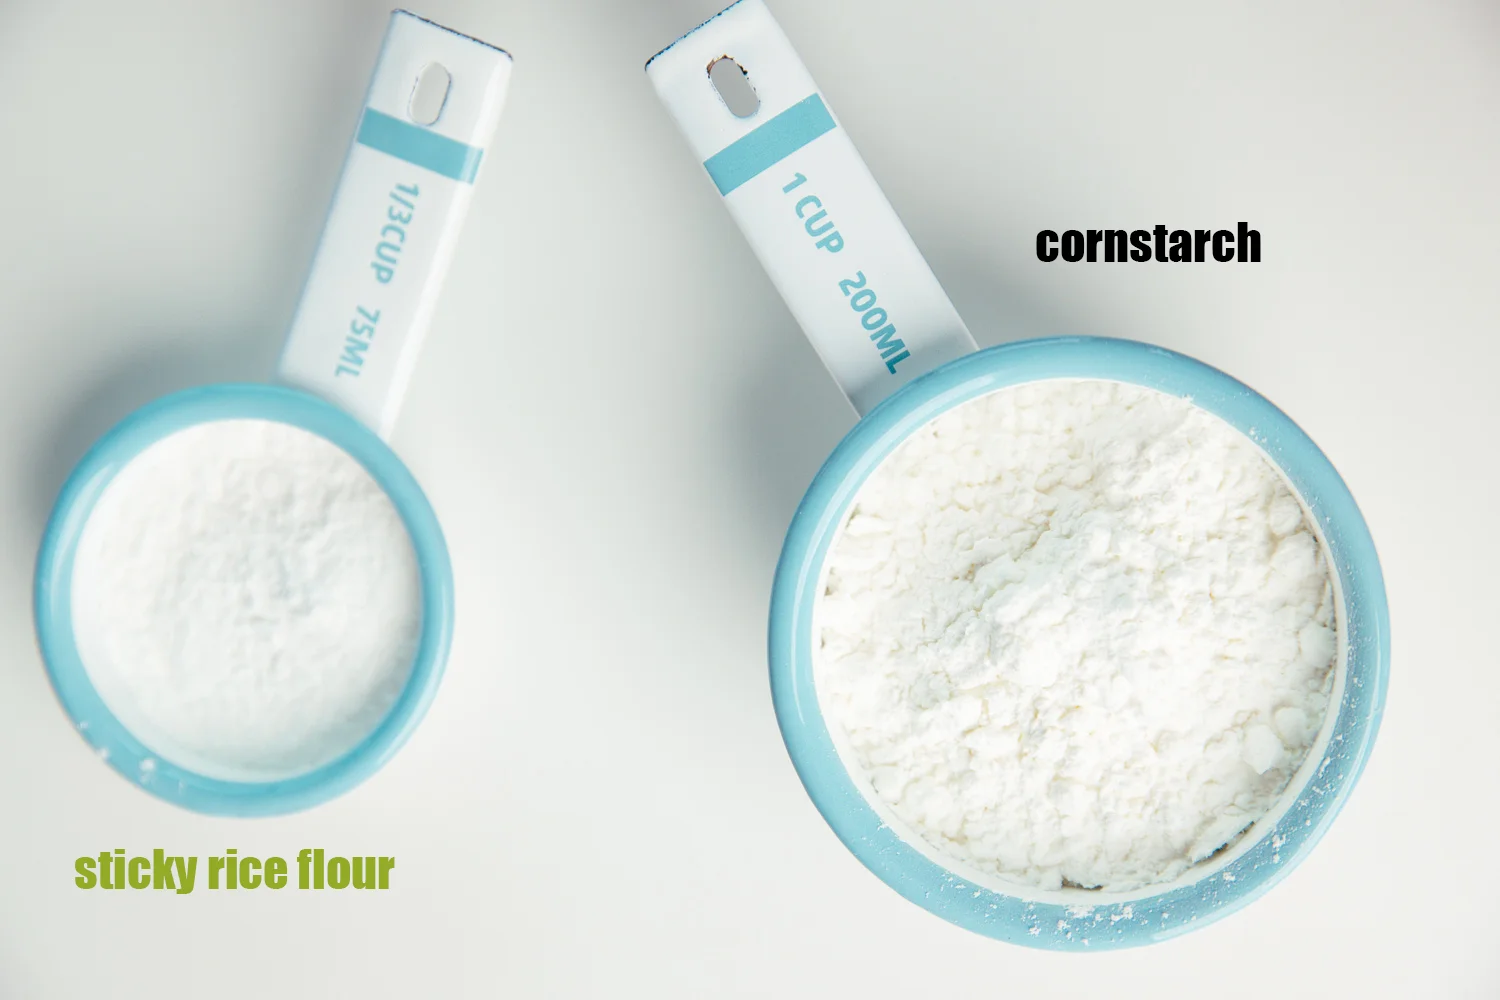
Potato starch is the best option for this recipe since it creates the most fluffy and crispy texture. You can also use cornstarch as a replacement.
A smart way is to add around 1 tablespoon of sticky rice flour so the pancake combines well and doesn’t fall apart.
How to Hand-Shell Corn Kernels
Cut the corn cob in half crosswise, then split each half lengthwise into quarters. With the cob now in smaller, manageable sections, simply use your thumbs to push the kernels off row by row — they come off cleanly and easily with very little effort.
I recommend using hand-shelled kernels for this crispy corn with salted egg because it lets us keep the kernels whole and intact, preserving their natural round shape. This makes the final look much better.
In addition, because we don’t damage the kernel, the natural pocket will remain. That’s the very important group of flavor and juicy bits.
Step by Step
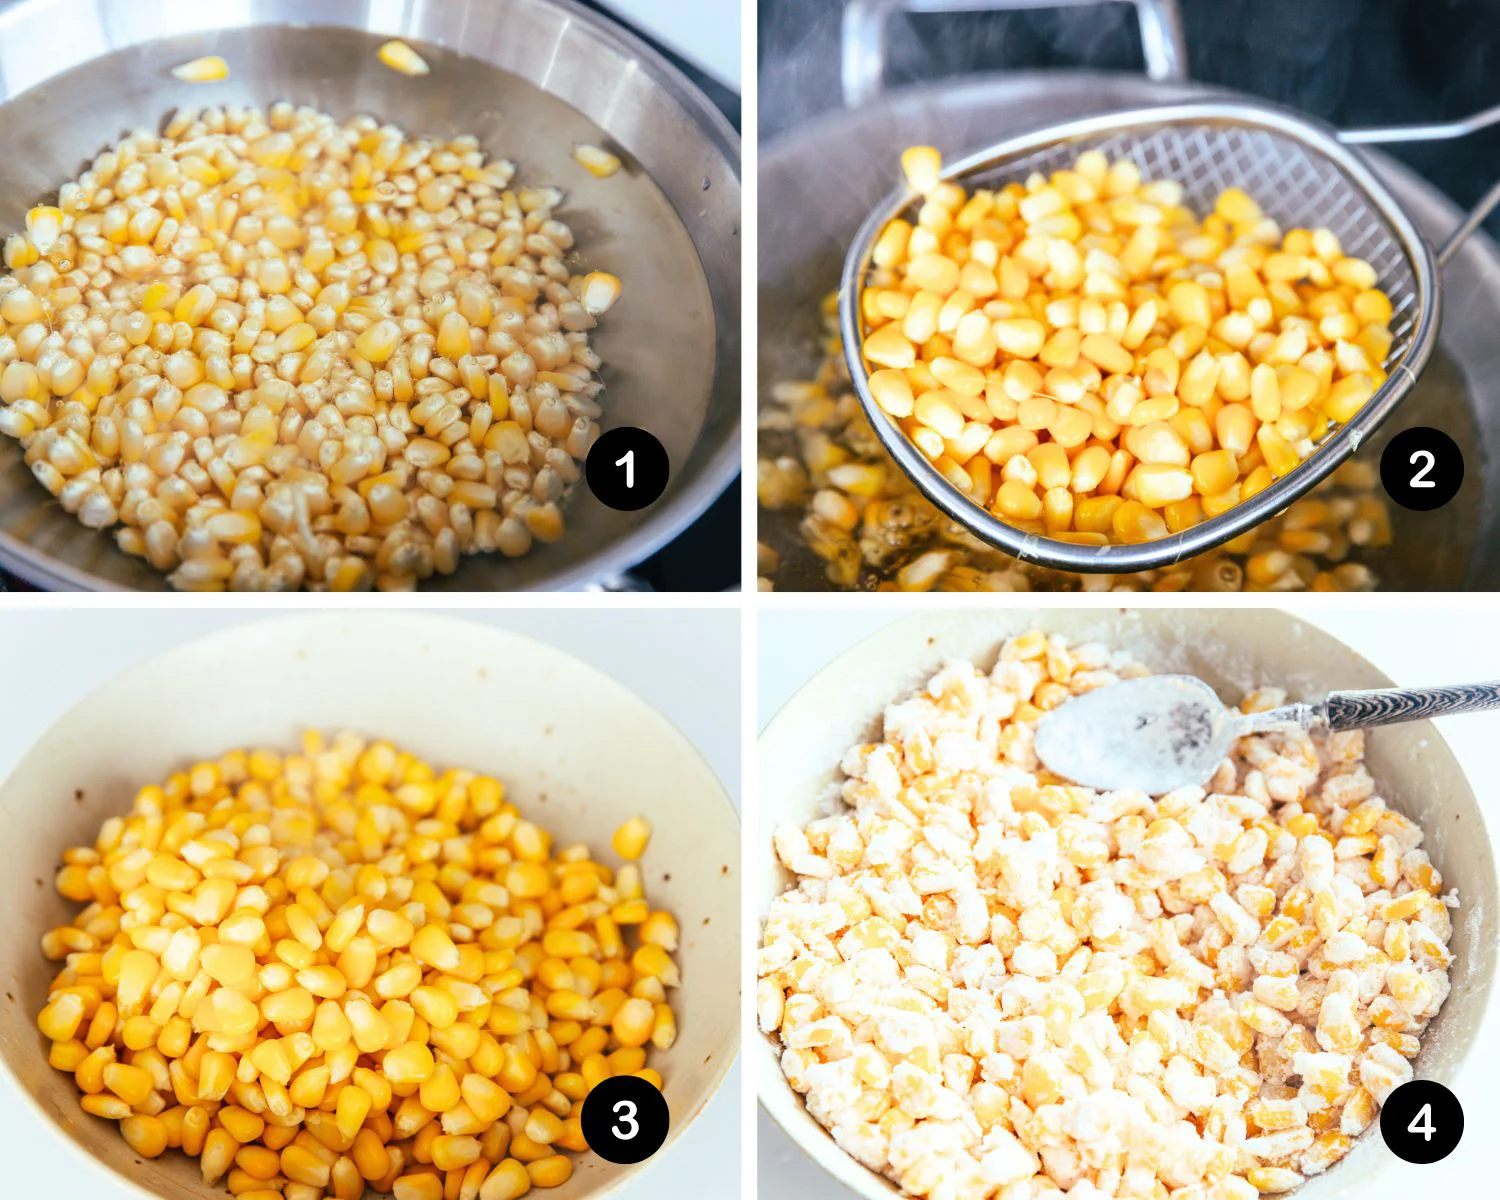
- Remove the corn kernels, then cook in boiling water for about 2 to 3 minutes. This will make them slightly cooked and attached to some water. You can use canned kernels too.
- Slightly drain, keeping the surface wet, then add potato starch in batches to coat the kernels well.
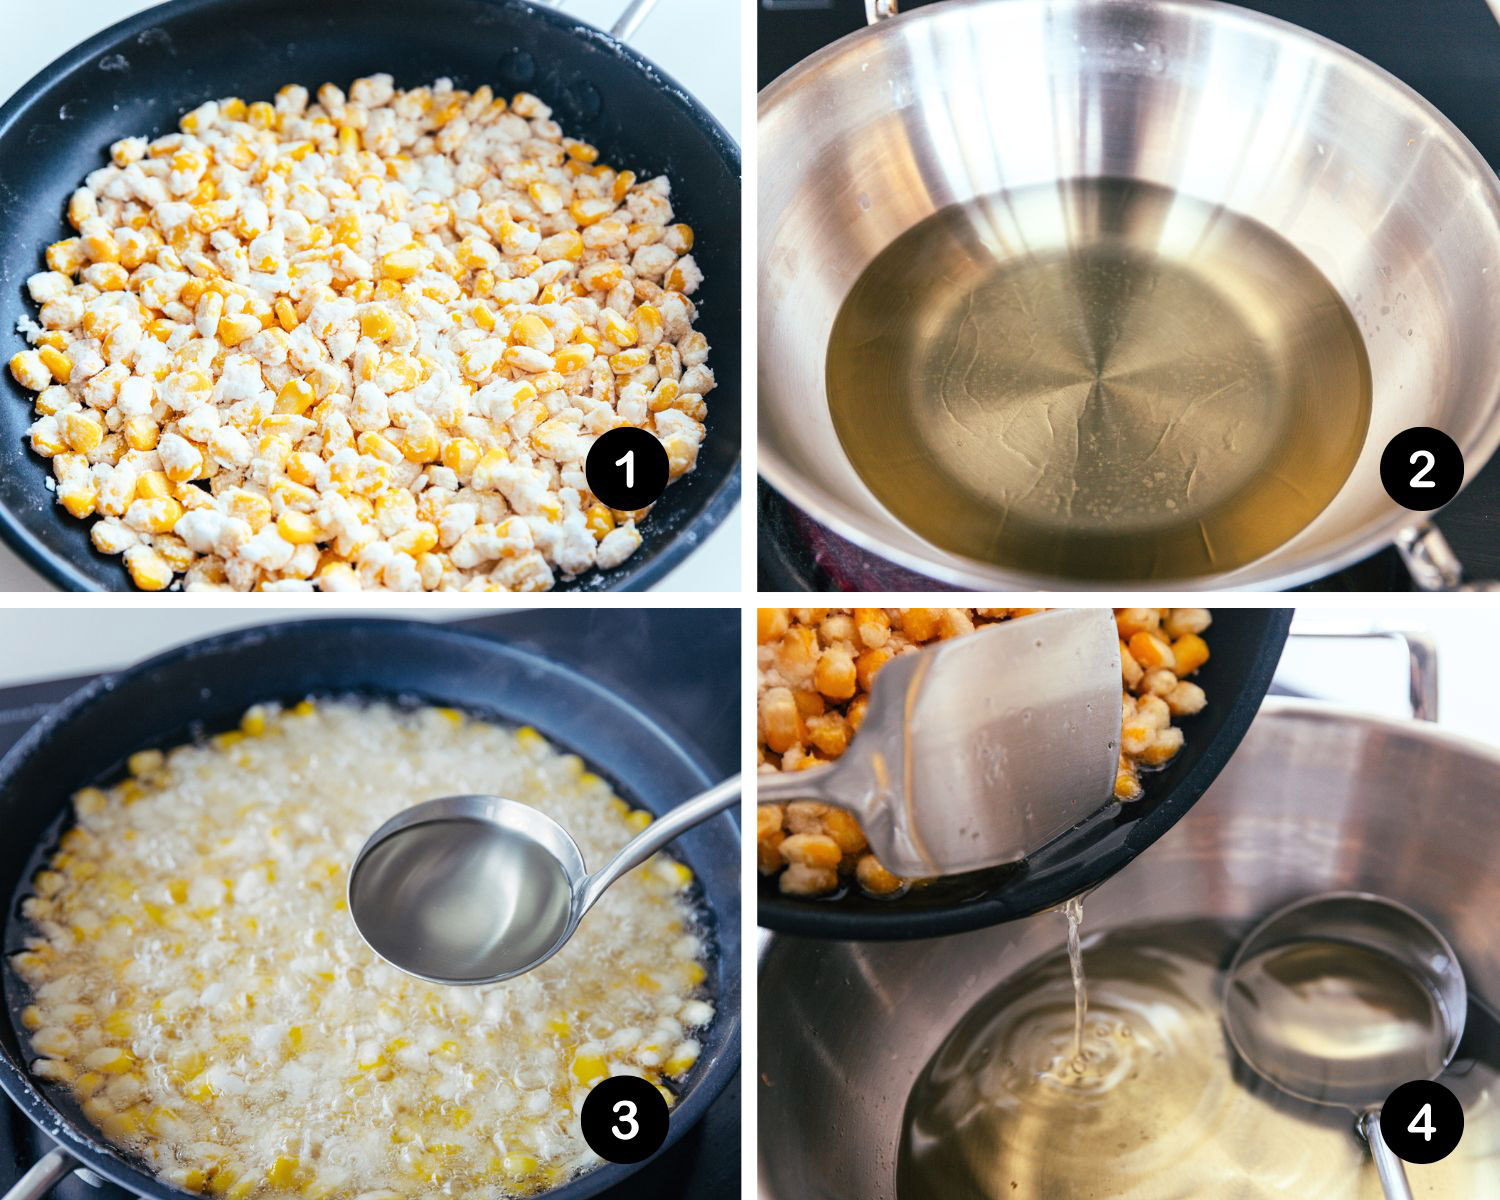
- Add the starch-coated kernels to the pan and pack them tightly, side by side.
- Heat your oil in another pot. Spread the hot oil over the corn pancake in batches. Don’t move at the beginning and wait for the pancake to firm up. Instead of submerging the whole pancake in oil (deep-frying), ladle hot oil in batches to control exactly where the heat goes, help to avoid the pancake breaking, and give it a more even heating.
- Continue deep-frying over the middle fire until golden brown and crispy. Pour the oil out.
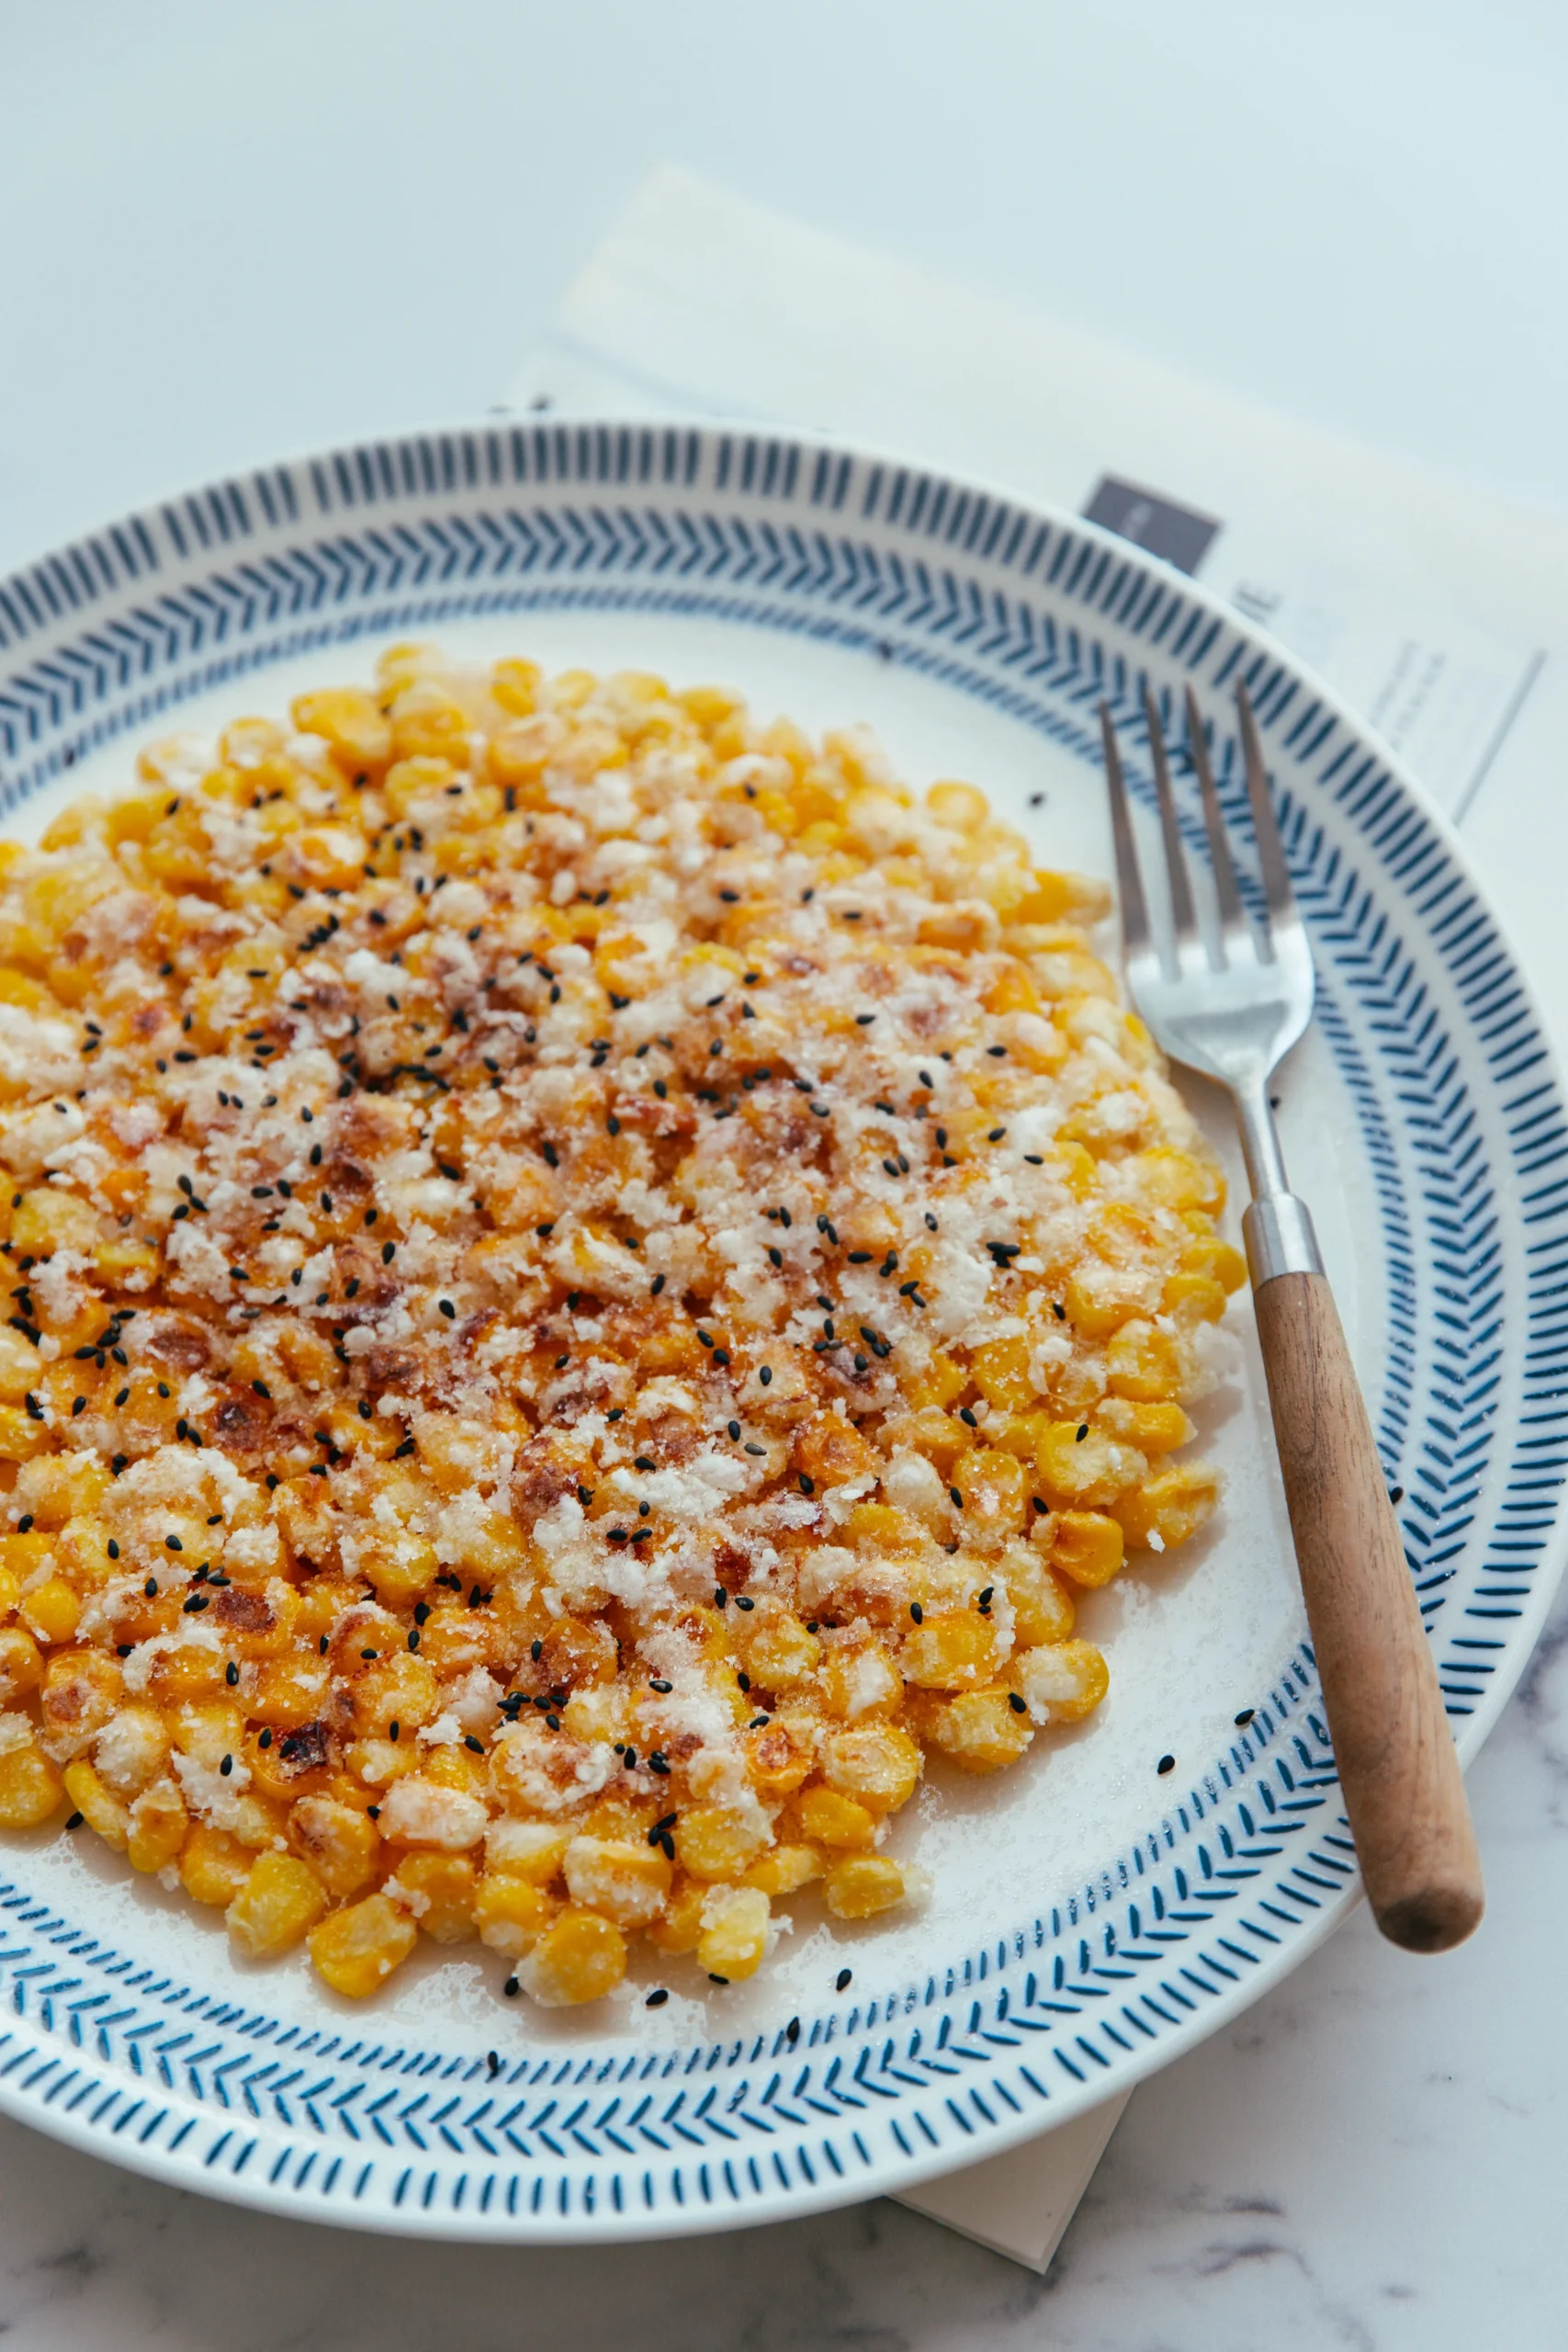
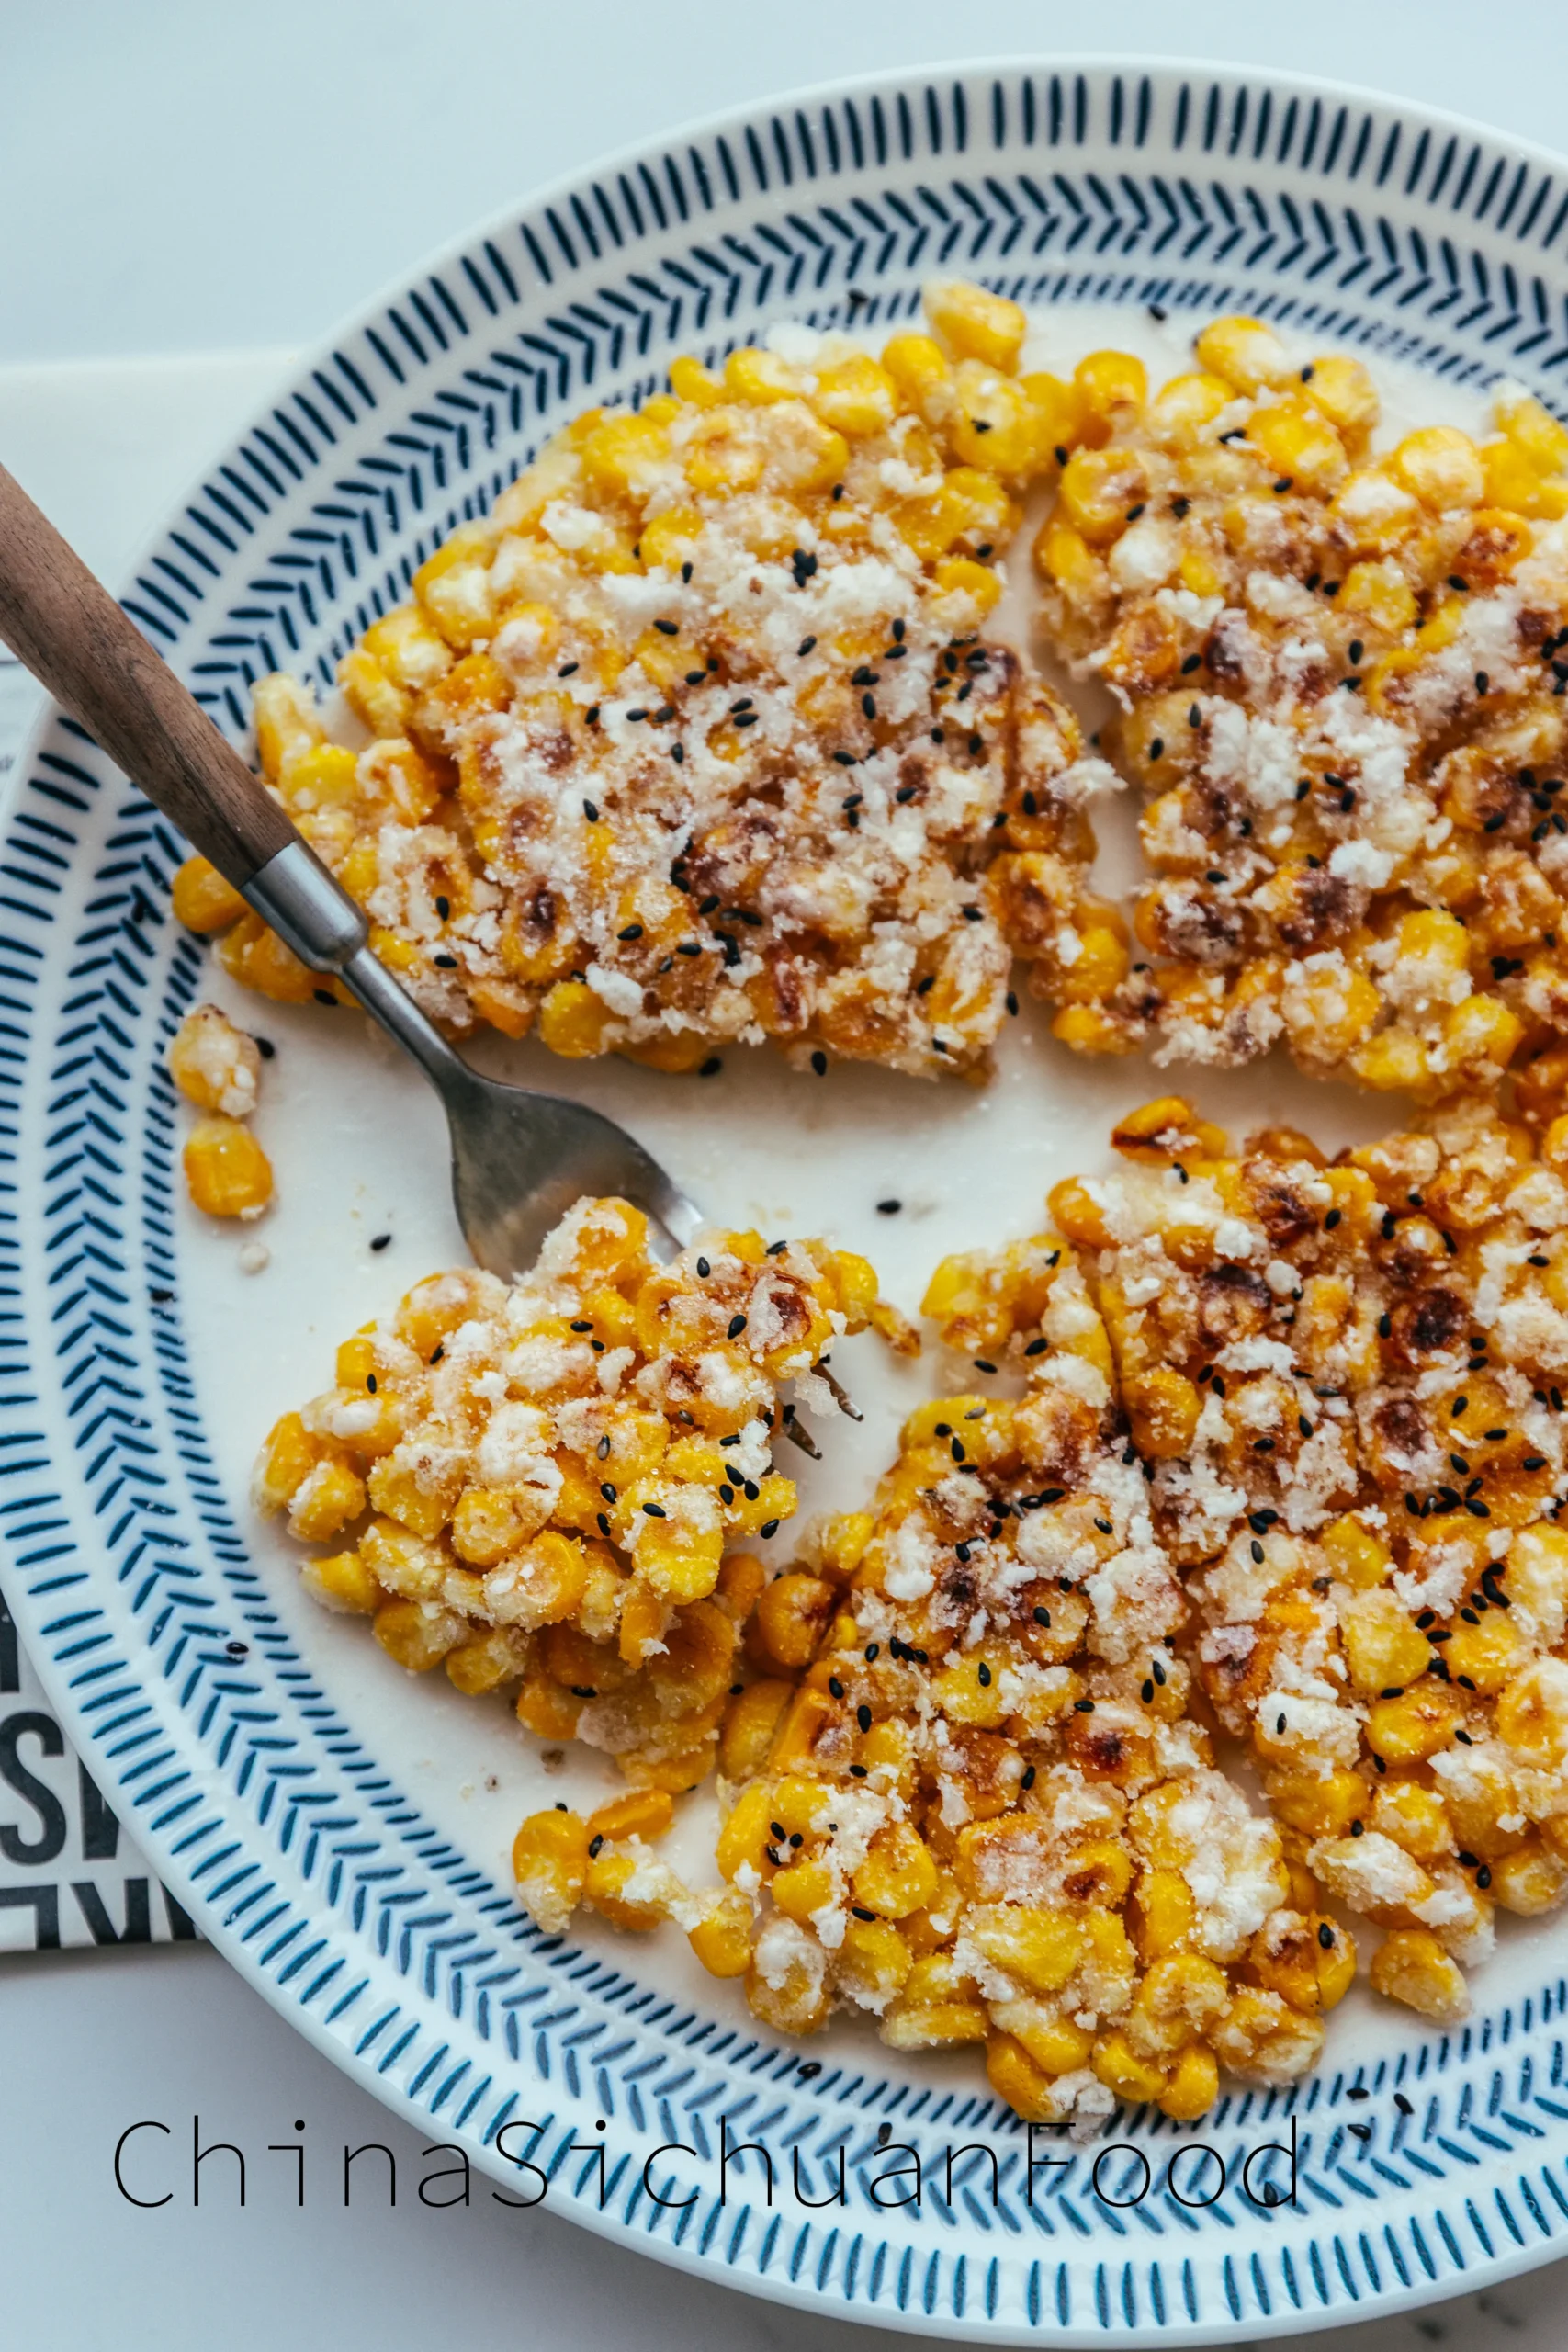
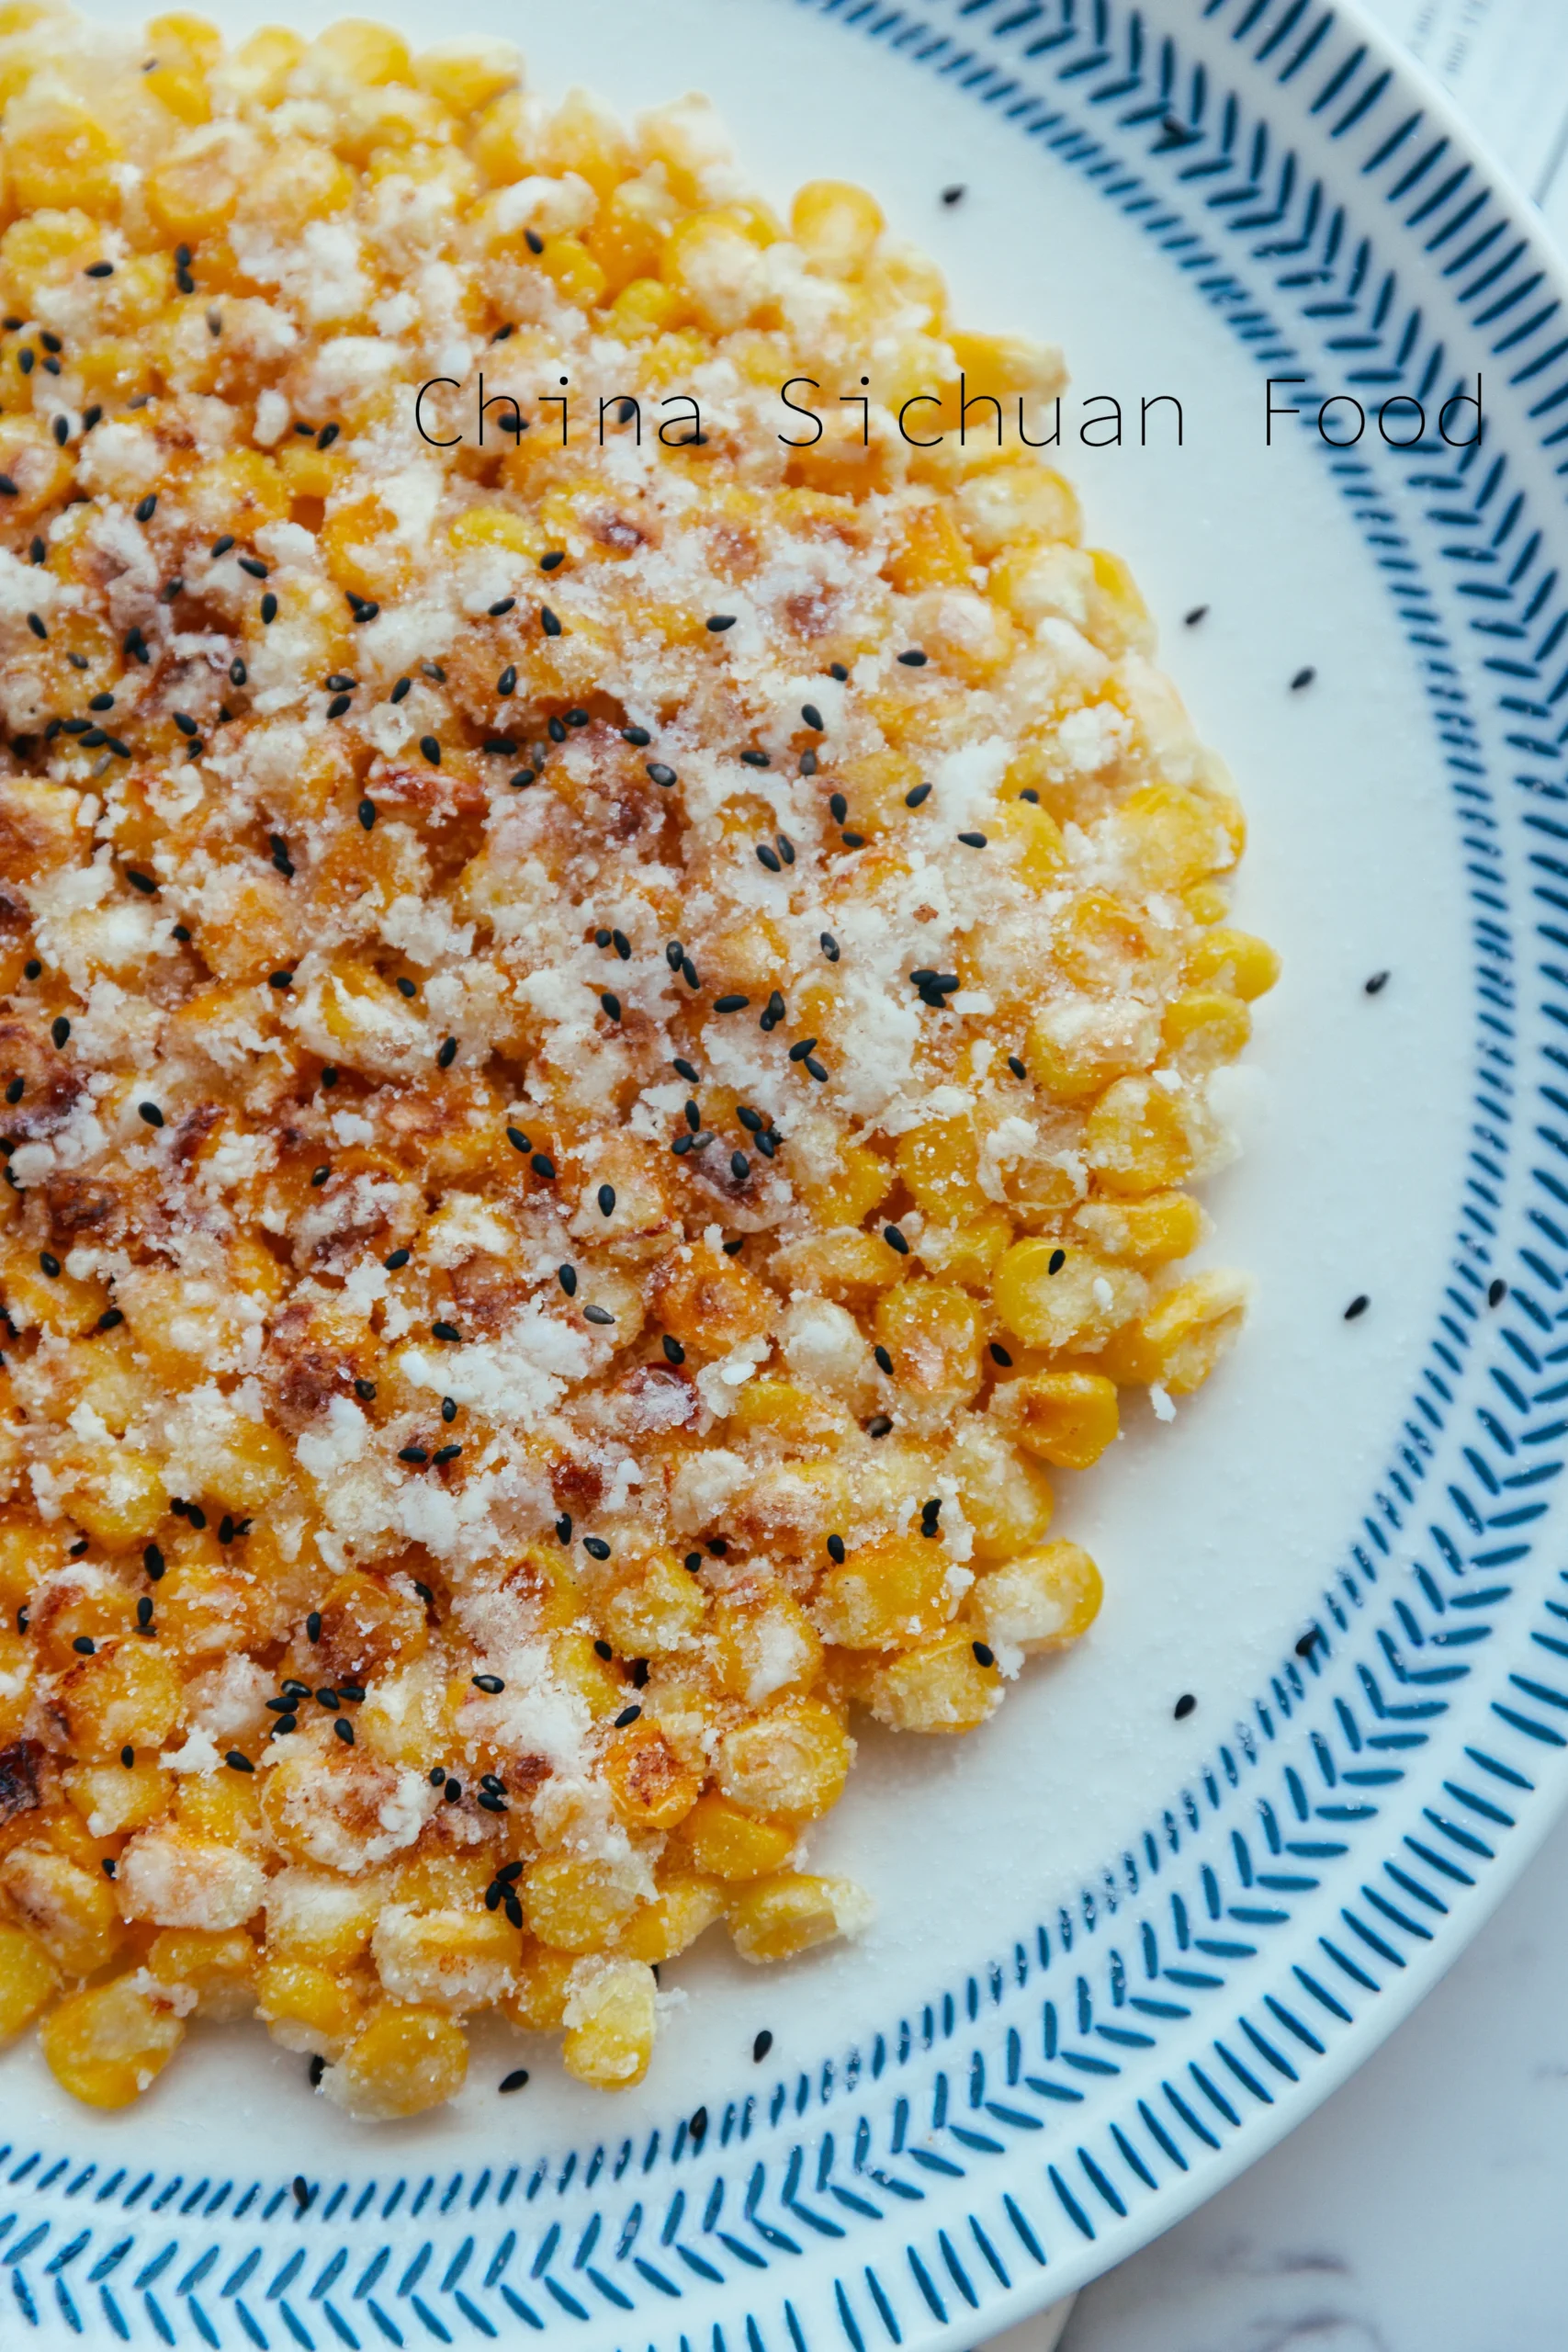
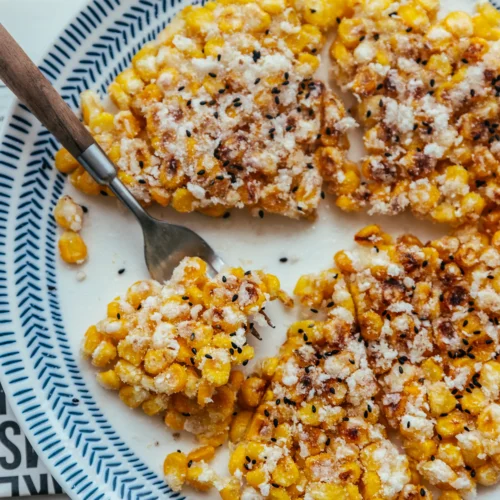
Then sprinkle white sugar and black sesame seeds if you prefer. This is a side dish our whole family loves for this coming summer. Another popular option is to use pepper and salt with some paprika flakes.

Crispy Corn Pancake
#wprm-recipe-user-rating-1 .wprm-rating-star.wprm-rating-star-full svg * { fill: #ffffff; }#wprm-recipe-user-rating-1 .wprm-rating-star.wprm-rating-star-33 svg * { fill: url(#wprm-recipe-user-rating-1-33); }#wprm-recipe-user-rating-1 .wprm-rating-star.wprm-rating-star-50 svg * { fill: url(#wprm-recipe-user-rating-1-50); }#wprm-recipe-user-rating-1 .wprm-rating-star.wprm-rating-star-66 svg * { fill: url(#wprm-recipe-user-rating-1-66); }linearGradient#wprm-recipe-user-rating-1-33 stop { stop-color: #ffffff; }linearGradient#wprm-recipe-user-rating-1-50 stop { stop-color: #ffffff; }linearGradient#wprm-recipe-user-rating-1-66 stop { stop-color: #ffffff; }
Ingredients
- 1 fresh corn remove the kernel
- Oil for deep frying
- 1.5 cup Starch potato starch is the first choice or you can use cornstarch too
- 1 tbsp. sticky rice flour , optional
- Sugar for sprinkling
- Tossed black sesame seeds
ul.wprm-advanced-list-4495 li:before {background-color: #000000;color: #ffffff;width: 18px;height: 18px;font-size: 12px;line-height: 12px;}
Instructions
-
Remove the corn kernels, then cook in boiling water for about 2 to 3 minutes. So they will be slightly cooked and attached to some water. You can use canned kernels too.
-
Slightly drain, keeping the surface wet, then add potato starch in batches to coat the kernels well.
-
Add the starch-coated kernels to the pan and pack them tightly, side by side.
-
Heat your oil in another pot. Spread the oil over the corn pancake in batches.
-
Instead of submerging the whole pancake in oil (deep-frying), ladle hot oil in batches to control exactly where the heat goes, help to avoid the pancake breaking, and give it a more even heating.
-
Continue deep-frying until golden brown and crispy. Then pour out the oil.
-
Sprinkle white sugar and black sesame seeds if you prefer. Serve hot!