Battle of Midway order of battle
This is the order of battle for the Battle of Midway, a major engagement of the Pacific Theatre of World War II, fought 4–7 June 1942 by naval and air forces of Imperial Japan and the United States in the waters around Midway Atoll in the far northwestern Hawaiian Islands.
The Japanese had two purposes for the campaign: to occupy Midway for use as a base for long-range search planes (for which the Americans were already using it), and to draw the US Pacific Fleet out of its base at Pearl Harbor for a decisive showdown battle.
Admiral Isoroku Yamamoto, commander of the Japanese Combined Fleet (comprising all combat vessels) and mastermind of the Pearl Harbor Attack, was tasked with drawing up the operational plan. The Japanese Naval General Staff, responsible for strategic planning, required him to include a diversionary move as part of his detailed battle plan; they told him to include a side operation that would result in the capture of two islands in the Aleutians chain, believing that the occupation of even a tiny portion of a US possession would be sufficient to draw out the bulk of the Pacific Fleet.[1]
US Navy code-breaking, Japanese overconfidence and the courage of American carrier fliers combined to create both a strategic and a tactical defeat for the Japanese: they failed to capture Midway and they suffered much greater losses in ships and planes than did the Americans (the loss of experienced naval pilots would prove to be particularly costly as the war dragged on). Midway put an end to Japanese expansion in the Pacific.
Because the Japanese assumed the tactical initiative, their forces are listed first.
Overview
Ships involved in the Midway operation[2][3]
Losses indicated by *, counts in parentheses
Combat vessels
Auxiliaries
| Imperial Japanese Navy | Ship Type | United States Navy | ||
|---|---|---|---|---|
| Akebono · Fujisan · Genyo · Kenyo · Kokuyu · Kyokuto · Naruto · Nichiei · Nippon · Nissan Maru · San Clemente[4] · Sata · Shinkoku · Toa Maru[4] · Toei · Tōhō Maru · Tsurumi | 17 | AO | 4 | Cimarron · Guadalupe · Platte · Kaloli |
| No. 1 · No. 2 · No. 34 · No. 35 | 4 | PT | 16 | PT-20 · PT-21 · PT-22 · PT-24 · PT-25 · PT-26 · PT-27 · PT-28 · PT-29 · PT-30 · PT-42 · Crystal · YP-284 · YP-290 · YP-345 · YP-350 |
| Awata Maru | 2 | AMC | - | |
| Soya | 1 | AE | - | |
| Argentina Maru · Azuma Maru · Brazil Maru · Goshu Maru · Hakusan Maru · Hokuroku Maru · Kano Maru · Keiyo Maru · Kinugasa Maru · Kirishima Maru · Kiyosumi Maru · Kumagawa Maru · Meiyo Maru · Nankai Maru · Toa Maru No. 2 Go · Tōkō Maru No. 2 Go · Yamafuku Maru · Zenyo Maru | 18 | AP / AK | - | |
| Tama Maru No. 3 · Tama Maru No. 5 · Showa Maru No. 7 · Showa Maru No. 8 · Hakuhō Maru · Kaihō Maru · Shunkotsu Maru | 7 | AMS | - | |
| CH-16 · CH-17 · CH-18 | 3 | SC | - | |
| Akashi | 1 | AR | - | |
| Magane Maru | 1 | ML | - | |
| - | AT | 1 | Vireo | |
Aircraft
| Imperial Japanese Navy | Aircraft Type | United States Navy |
|---|---|---|
| 105 × Mitsubishi A6M "Zero" | Fighters | 86 × Grumman F4F-4 "Wildcat" |
| 97 × Aichi D3A "Val" | Dive bombers |
131 × Douglas SBD-3 "Dauntless"
17 × Chance-Vought SB2U-3 "Vindicator" (USMC) |
| 101 × Nakajima B5N "Kate" | Torpedo bombers |
42 × Douglas TBD-1 "Devastator" 6 × Grumman TBF "Avenger" (USMC) |
| Level bombers |
17 × Boeing B-17 "Flying Fortress" (USAAC) 4 × Martin B-26 "Marauder" (USAAC) | |
| 10 × Nakajima E8N2 Type 95 "Dave" float plane
6 × Aichi E13A1 Type 0 "Jake" float plane 2 × Yokosuka D4Y1 "Judy" dive bomber |
Reconnaissance | 31 × Consolidated PBY "Catalina" |
| (Due to production flaws early D4Y were unable to dive bomb and were used for reconnaissance) | (US Navy used carrier dive bombers for reconnaissance, reflected in the designation SB - scout-bomber) |
Japan
Admiral Isoroku Yamamoto[a]
Commander, Combined Fleet
Significant combat was experienced by Nagumo's First Striking Force and Kurita's Midway Support Force. The vast majority Japanese ships saw no action during the entire Midway campaign.
First Fleet
First Fleet Main Force


Admiral Yamamoto in Yamato
- 1st Battleship Division (Admiral Yamamoto)
- 1 Yamato-class battleship (9 × 18-in. main battery)
- 2 Nagato-class battleships (8 × 16-in. main battery)
- Carrier Group:
- CVL Hōshō (Capt. Kaoru Umetani)
- Air Unit: 8 Yokosuka B4Y1 'Jean' biplane torpedo bombers (Lieutenant Yoshiaki Irikiin)
- 1 Minekaze-class destroyer (4 × 4.7-in. main battery)
- Yūkaze (Lt. Cmdr. Shizuka Kajimoto)
- CVL Hōshō (Capt. Kaoru Umetani)
- Special Force
- Screening Force
- 3rd Destroyer Squadron
- Rear Admiral Shintaro Hashimoto[b] in Sendai
- 1 Sendai-class cruiser (7 × 5.5-in. main battery)
- Sendai (Capt. Nobue Morishita)
- 11th Destroyer Division (Capt. Kichiro Shoji)
- 4 Fubuki-class destroyers (6 × 5-in. main battery)
- 19th Destroyer Division (Capt. Ranji Oe)
- 4 Fubuki-class destroyers (6 × 5-in. main battery)
- 1 Sendai-class cruiser (7 × 5.5-in. main battery)
- 1st Supply Group
- Captain Shigeyasu Nishioka in Naruto
- AO Naruto (Capt. Nishioka)
- AO Toei Maru
First Carrier Striking Force / First Air Fleet


Vice Admiral Chuichi Nagumo[c] in Akagi
- 1st Carrier Division
- Vice Admiral Nagumo
- Akagi (scuttled 5 June) (Capt. Taijiro Aoki)
- Air Unit (Commander Mitsuo Fuchida)
- 18 Mitsubishi A6M2 Type 21 'Zeke' fighters (Lt. Cmdr. Shigeru Itaya)
- 18 Aichi D3A1 'Val' dive bombers (Lt. Takehiko Chihaya)
- 18 Nakajima B5N2 'Kate' torpedo bombers (Lt. Cmdr. Shigeharu Murata)
- Air Unit (Commander Mitsuo Fuchida)
- Kaga (sunk 4 June) (Capt. Jisaku Okada†)
- Air Unit (Lt. Cmdr. Tadashi Kusumi†):
- 18 Mitsubishi A6M2 Type 21 'Zeke' fighters (Lt. Masao Sato)
- 18 Aichi D3A1 'Val' dive bombers (Lt. Shoichi Ogawa†)
- 27 Nakajima B5N2 'Kate' torpedo bombers (Lt. Ichiro Kitajima)
- Air Unit (Lt. Cmdr. Tadashi Kusumi†):
- Akagi (scuttled 5 June) (Capt. Taijiro Aoki)
- 2nd Carrier Division
- Rear Admiral Tamon Yamaguchi† in Hiryū
- Hiryū (scuttled 5 June) (Capt. Tomeo Kaku†)
- Air Unit (Lt. Joichi Tomonaga†)
- 18 Mitsubishi A6M2 Type 21 'Zeke' fighters (Lt. Shigeru Mori†)
- 18 Aichi D3A1 'Val' dive bombers (Lt. Michio Kobayashi†)
- 18 Nakajima B5N2 'Kate' torpedo bombers (Lt. Rokuro Kikuchi†)
- Air Unit (Lt. Joichi Tomonaga†)
- Sōryū (scuttled 4 June) (Capt. Ryusaku Yanagimoto†)
- Air Unit (Lt. Cmdr. Takashige Egusa)
- 18 Mitsubishi A6M2 Type 21 'Zeke' fighters (Lt. Masaji Suganami)
- 16 Aichi D3A1 'Val' dive bombers (Lt. Masai Ikeda)
- 18 Nakajima B5N2 'Kate' torpedo bombers (Lt. Heijiro Abe)
- 2 Yokosuka D4Y1 'Judy' dive bombers
- Air Unit (Lt. Cmdr. Takashige Egusa)
- Hiryū (scuttled 5 June) (Capt. Tomeo Kaku†)
- Support Group
- 8th Cruiser Division
- Rear Admiral Hiroaki Abe[d] in Tone
- 2 Tone-class heavy cruisers (8 × 7.9-in. main battery)
- Tone (Capt. Tametsugu Okada)
- Air Unit: 3 Aichi E13A1 Type 0 'Jake' float planes, 2 Nakajima E8N2 Type 95 'Dave' float planes
- Chikuma (Capt. Keizo Komura)
- Air Unit: 3 Aichi E13A1 Type 0 'Jake' float planes, 2 Nakajima E8N2 Type 95 'Dave' float planes
- Tone (Capt. Tametsugu Okada)
- 2 Tone-class heavy cruisers (8 × 7.9-in. main battery)
- 3rd Battleship Division, 2nd Section
- Rear Admiral Tamotsu Takama in Haruna
- 2 Kongo-class fast battleships (8 × 14-in. main battery)
- Haruna (Rear Adm. Takama)
- Air unit: 3 Nakajima E8N2 Type 95 'Dave' float planes
- Kirishima (Capt. Sanji Iwabuchi)
- Air unit: 3 Nakajima E8N2 Type 95 'Dave' float planes
- Haruna (Rear Adm. Takama)
- 2 Kongo-class fast battleships (8 × 14-in. main battery)
- Screening Force
- 10th Destroyer Squadron
- Rear Admiral Susumu Kimura in Nagara
- 1 Nagara-class light cruiser (7 × 5.5-in. main battery)
- Nagara (Capt. Toshio Naoi)
- 4th Destroyer Division (Capt. Kōsaku Aruga)
- 4 Kagero-class destroyers (6 × 5-in. main battery)
- 10th Destroyer Division (Capt. Toshio Abe)
- 3 Yugumo-class destroyers (6 × 5-in. main battery)
- 17th Destroyer Division (Capt. Masayuki Kitamura)
- 4 Kagero-class destroyers (6 × 5-in. main battery)
- 1 Nagara-class light cruiser (7 × 5.5-in. main battery)
- Supply Group 1
- Captain Masanao Ota in Kyokuto Maru
- 1 Kagero-class destroyer (6 × 5-in. main battery)
- Akigumo (Cmdr. Shohei Soma)
- AO Kyokuto Maru (Capt. Ota)
- AO Shinkoku Maru (Capt. Tokugyo Ito)
- AO Tōhō Maru (Capt. Kazutaka Niimi)
- AO Nippon Maru (Capt. Hironosuke Ueda)
- AO Kokuyo Maru (Capt. Toraji Hidai)
- 1 Kagero-class destroyer (6 × 5-in. main battery)
Second Fleet (Midway Invasion Force)


Second Fleet Main Body
Vice Admiral Nobutake Kondō[5] in Atago
- 3rd Battleship Division less 2nd Section
- Vice Admiral Gunichi Mikawa
- 2 Kongo-class fast battleships (8 × 14-in. main battery)
- Kongō (Capt. Tomiji Koyanagi)
- Hiei (Capt. Masao Nishida)
- 2 Kongo-class fast battleships (8 × 14-in. main battery)
- 4th Cruiser Division less 2nd Section
- Vice Admiral Kondo
- 2 Takao-class heavy cruisers (10 × 7.9-in. main battery)
- Atago (Capt. Baron Matsuji Ijuin)
- Chōkai (Capt. Mikio Hayakawa)
- 2 Takao-class heavy cruisers (10 × 7.9-in. main battery)
- 5th Cruiser Division
- Vice Admiral Takeo Takagi[e]
- 2 Myōkō-class heavy cruisers (10 × 7.9-in. main battery)
- Screening Force
- 4th Destroyer Squadron
- Rear Admiral Shoji Nishimura[f] in Yura
- 1 Nagara-class light cruiser (7 × 5.5-in. main battery)
- Yura (Capt. Shiro Sato)
- 3rd Destroyer Division (Capt. Ranji Oe)
- 4 Shiratsuyu-class destroyers
- 9th Destroyer Division (Capt. Yasuo Sato)
- 3 Asashio-class destroyers
- 1 Nagara-class light cruiser (7 × 5.5-in. main battery)
- Carrier Group
- Captain Sueo Obayashi
- CVL Zuihō (Capt. Obayashi)
- 12 Mitsubishi A6M2 Type 21 'Zeke' fighters (Lt. Saneyasu Hidaka)
- 12 Nakajima B5N2 'Kate' torpedo bombers (Lt. Kaji Matsuo)
- 1 Mutsuki-class destroyer (4 × 4.7-in. main battery)
- Mikazuki (Lt. Cmdr. Saneho Maeda)
- CVL Zuihō (Capt. Obayashi)
- Supply Group
- Captain Jiro Murao in Sata
- AO Sata (Capt. Murao)
- AO Tsurumi (Capt. Toshizo Fujita)
- AO Genyo Maru (Capt. Shigetaro Ogawa)
- AO Kenyo Maru (Capt. Yoshio Kanemasu)
- AR Akashi (Capt. Tsunekichi Fukuzawa)
Midway Occupation Force


Rear Admiral Raizo Tanaka[g] in Jintsu
- Transport Group carrying about 5000 troops under Captain Minoru Ōta,[h] IJN and Colonel Kiyonao Ichiki,[i] IJA
- Transports
- Kiyosumi Maru (Capt. Seiichiro Kito)
- Keiyo Maru (Capt. Masamichi Ikeuchi)
- Zenyo Maru
- Goshu Maru (Capt. Hiyoshi Furuya)
- Toa Maru No. 2 Go
- Kano Maru (Capt. Tomosaburo Miura)
- Argentina Maru (Cmdr. Takeshi Watanabe)
- Hokuroku Maru (Capt. Hiotaro Tsukagoshi)
- Brazil Maru (Capt. Kyujiro Jintsu)
- Kirishima Maru (Capt. Hiroshi Okubo)
- Azuma Maru (Capt. Nobuyoshi Morikawa)
- Nankai Maru (Capt. Akira Maki)
- Patrol Boats
- Patrol Boat #1
- Patrol Boat #2
- Patrol Boat #34 also carrying SNLF detachment
- AO Akebono Maru (damaged by torpedo night of June 3–4) (Capt. Miki Otsuka)
- Transports
- Escort Force
- 2nd Destroyer Squadron
- Rear Admiral Tanaka
- 1 Sendai-class cruiser (7 × 5.5-in. main battery)
- CL Jintsu (Capt. Torazo Kozai)
- 15th Destroyer Division (Capt. Torajiro Sato)
- 2 Kagero-class destroyers
- 16th Destroyer Division (Capt. Shiro Shibuya)
- 4 Kagero-class destroyers
- Yukikaze (Cmdr. Kenjiro Tobita)
- Amatsukaze (Cmdr. Tameichi Hara)
- Tokitsukaze (Cmdr. Giichiro Nakahara)
- Hatsukaze (Cmdr. Kameshiro Takahashi)
- 4 Kagero-class destroyers
- 18th Destroyer Division (Capt. Yoshito Miyasaka)
- 2 Kagero-class destroyers
- 2 Asashio-class destroyers
- Seaplane Tender Group
- Rear Admiral Ruitaro Fujita in Chitose
- 11th Seaplane Tender Division
- CVS Chitose (Capt. Tamotsu Furukawa)
- 16 Nakajima A6M2-N 'Rufe' floatplane fighters
- 4 Aichi E13A 'Jake' scout floatplanes
- AV Kamikawa Maru (Capt. Tarohachi Shinoda)
- 8 Nakajima A6M2-N 'Rufe' floatplane fighters
- 4 Aichi E13A 'Jake' scout floatplanes
- CVS Chitose (Capt. Tamotsu Furukawa)
- 1 Kagero-class destroyer
- Hayashio (Cmdr. Kiyoshi Kaneda)
- Patrol Boat #35 (carrying troops)
- 11th Seaplane Tender Division
Midway Support Force


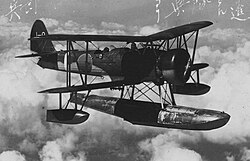
Vice Admiral Takeo Kurita in Kumano
- 7th Cruiser Division (Vice Adm. Kurita)
- Kumano (Capt. Kikumatsu Tanaka)
- Suzuya (Capt. Masatomi Kimura)
- Mikuma (scuttled x June) (Capt. Shakao Sakiyama†)
- Mogami (Capt. Akira Soji)
- 8th Destroyer Division (Cmdr. Nobuki Ogawa)
- 2 Asashio-class destroyers
- Attached Oiler
- AO Nichiei Maru (Capt. Matsushi Yamamoto)
- Minesweeper Group
- Captain Sadatomo Miyamoto
- 4 auxiliary minesweepers
- Tama Maru #3 (Lt. (j.g.) Atsutoshi Yamaguchi)
- Tama Maru #5 (Lt. Akira Takato)
- Showa Maru #7 (Lt. Teruhisa Takahashi)
- Showa Maru #8 (Lt. (j.g.) Kiichi Sasaki)
- 3 subchasers
- Subchaser #16 (Lt. Yasukichi Suzuki)
- Subchaser #17 (Lt. Shigematsu Yoshioka)
- Subchaser #18 (Lt. Mitsugu Miyoi)
- 4 auxiliary minesweepers
- 1 supply ship
- Soya (Cmdr. Toshi Kubota)
- 2 cargo ships
- Meiyo Maru (Capt. Hisao Koizumi)
- Yamafuku Maru (Capt. Torao Honda)
Advance (Submarine) Force (Sixth Fleet)
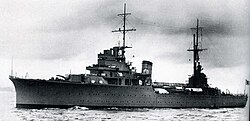

Vice Admiral Teruhisa Komatsu in Katori at Kwajalein
- 1 Katori-class cruiser (4 × 5.5-in. main battery)
- Katori (Capt. Noboru Owada)
- 3rd Submarine Squadron
- Rear Admiral Chimaki Kona in Rio de Janeiro Maru at Kwajalein
- 19th Submarine Division (Capt. Ryojiro Ono)
- 13th Submarine Division (Capt. Takeji Miyazaki)
- 30th Submarine Division (Capt. Maseo Teraoka)
- I-162 (Lt. Cmdr. Takakazu Kinashi)
- I-165 (Lt. Cmdr. Hakue Jarada)
- I-166 (Lt. Cmdr. Makio Tanaka)
Shore-based Air Force


Eleventh Air Fleet
Vice Admiral Nishizo Tsukahara at Tinian
- Midway Expeditionary Force (Capt. Chisato Morita)
- 36 Mitsubishi A6M Zero fighters (Lt. Tadashi Kaneko)
- 10 Mitsubishi G4M 'Betty' level bombers at Wake Island
- 6 flying boats at Jaluit
- 24th Air Flotilla (Rear Adm. Minoru Maeda)
- Chitose Air Group at Kwajalein (Capt. Fujiro Ohashi)
- 36 Mitsubishi A6M Zero fighters
- 36 Nakajima B5N2 'Kate' torpedo bombers
- 1st Air Group at Aur and Wotje (Capt. Samaji Inoue)
- 36 Mitsubishi A6M Zero fighters
- 36 Nakajima B5N2 'Kate' torpedo bombers
- 14th Air Group (Capt. Daizo Nakajima)
- 36 Kawanishi H6K 'Mavis' flying boats at Jaluit and Wotje
- Chitose Air Group at Kwajalein (Capt. Fujiro Ohashi)
Northern Area Force
Fifth Fleet Main Body

Vice Admiral Boshirō Hosogaya[j] in Nachi
- 1 Myoko-class heavy cruiser
- Nachi (Capt. Takahiko Kiyota)
- 2 Akatsuki-class destroyers
- Supply Group:
- AO Fujisan Maru (Capt. Kikuta Maki)
- AO Nissan Maru (Capt. Hachiro Naotsuka)
- AC Muroto (Capt. Masaji Yamagata)
- AP Akashisan Maru (Capt. Yoshio Hosoya)
- AF Tōkō Maru No. 2 Go
Second Carrier Striking Force

Rear Admiral Kakuji Kakuta[k] in Ryujo
- 4th Carrier Division (Rear Adm. Kakuta)
- CVL Ryūjō (Capt. Tadeo Kato)
- Air Unit (Lt. Masayuki Yamagami)
- 16 Mitsubishi A6M2 Type 21 'Zeke' fighters (Lt. Minoru Kobayashi)
- 21 Nakajima B5N2 'Kate' torpedo bombers (Lt. Yamagami)
- Air Unit (Lt. Masayuki Yamagami)
- CV Jun'yō (Capt. Shizue Isii)
- Air Unit (Lt. Yoshio Shiga)
- 24 Mitsubishi A6M Zero Type 21 'Zeke' fighters (Lt. Shiga)
- 15 Aichi D3A1 'Val' dive bombers (Lt. Zenji Abe)
- Air Unit (Lt. Yoshio Shiga)
- CVL Ryūjō (Capt. Tadeo Kato)
- 4th Cruiser Division, 2nd Section (Capt. Shunsaku Nabeshima in Maya)
- 2 Takao-class heavy cruisers
- 7th Destroyer Division (Capt. Kaname Konishi)
- 3 Fubuki-class destroyers
- AO Teiyo Maru (Capt. Katasuke Tanaka)
Aleutian Support Force

Vice Admiral Shiro Takasu[l] in Hyūga
- 2nd Battleship Division (Vice Adm. Takasu)
- Fusō (Capt. Chozaemon Obata)
- Hyūga (Capt. Chiaki Matsuda)
- Ise (Capt. Isamu Takeda)
- Yamashiro (Capt. Gunji Kogure)
- Screening Force (Rear Adm. Fukuji Kishi] in Kitakami)
- 9th Cruiser Division (Rear Adm. Kishi)
- 20th Destroyer Division (Capt. Yuji Yamada)
- 4 Fubuki-class destroyers
- 24th Destroyer Division (Capt. Yasuji Hirai)
- 4 Shiratsuyu-class destroyers
- 27th Destroyer Division (Capt. Matake Yoshimura)
- 2 Hatsuharu-class destroyers
- 2 Shiratsuyu-class destroyers
- Shigure (Cmdr. Noboru Seo)
- Shiratsuyu (Lt. Cmdr. Kanematsu Hashimoto)
- Supply Group (Capt. Matsuo Eguchi)
- AO San Clemente Maru (Capt. Eguchi)
- AO Toa Maru (Capt. Yataro Yokohama)
Attu Invasion Force

Rear Admiral Sentarō Ōmori[m] in Abukuma
- 1st Destroyer Squadron
- Rear Admiral Ōmori
- CL Abukuma (Capt. Seiroku Murayama)
- 21st Destroyer Division (Capt. Toshio Shimizu)
- 4 Hatsuharu-class destroyers
- Wakaba (Lt. Cmdr. Masakichi Kuroki)
- Nenohi (Lt. Cmdr. Saburo Terauchi)
- Hatsuharu (Lt. Cmdr. Hiroshi Makino)
- Hatsushimo (Lt. Cmdr. Satoru Kohama)
- 4 Hatsuharu-class destroyers
- ML Magane Maru (Capt. Heiji Sasaki)
- AP Kinugasa Maru (Capt. Naoshi Arima) carrying 1,200 army troops under Major Matsutoshi Hozumi
Kiska Invasion Force
Captain Takeji Ono in Kiso
- 21st Cruiser Division (Capt. Ono)
- 2 Kuma-class cruisers
- 2 auxiliary cruisers
- Asaka Maru (Capt. Jiro Ban)
- Awata Maru (Capt. Kikuta Maki)
- Screening Force
- 6th Destroyer Division (Capt. Yusuke Tamada)
- 2 Akatsuki-class destroyers
- 1 Minekaze-class destroyer
- Hakaze (Lt. Cmdr. Tomo Tanaka)
- 6th Destroyer Division (Capt. Yusuke Tamada)
- 13th Minesweeper Division (Capt. Toshio Mitsuka)
- Hakuhō Maru
- Kaihō Maru
- Shunkotsu Maru
- Transports
- Hakusan Maru (Capt. Hareyoshi Goto) carrying 550 troops under Lt. Cmdr. Hifumi Mukai
- Kumagawa Maru (Capt. Shiro Yoshida) carrying 700 labor troops with construction equipment
- Submarine Detachment
- 1st Submarine Squadron (Rear Adm. Shigeaki Yamakazi)
- Aleutian Seaplane Tender Force (Capt. Keiichi Ujuku)
- AV Kimikawa Maru (Capt. Ujuku)
- Air Unit: 8 3-seat floatplanes
- 1 Minekaze-class destroyer
- Shiokaze (Lt. Yoji Tanegashima)
- AV Kimikawa Maru (Capt. Ujuku)
United States
The US Pacific Fleet and Pacific Ocean Areas were under the overall command of Admiral Chester W. Nimitz.[6]
Task Force 17


Rear Admiral Frank J. Fletcher[n] in Yorktown
- Task Group 17.5 (Carrier Group)
- Yorktown (sunk by I-168 7 June) (Captain Elliott Buckmaster)
- Yorktown Air Group[o] (Lieutenant Commander Oscar Pederson)
- 25 Grumman F4F-4 Wildcat fighters (VF-3 – Lt. Cmdr. John S. Thach)
- 18 Douglas SBD-3 Dauntless dive bombers (VB-3 – Lt. Cmdr. Maxwell F. Leslie)
- 19 Douglas SBD-3 Dauntless dive bombers (VS-5 – Lt. Wallace C. Short, Jr.)
- 13 Douglas TBD-1 Devastator[p] torpedo bombers (VT-3 – Lt. Cmdr. Lance E. Massey†)
- Yorktown Air Group[o] (Lieutenant Commander Oscar Pederson)
- Yorktown (sunk by I-168 7 June) (Captain Elliott Buckmaster)
- Task Group 17.2 (Cruiser Group)
- Rear Admiral William W. Smith[q] in Astoria
- 1 New Orleans-class heavy cruiser (9 × 8-in. main battery)
- Astoria (Capt. Francis W. Scanland)
- 1 Portland-class heavy cruiser (9 × 8-in. main battery)
- Portland (Capt. Laurance T. DuBose)
- 1 New Orleans-class heavy cruiser (9 × 8-in. main battery)
- Task Group 17.4 (Destroyer Screen)
- Captain Gilbert Hoover,[r] COMDESRON 2
- 5 Sims-class destroyers (4 × 5-in. main battery)
- Hammann (sunk by I-168 7 June) (Commander Arnold E. True)
- Anderson (Lt. Cmdr. William M. Hobby, Jr.)
- Hughes (Lt. Cmdr. Donald J. Ramsey)
- Morris (Cmdr. Harry B. Jarrett)
- Russell (Lt. Cmdr. J. C. Pollock)
- 1 Gleaves-class destroyer (5 × 5-in. main battery)
- Gwin (Lt. Cmdr. John M. Higgins)
- 5 Sims-class destroyers (4 × 5-in. main battery)
Task Force 16


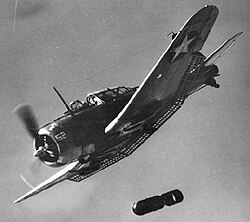


Rear Admiral Raymond A. Spruance[s] in Enterprise
- Task Group 16.5 (Carrier Group):[7]
- Enterprise (Capt. George D. Murray)[t]
- Enterprise Air Group (Lt. Cmdr. C. Wade McClusky)
- 27 F4F-4 fighters (VF-6 – Lt. James S. Gray)
- 19 SBD-2/3 dive bombers (VB-6 – Lt. Richard H. Best)
- 19 SBD-2/3 dive bombers (VS-6 – Lt. Wilmer E. Gallaher)
- 14 TBD-1 torpedo bombers (VT-6 – Lt. Cmdr. Eugene E. Lindsey†)
- Enterprise Air Group (Lt. Cmdr. C. Wade McClusky)
- Hornet (Capt. Marc A. Mitscher, promoted to Rear Adm en route)[u]
- Hornet Air Group (Cmdr. Stanhope C. Ring)
- 27 F4F-4 fighters (VF-8 – Lt. Cmdr. Samuel G. Mitchell)
- 19 SBD-2/3 dive bombers (VB-8 – Lt. Cmdr. Robert R. Johnson)
- 18 SBD-1/2/3 dive bombers (VS-8 – Lt. Cmdr. Walter F. Rodee)
- 15 TBD-1 torpedo bombers (VT-8 – Lt. Cmdr. John C. Waldron†)
- Hornet Air Group (Cmdr. Stanhope C. Ring)
- Enterprise (Capt. George D. Murray)[t]
- Task Group 16.2 (Cruiser Group)
- Rear Admiral Thomas C. Kinkaid,[v] COMCRUDIV 6
- 1 Pensacola-class heavy cruiser (10 × 8-in. main battery)
- Pensacola (Capt. Frank L. Lowe)
- 1 Northampton-class heavy cruiser (9 × 8-in. main battery)
- Northampton (Capt. William D. Chandler Jr.)
- 3 New Orleans-class heavy cruisers (9 × 8-in. main battery)
- New Orleans (Capt. Howard H. Good)
- Minneapolis (Capt. Frank J. Lowry)[w]
- Vincennes (Capt. Frederick L. Riefkohl)[x]
- 1 anti-aircraft light cruiser (16 × 5-in. main battery)
- Atlanta (Capt. Samuel P. Jenkins)
- 1 Pensacola-class heavy cruiser (10 × 8-in. main battery)
- Task Group 16.4 (Destroyer Screen)
- Captain Alexander R. Early, COMDESRON 1
- Destroyer Squadron 1
- 1 Porter-class destroyer (8 × 5-in. main battery)
- Phelps (Lt. Cmdr. Edward L. Beck)
- 3 Farragut-class destroyer (5 × 5-in. main battery)
- 1 Porter-class destroyer (8 × 5-in. main battery)
- Destroyer Squadron 6
- 1 Gridley-class destroyer (4 × 5-in. main battery)
- Maury (Lt. Cmdr. Gelzer L. Sims)
- 2 Benham-class destroyer (4 × 5-in. main battery)
- 1 Mahan-class destroyer (5 × 5-in. main battery)
- Conyngham (Lt. Cmdr. Henry C. Daniel)
- 1 Porter-class destroyer (8 × 5-in. main battery)
- Balch (Lt. Cmdr. Harold H. Thiemroth)
- 1 Gridley-class destroyer (4 × 5-in. main battery)
- Destroyer Squadron 1
- Oilers Group
Submarines

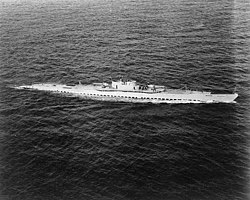

Rear Admiral Robert H. English[z]
Commander, Submarine Force, Pacific Fleet, HQ at Pearl Harbor
- Task Group 7.1 (Midway Patrol Group)
- 3 Gato-class (10 tubes: 6 forward, 4 aft):
- Gato (Lt. Cmdr. W.G. Myers)
- Grouper (Lt. Cmdr. C.E. Duke)
- Flying Fish (Lt. Cmdr. Glynn R. Donaho)
- 5 Tambor-class (10 tubes: 6 forward, 4 aft):
- 4 Narhwhal-class (6 tubes: 4 forward, 2 aft):
- Nautilus (Lt. Cmdr. William H. Brockman Jr.)
- Dolphin (Lt. Cmdr. R.L. Rutter)
- Cachalot (Lt. Cmdr. G.A. Lewis)
- Cuttlefish (Lt. Cmdr. Martin P. Hottel)
- 3 Gato-class (10 tubes: 6 forward, 4 aft):
- Task Group 7.2 ("Roving Short-Stops")
- 1 Gato-class (10 tubes: 6 forward, 4 aft):
- Trigger (Lt. Cmdr. J.H. Lewis)
- 1 Porpoise-class (6 tubes: 4 forward, 2 aft):
- Plunger (Lt. Cmdr. D.C. White)
- 1 Narhwhal-class (6 tubes: 4 forward, 2 aft):
- Narwhal (Lt. Cmdr. C.W. Wilkins)
- 1 Gato-class (10 tubes: 6 forward, 4 aft):
- Task Group 7.3 (North of Oahu Patrol)
- 2 Gato-class (10 tubes: 6 forward, 4 aft):
- Growler (Lt. Cmdr. Howard W. Gilmore)
- Finback (Lt. Cmdr. J.L. Hull)
- 2 Porpoise-class (6 tubes: 4 forward, 2 aft):
- 2 Gato-class (10 tubes: 6 forward, 4 aft):
Midway Garrison


- Air group
- Marine Aircraft Group 22
- Colonel Ira L. Kimes, USMC
- 21 Brewster F2A-3 Buffalo[aa] (VMF-221, Major Floyd B. Parks†, USMC)
- 7 Grumman F4F-3A Wildcat (VMF-221, Captain John F. Carey, USMC)
- 19 Douglas SBD-2 Dauntless (VMSB-241 Major Lofton R. Henderson†, USMC)
- 17 Chance-Vought SB2U-3 Vindicator (VMSB-241, Major Benjamin W. Norris†, USMC)
- Navy Air Units
- Captain Cyril T. Simard
- 31 PBY-5 and PBY-5A Catalinas (Detachments from Patrol Wings 1 and 2, USN)
- 6 Grumman TBF Avenger (Detachment from VT-8, USS Hornet - Lt. Langdon K. Fieberling†, USN)
- Detachment of Seventh Air Force
- Major General Willis Hale
- 4 Martin B-26 Marauder (Detachments from the 18th Reconnaissance and 69th Bombardment Squadrons - Capt. James Collins, USAAF)
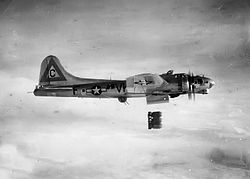
- 17 Boeing B-17 Flying Fortress (Detachments from the 26th, 31st, 72nd, and 431st Bombardment Squadrons - Lt.Col. Walter C. Sweeney, Jr., USAAF)
- Local Defenses
- Colonel Harold D. Shannon, Fleet Marine Force commander
- "C" and "D" Companies, 2nd Raider Battalion, USMC
- 6th Defense Battalion (Reinforced) USMC Colonel Harold D. Shannon
- USS Allen (DD-66)
- 1st Motor Torpedo Boat Squadron
- 11 PT boats (9 at Midway Island and 2 at Kure Atoll)[8]
Deployed along lesser reefs and islands of the Hawaiian Group

- French Frigate Shoals
- Pearl and Hermes Reef
- Lisianski Island
- patrol boat YP-284
- Gardner Pinnacles
- patrol boat YP-345
- Laysan Island
- patrol boat YP-290
- Necker Island
- patrol boat YP-350
Midway Refueling Unit
- Cmdr. Harry R. Thurber, USN
- AO Guadalupe
- DD Blue and Ralph Talbot
The military forces at the immediate point of tactical contact (i.e. not including support formations) are described below.
Aircraft
American Forces
Naval Air Station (NAS) Midway operated:[9]
- 31 Consolidated PBY-5 Catalina, seaplanes.
- 6 Grumman TBF-1 Avenger, torpedo bombers (5 lost)
- 4 Martin B-26 Marauder, medium bombers
- 17 Boeing B-17 Flying Fortress, heavy bombers
- 19 Douglas SBD-2 Dauntless, dive bombers
- 17 Chance-Vought SB2U-3 Vindicator, dive bombers
- 21 Brewster F2A Buffalo, fighters
- 7 Grumman F4F-3A Wildcat, fighters
- 1 light utility aircraft
Task Force 17:
Yorktown: 77 aircraft (sunk)
- 25 Grumman F4F-4 Wildcat, fighters
- 37 Douglas SBD-3 Dauntless, dive bombers
- 15 Douglas TBD-1 Devastator, torpedo bombers (13 lost)
Task Force 16:
Enterprise: 78 aircraft
- 27 Grumman F4F-4 Wildcat, fighters
- 37 Douglas SBD-3 Dauntless, dive bombers
- 14 Douglas TBD-1 Devastator, torpedo bombers (10 lost)
Hornet: 77 aircraft
- 27 Grumman F4F-4 Wildcat, fighters
- 35 Douglas SBD-3 Dauntless, dive bombers
- 15 Douglas TBD-1 Devastator, torpedo bombers (all lost)
Japanese Forces
The Japanese carriers of the Striking Force operated:
Akagi: 60 aircraft (sunk)
- 24 Mitsubishi A6M Zero, fighters
- 18 Aichi D3A,"Val" dive bombers
- 18 Nakajima B5N,"Kate" torpedo bombers
Kaga: 74 aircraft (sunk)
- 27 Mitsubishi A6M Zero, fighters
- 18 Aichi D3A,"Val" dive bombers
- 27 Nakajima B5N,"Kate" torpedo bombers
- 2 Aichi D3A,"Val" dive bombers (as cargo, likely non-operational)
Hiryū: 57 aircraft (sunk)
- 21 Mitsubishi A6M Zero, fighters
- 18 Aichi D3A,"Val" dive bombers
- 18 Nakajima B5N,"Kate" torpedo bombers
Sōryū: 57 aircraft (sunk) [10]
- 21 Mitsubishi A6M Zero, fighters
- 16 Aichi D3A,"Val" dive bombers
- 18 Nakajima B5N,"Kate" torpedo bombers
- 2 Yokosuka D4Y1C, pre-series dive bombers (experimental reconnaissance aircraft)
(Note: These figures include 21 operational Zero fighters of the 6th Air Group being ferried to Midway by the carriers.)
- Japanese battleships and cruisers: 16 reconnaissance floatplanes, most of them short-ranged (5 Aichi E13A, 10 Nakajima E8N, 1 Aichi E11A)
Footnotes
- ^ Shot down and killed by US fighter planes while on tour of upper Solomons April 1943.
- ^ Killed during Battle of the Malacca Strait May 1945
- ^ Died by self-inflicted gunshot on Saipan July 1944
- ^ Forced to resign from navy March 1943 following unsatisfactory performance at Naval Battle of Guadalcanal
- ^ Died during Battle of Saipan July 1944
- ^ Killed during Battle of Surigao Strait October 1944
- ^ Fell out of favor with Naval high command after the Guadalcanal campaign and was assigned to shore duty from December 1942 until end of war.
- ^ Died by self-inflicted gunshot on Okinawa June 1945
- ^ Killed on Guadalcanal August 1942
- ^ Assigned to shore duty following unsatisfactory performance in Battle of the Komandorski Islands
- ^ Died on Tinian prob. by suicide August 1944
- ^ Died of illness September 1944 six months after promotion to full admiral
- ^ Later oversaw work with torpedo suicide weapons; survived war
- ^ Held overall command of invasion forces for Guadalcanal August 1942..
- ^ Including elements from the sidelined Saratoga air group
- ^ These aircraft were obsolete by mid-1942 and their slow speed allowed them to be practically wiped out during their attacks on the Japanese carriers. This sacrifice, however, was instrumental in allowing the US dive bombers to appear over Nagumo's task force almost unnoticed.
- ^ Held desk job for remainder of war following disappointing performance in Aleutian Islands campaign.
- ^ Impulsively relieved of command by Halsey following loss of light cruiser USS Juneau November 1942, a career-ruining move Halsey later supposedly expressed regret over.
- ^ Later promoted to full admiral and commanded US Third Fleet.
- ^ Later promoted to full admiral and commanded US First Fleet after war.
- ^ An early proponent of naval aviation; later promoted to full admiral and commanded Fast Carrier Task Force.
- ^ Later promoted to full admiral and commanded US Seventh Fleet.
- ^ Later promoted to vice admiral and commanded amphibious forces in both Mediterranean and Pacific Theatres.
- ^ First Puerto Rican to graduate from US Naval Academy; relieved following disastrous Battle of Savo Island and never held another sea command.
- ^ Received ten commendations over his service in war.
- ^ Killed in plane crash in Mendocino County, California January 1943.
- ^ These aircraft were obsolete by mid-1942 and were no match for the advanced Mitsubishi Zero.
References
- ^ Prange, Gordon W.; Goldstein, Donald M.; Dillon, Katherine V. (1982). Miracle at Midway. MJF Books. p. 30. ISBN 978-1567318951.
- ^ "MilitaryHistoryOnline.com". Archived from the original on 2018-03-10. Retrieved 2009-11-11.
- ^ Spennemann, Dirk HR (June 2009). "The Cultural Landscape of the World War II Battlefield of Kiska, Aleutian Islands" (PDF). National Park Service.
- ^ a b c d e f g h i j k l Part of the Aleutian's Support Force: These ships detached from the Main Body before the Midway action commenced
- ^ L, Klemen (1999–2000). "Vice-Admiral Nobutake Kondō". Forgotten Campaign: The Dutch East Indies Campaign 1941-1942. Archived from the original on 2021-04-12. Retrieved 2021-03-30.
- ^ "Battle of Midway". World War 2 Facts. Retrieved 14 December 2013.
- ^ "Midway Order of Battle". NavWeaps.com. Retrieved 14 December 2013.
- ^ THE BATTLE OF MIDWAY INCLUDING THE ALEUTIAN PHASE. U.S. Naval War College. 1948. p. 120.
Meanwhile, at 1920 CNAS Midway decided to employ his motor torpedo boats as an attack squadron and sent a squadron of nine MTB's from Midway and two MTB's from Kure Island to attack the task force containing the burning carriers. They were unable to locate the target. With the coming of daylight they commenced their return to Midway.:
- ^ "ONI Review of Midway". iBiblio.org. Retrieved 14 December 2013.
- ^ "After Midway". Military History Online. militaryhistoryonline.com. Archived from the original on 10 March 2018. Retrieved 14 December 2013.
