[gtranslate]
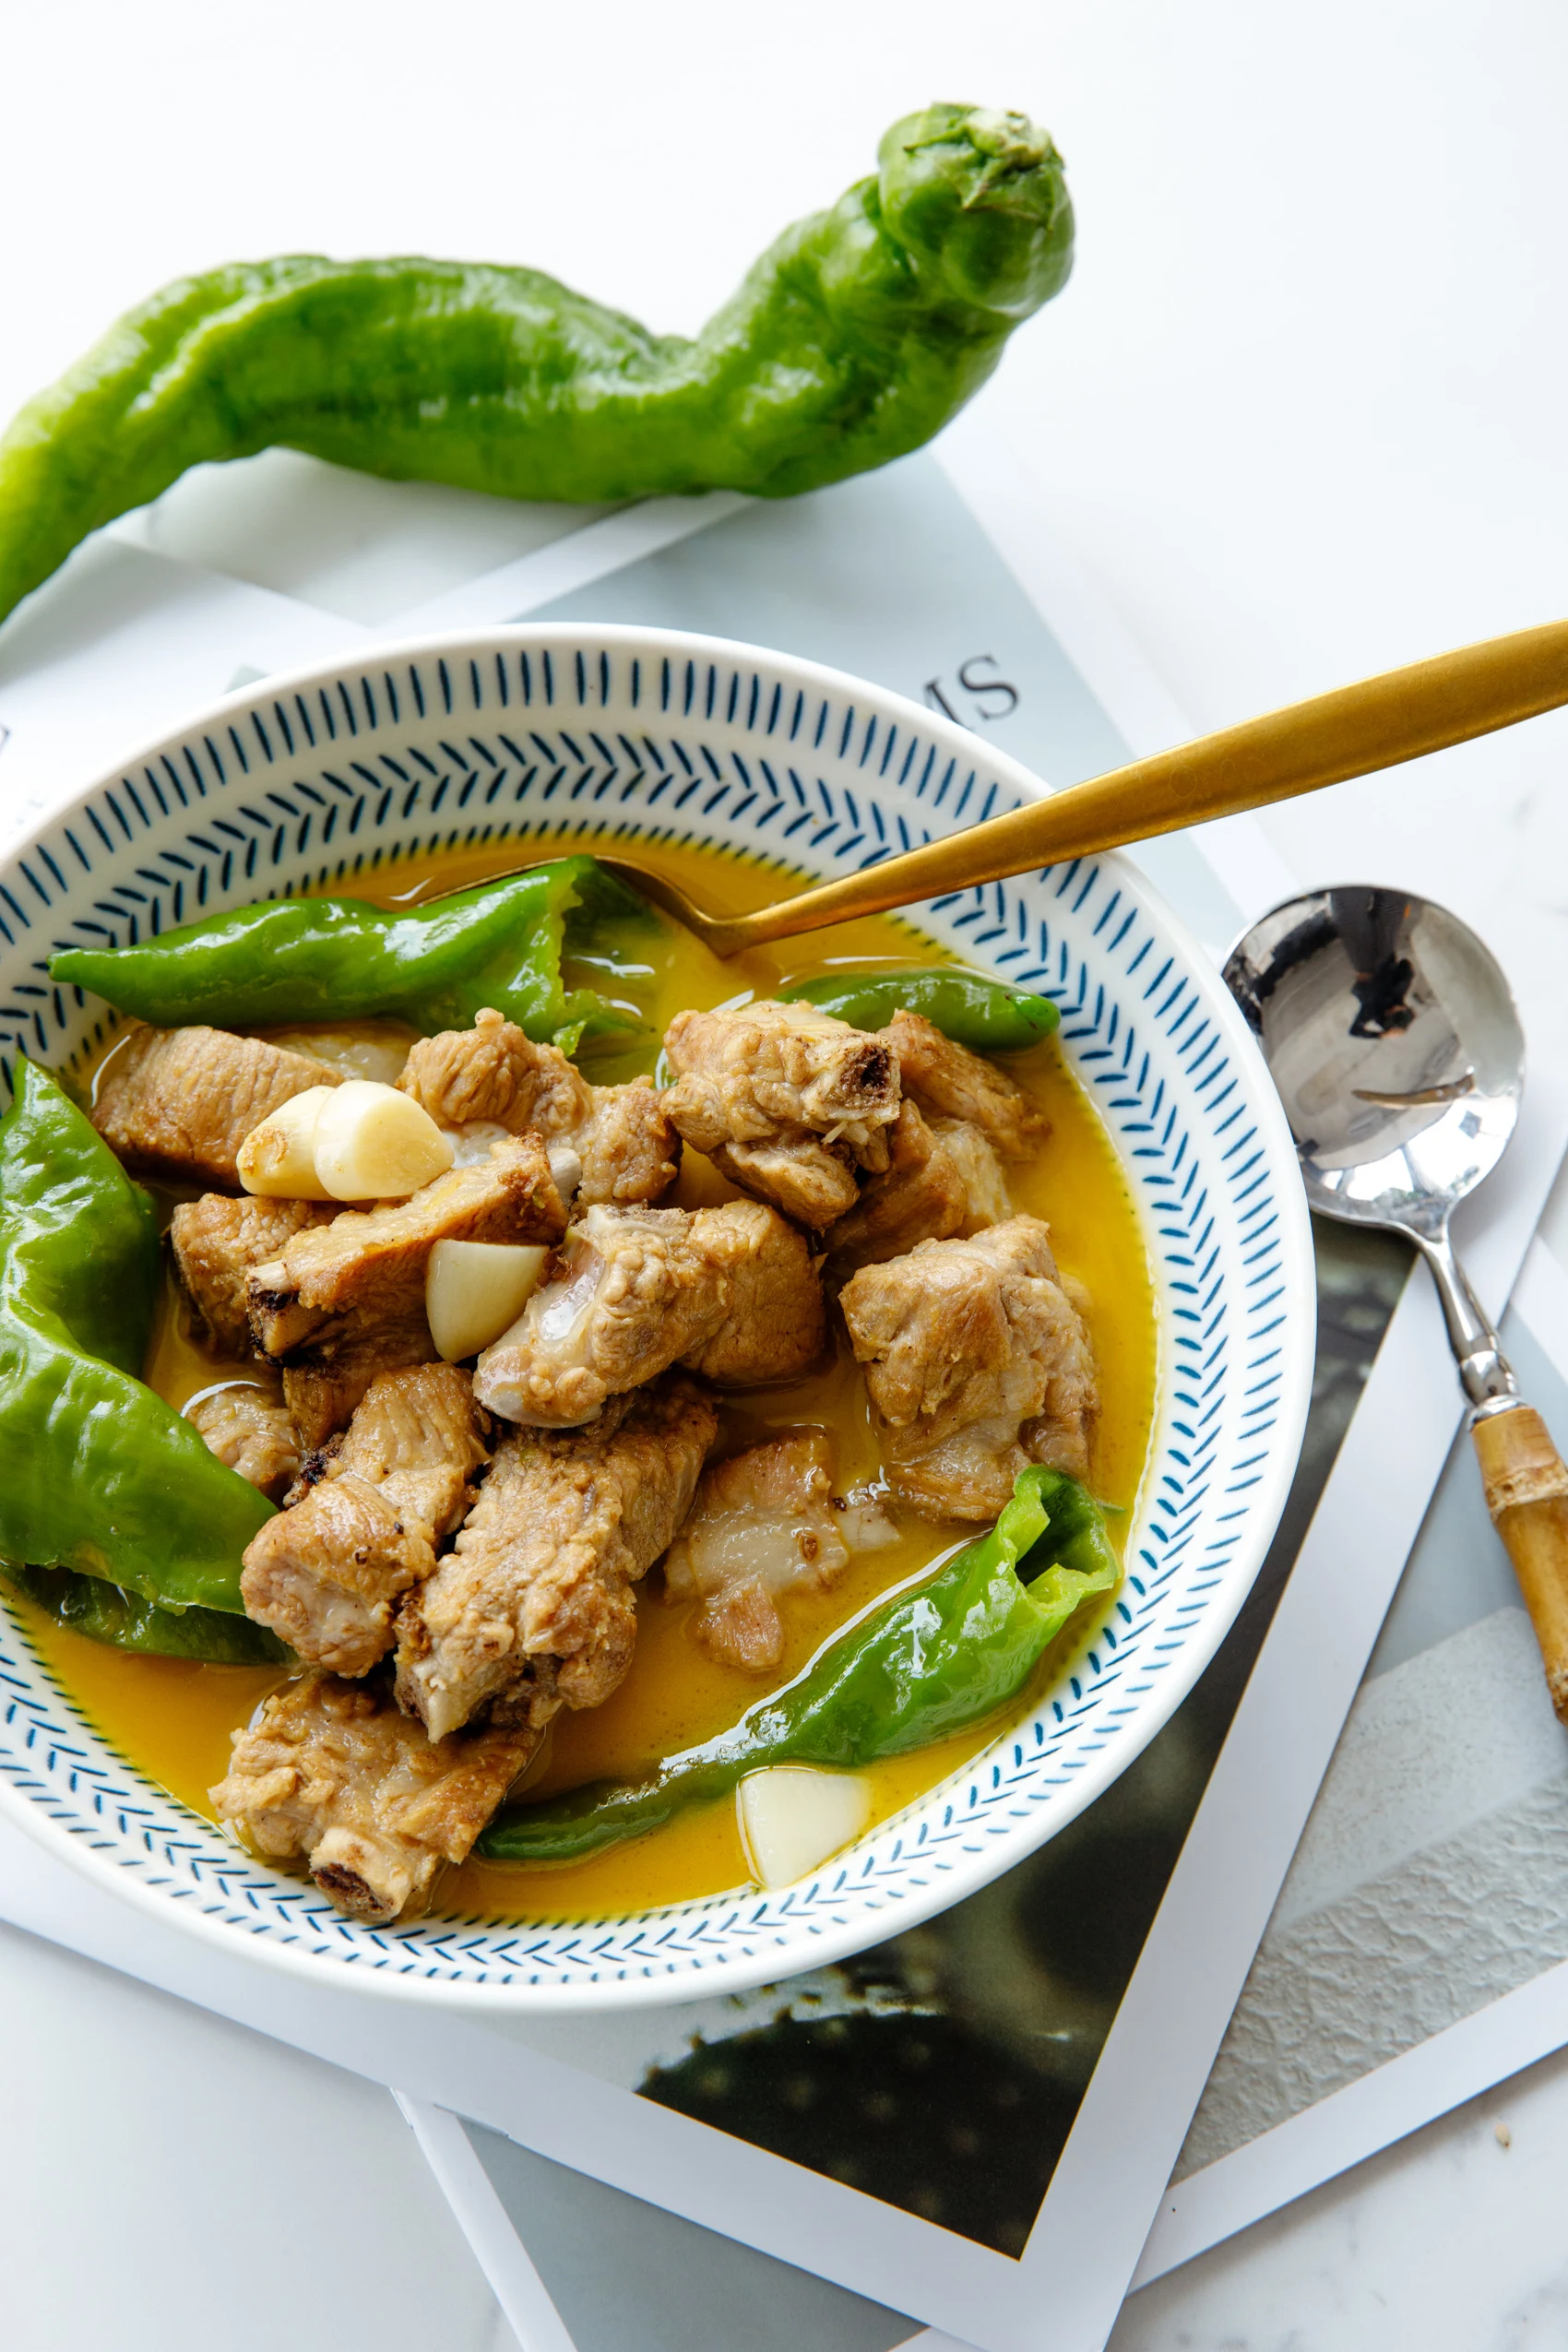
This is a super easy, foolproof, simmered ribs with green peppers, a dish coming from Hunan cuisine that is not so hot!
I traveled to Hunna on my last holiday and decided to try some of their local dishes. Guess what? Most of those dishes are too hot for me as well. There are peppers almost everywhere, including the soups. But I do find one, easy, humble, delicious, with a mild heat- these simmered ribs with peppers. It is incredibly delicious, even with a super-easy ingredient list.
You may know that both Sichuan and Hunan cuisines are famous for being hot, but they differ in many ways. Firstly, Sichuan heat in most cases is Mala with a small amount of pepper and Sichuan pepper. However, Hunan heart is much sharper, since lots of fresh, pickled peppers are used- like Hunan beef stir fry. Another difference is that many dishes in Sichuan cuisine are not hot at all. But most Hunan-style dishes are quite hot.
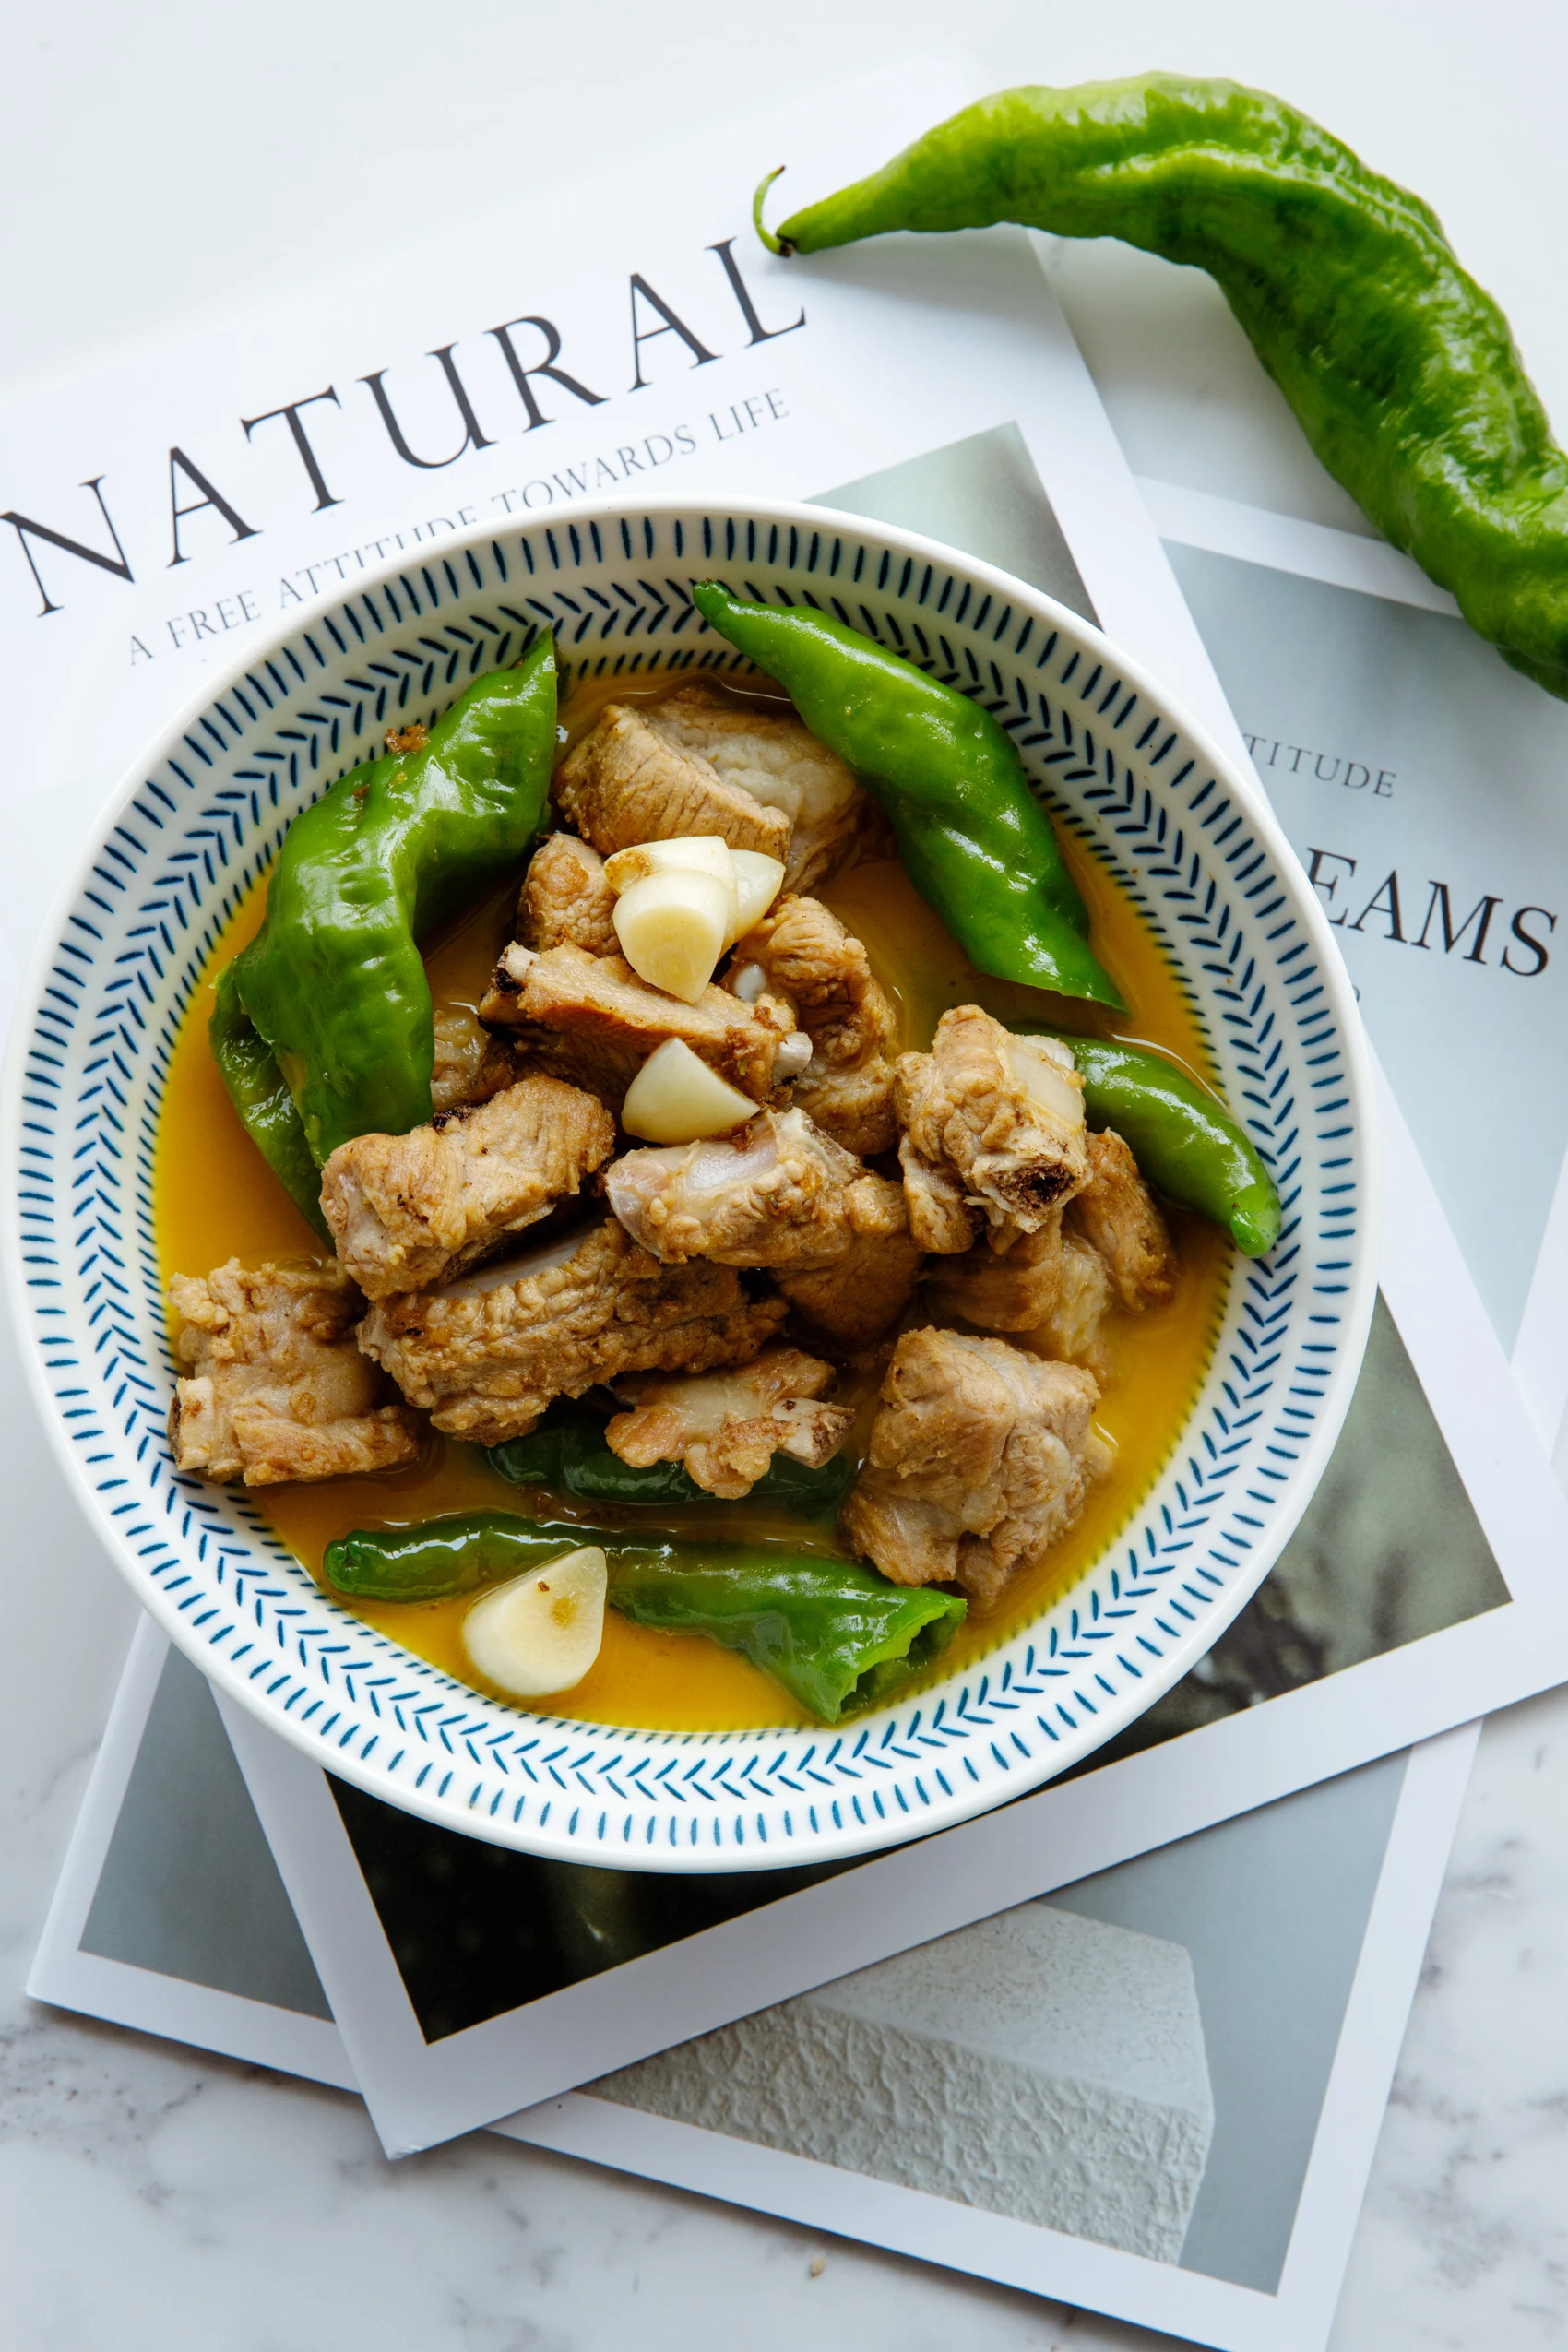
I know that ribs and peppers are a great combination, and we have already proved that in many other ways. But we will support this combination once again as soup.
This soup method is super beginner-friendly. The process is just as simple as this- sear the ribs, add hot water, simmer for around 15 miuntes, add fresh chili pepper, continue cooking for 5 minutes. Even if you don’t have any cooking skills, this can be your master dish.
Ingredients
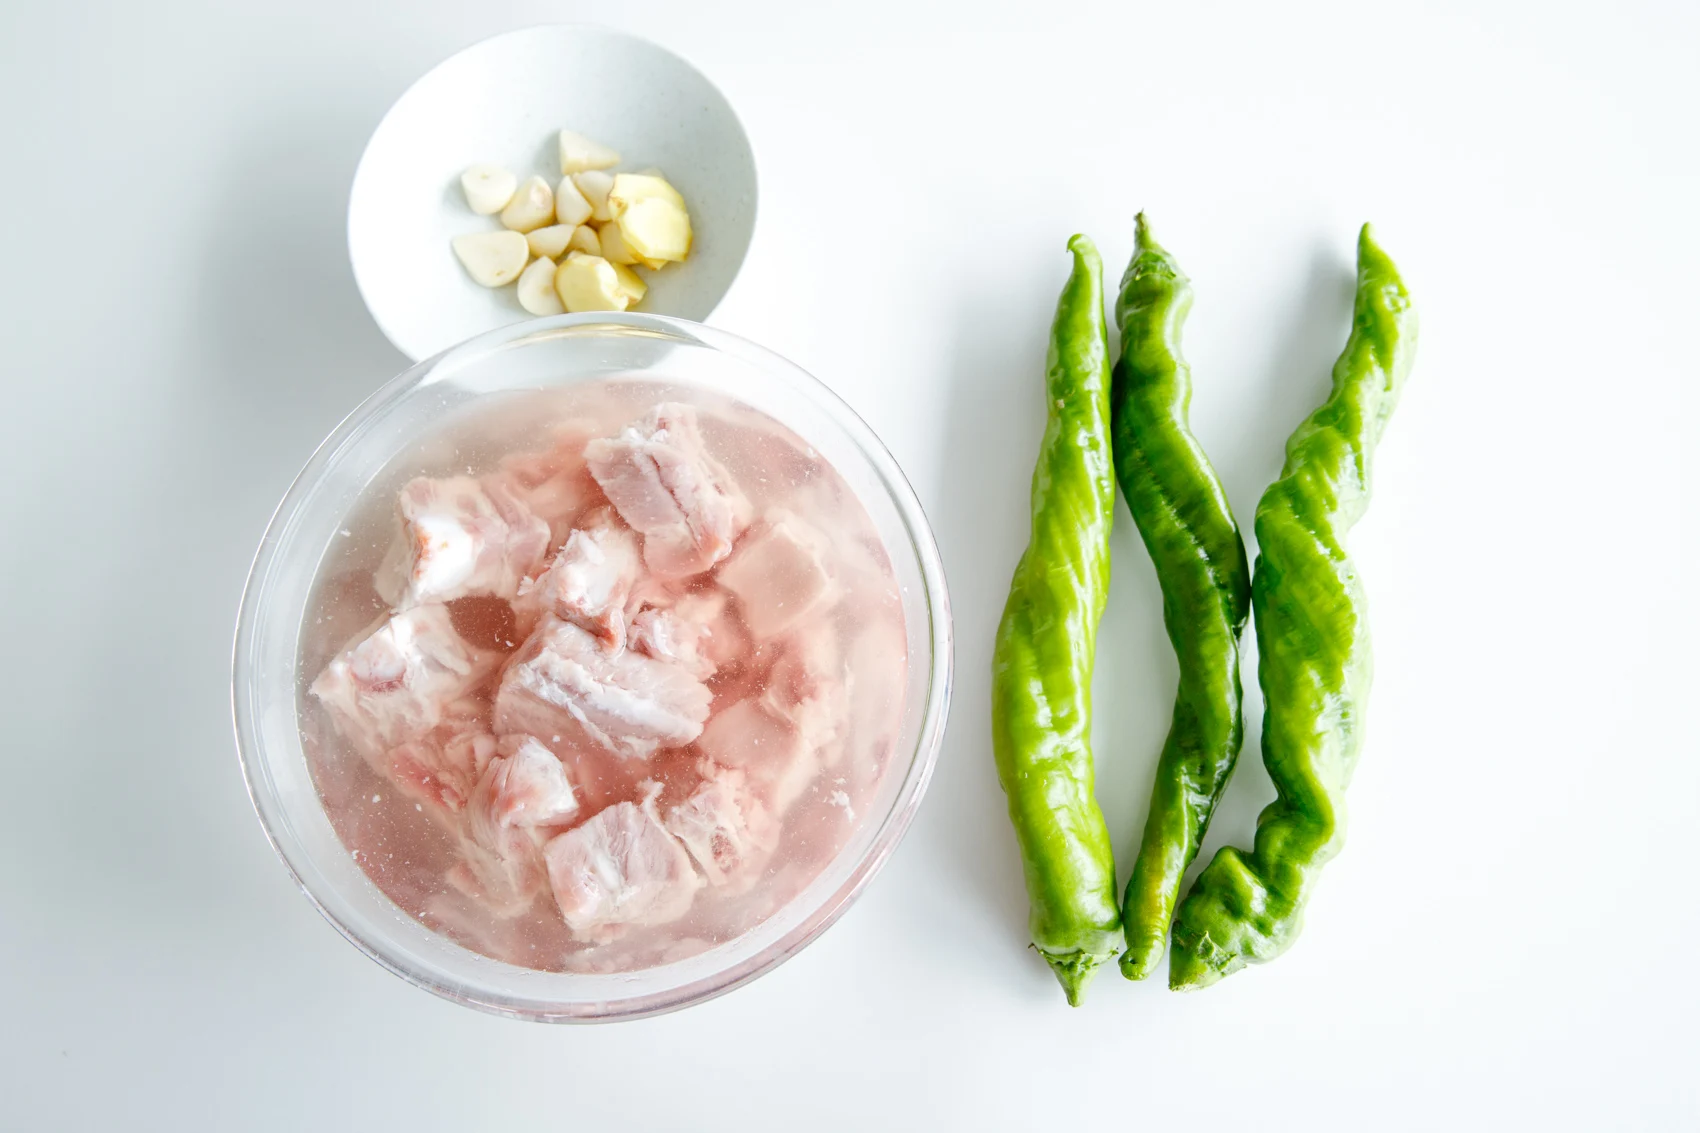
The main ingredient for these lovely simmered ribs is super short. Ribs, fresh peppers, ginger, and garlic as aromatics.
The pepper I am using is our local Hot Screw Pepper. They are super large ones, so I use any three. If you need to replace it with your common types, you may need to use more.
Elaine’s Note
- There is nothing fancy about the dish; the only tip is to use boiling water rather than cold. Cold water will cause a sudden temperature drop and cause the ribs to tighten.
- After a long time simmering, the peppers contribute all of the flavors to the soup and ribs. But they don’t taste good. So discard them and add some new peppers.
Step-by-step instructions
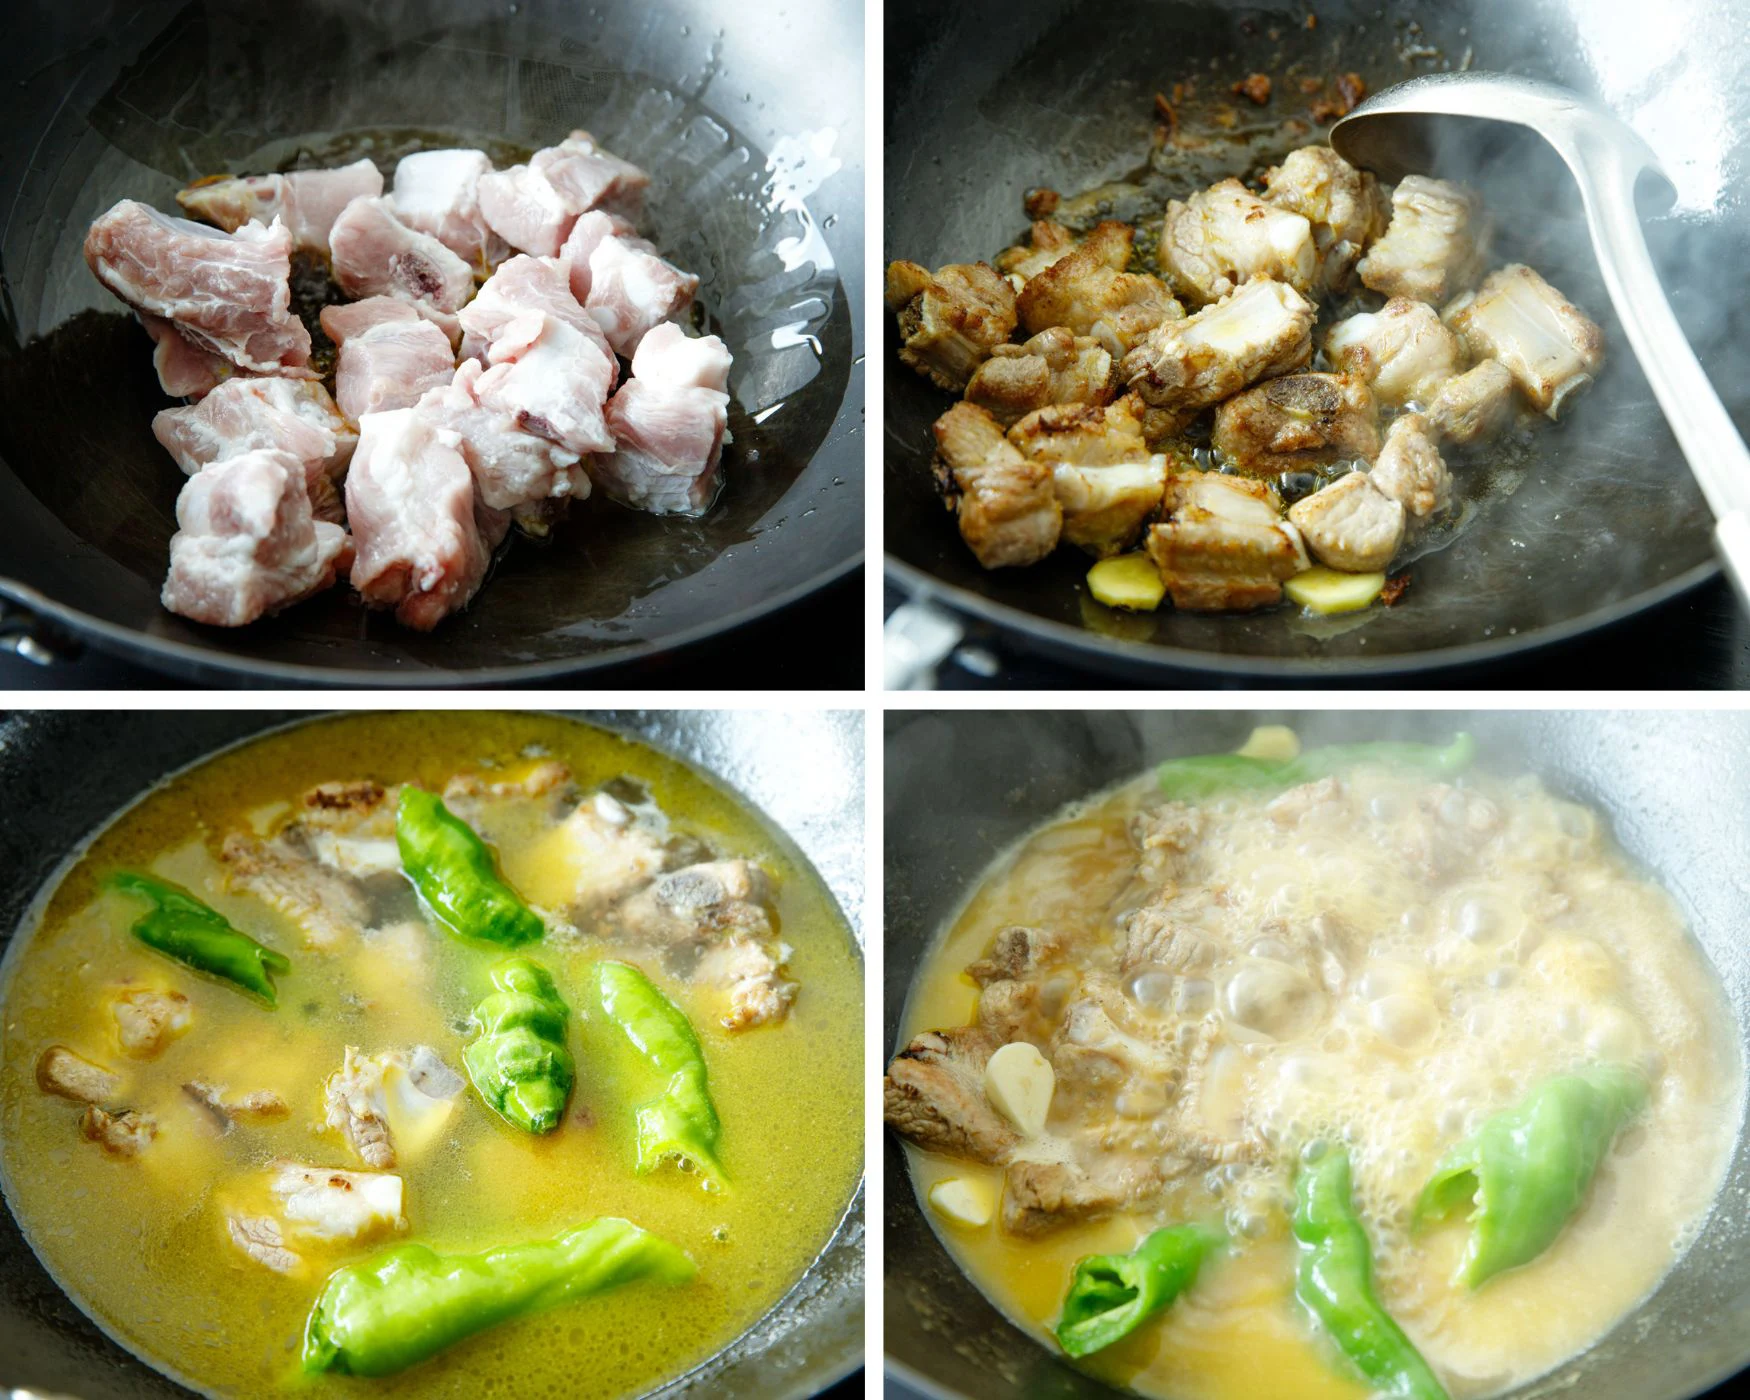
- Soak the ribs in clean water for about 30 minutes, then thoroughly strain and dry.
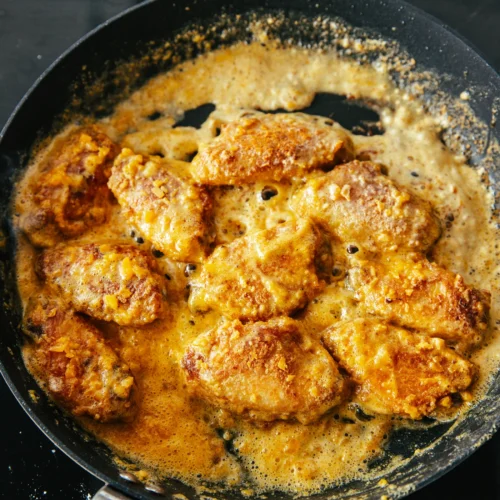
- Prepare a wok, add oil, and fry the pork ribs until golden brown and aromatic. Be patient, this may take several minutes.
- Add boiling water, 2 slices of ginger, and half of the fresh peppers. Cover the lid and cook for 15 minutes, until the ribs are cooked through. Then pick the peppers out and discard them.
- Add fresh peppers and garlic. Season with salt, light soy sauce, and white pepper, then continue heating over high heat for about 5 minutes to thicken the soup.
Varations
There are lots of add-ons you can add to the soup, such as mushrooms. I tasted adding shiitake mushrooms and chanterelles. They are good enhancer and help us transfering from Hunan cuisine to Yunnan.

How to serve
You can serve it with steamed rice or use it as a topping and base for noodle soup. I highly recommend mixing the soup with rice.
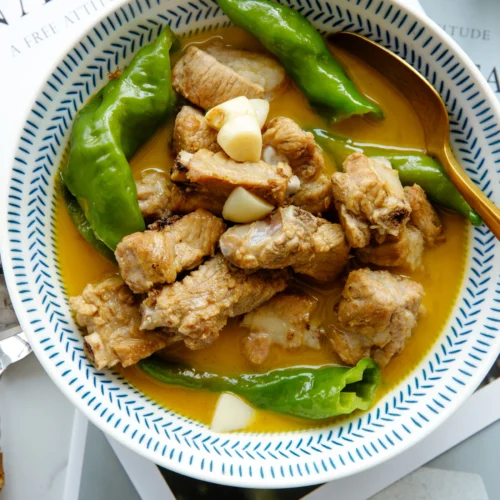
Simmered Ribs with Peppers
#wprm-recipe-user-rating-1 .wprm-rating-star.wprm-rating-star-full svg * { fill: #ffffff; }#wprm-recipe-user-rating-1 .wprm-rating-star.wprm-rating-star-33 svg * { fill: url(#wprm-recipe-user-rating-1-33); }#wprm-recipe-user-rating-1 .wprm-rating-star.wprm-rating-star-50 svg * { fill: url(#wprm-recipe-user-rating-1-50); }#wprm-recipe-user-rating-1 .wprm-rating-star.wprm-rating-star-66 svg * { fill: url(#wprm-recipe-user-rating-1-66); }linearGradient#wprm-recipe-user-rating-1-33 stop { stop-color: #ffffff; }linearGradient#wprm-recipe-user-rating-1-50 stop { stop-color: #ffffff; }linearGradient#wprm-recipe-user-rating-1-66 stop { stop-color: #ffffff; }
Ingredients
- 400 g ribs
- 8 green chili peppers divided
- 4 garlic cloves
- 1 thumb of ginger sliced
- 1 tbsp. light soy sauce
- 1/4 tsp. salt
- dash of pepper
ul.wprm-advanced-list-3292 li:before {background-color: #000000;color: #ffffff;width: 18px;height: 18px;font-size: 12px;line-height: 12px;}
Instructions
-
Soak the ribs in clean water for about 30 minutes, then thoroughly strain and dry.
-
Then prepare a wok, add oil, and fry the pork ribs until golden brown and aromatic. Be patient, this may take several minutes.
-
Add boiling water, slices of ginger, and half of the chili peppers. Cover the lid and cook for 15 minutes, until the ribs are cooked through. Then pick the peppers out and discard them.
-
Add the remaining fresh peppers and garlic. Season with salt, light soy sauce, and white pepper, and continue heating for around 5 minutes to thicken the soup.