[gtranslate]
Last time, we made our pickled mustard greens (Chinese suan cai) from scratch. I made a large batch when the mustard greens were in season. In this recipe, we will make it as a soup base with blanched pork slices.
The Soup Base
If you’ve ever been to a Chinese restaurant and ordered suan cai yu (酸菜鱼 — pickled greens fish soup), you already know the magic. Pickled mustard greens can add great flavor, especially to soups and stews, with a bright, deeply tangy profile.
Although suan cai yu is the most famous dish using pickled mustard greens, the fact is that this soup base can match almost everything- tofu, vegetables, mushrooms, beef, and shrimp balls. In this recipe, we will use pork. You can replace it with beef slices, too. For all soup-based pickled mustard green recipes, I recommend using the traditional fermentation method of making your pickled mustard greens.
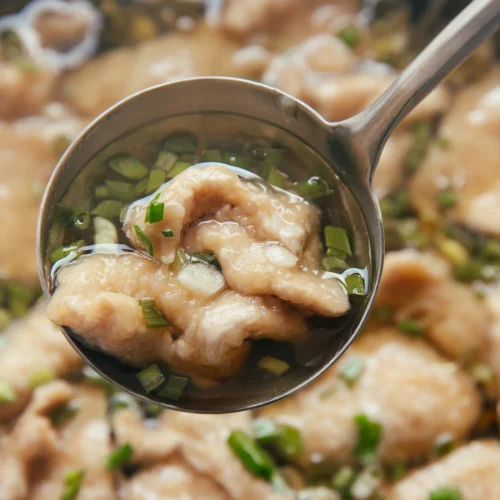
Today’s Star: Silky Pork Slices (水滑肉 Shuǐ Huá Ròu)
When I was a child, all kinds of boiled pork slices were my favorite food, and I was always amazed by how tender the meat could be.
Huá ròu piàn (滑肉片) is a classic Sichuan home-cooking technique in which thinly sliced pork is coated in a starch batter and then gently poached directly in hot broth or soup. We always use sweet potato starch because it is the strongest starch and can adhere to the pork slices even when cooked for a long time in the soup base. You may also use tapioca starch.
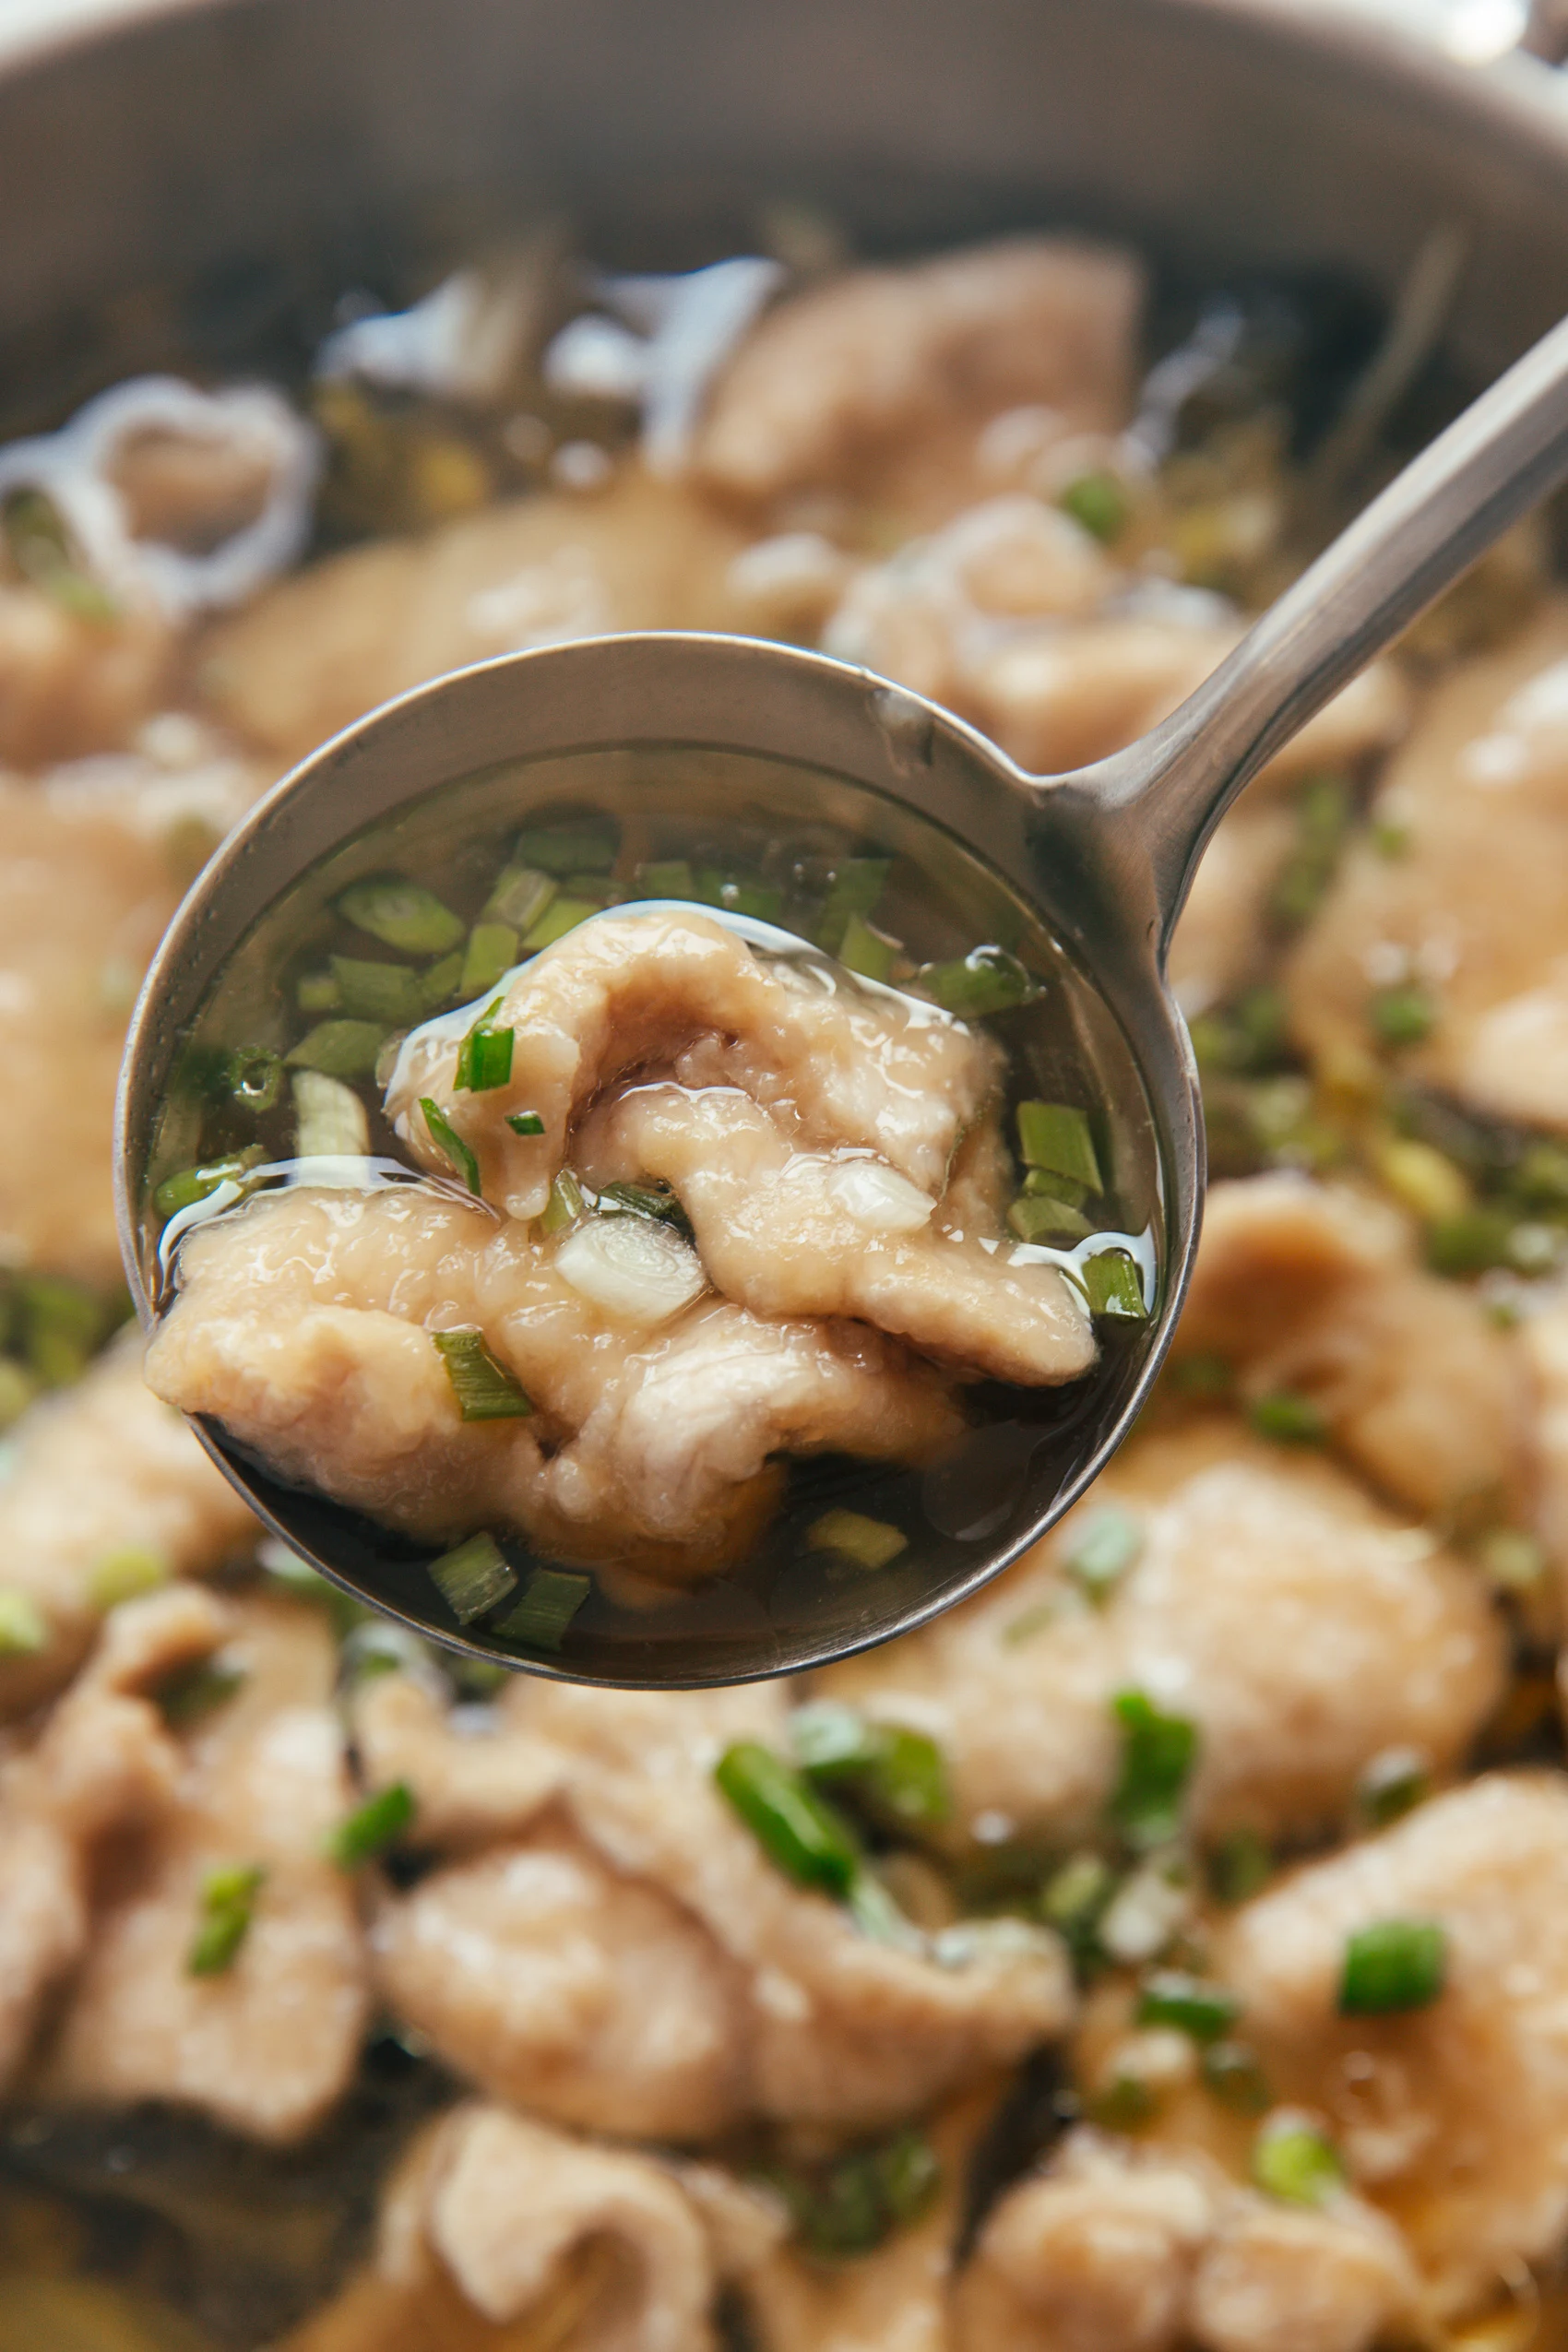
The cooked pork has an amazingly tender, smooth, and velvety texture on the outside. When you eat it, you can feel the silky texture.
Starch batter plays a super important role in this process. When it comes into contact with the hot liquid, the batter forms a protective barrier that further seals in moisture and prevents the pork from drying out. The technique is similar to the velveting for stir-frying.
When made in a clear broth, it’s called huá ròu piàn. But in Chongqing and Chengdu, you’ll find street vendors — often carrying their woks on shoulder poles. The spicer version of this type of pork slices is water-boiled pork-水煮肉片.
Step-by-Step Instructions
Let’s marinate the pork slice first.
- Cut the pork into slices, about 1-2mm thick. The most recommended pork cut for this one is pork butt. You can also replace it with beef.
- Marinating with shaoxin wine, salt, white pepper, and light soy sauce. Mix to combine all the flavors.
- Add around 3 tablespoons of water to 3 tablespoons of starch. And you will get a running-water, starchy texture like this. This special stage is scientifically named a non-Newtonian fluid. In the previous bok choy and pork soup, I used 2 tablespoons and found it was not runny and hard to coat. So I added 3 tablespoons this time. Pour the starch water into the marinated pork. Mix well and make sure each piece is well coated.

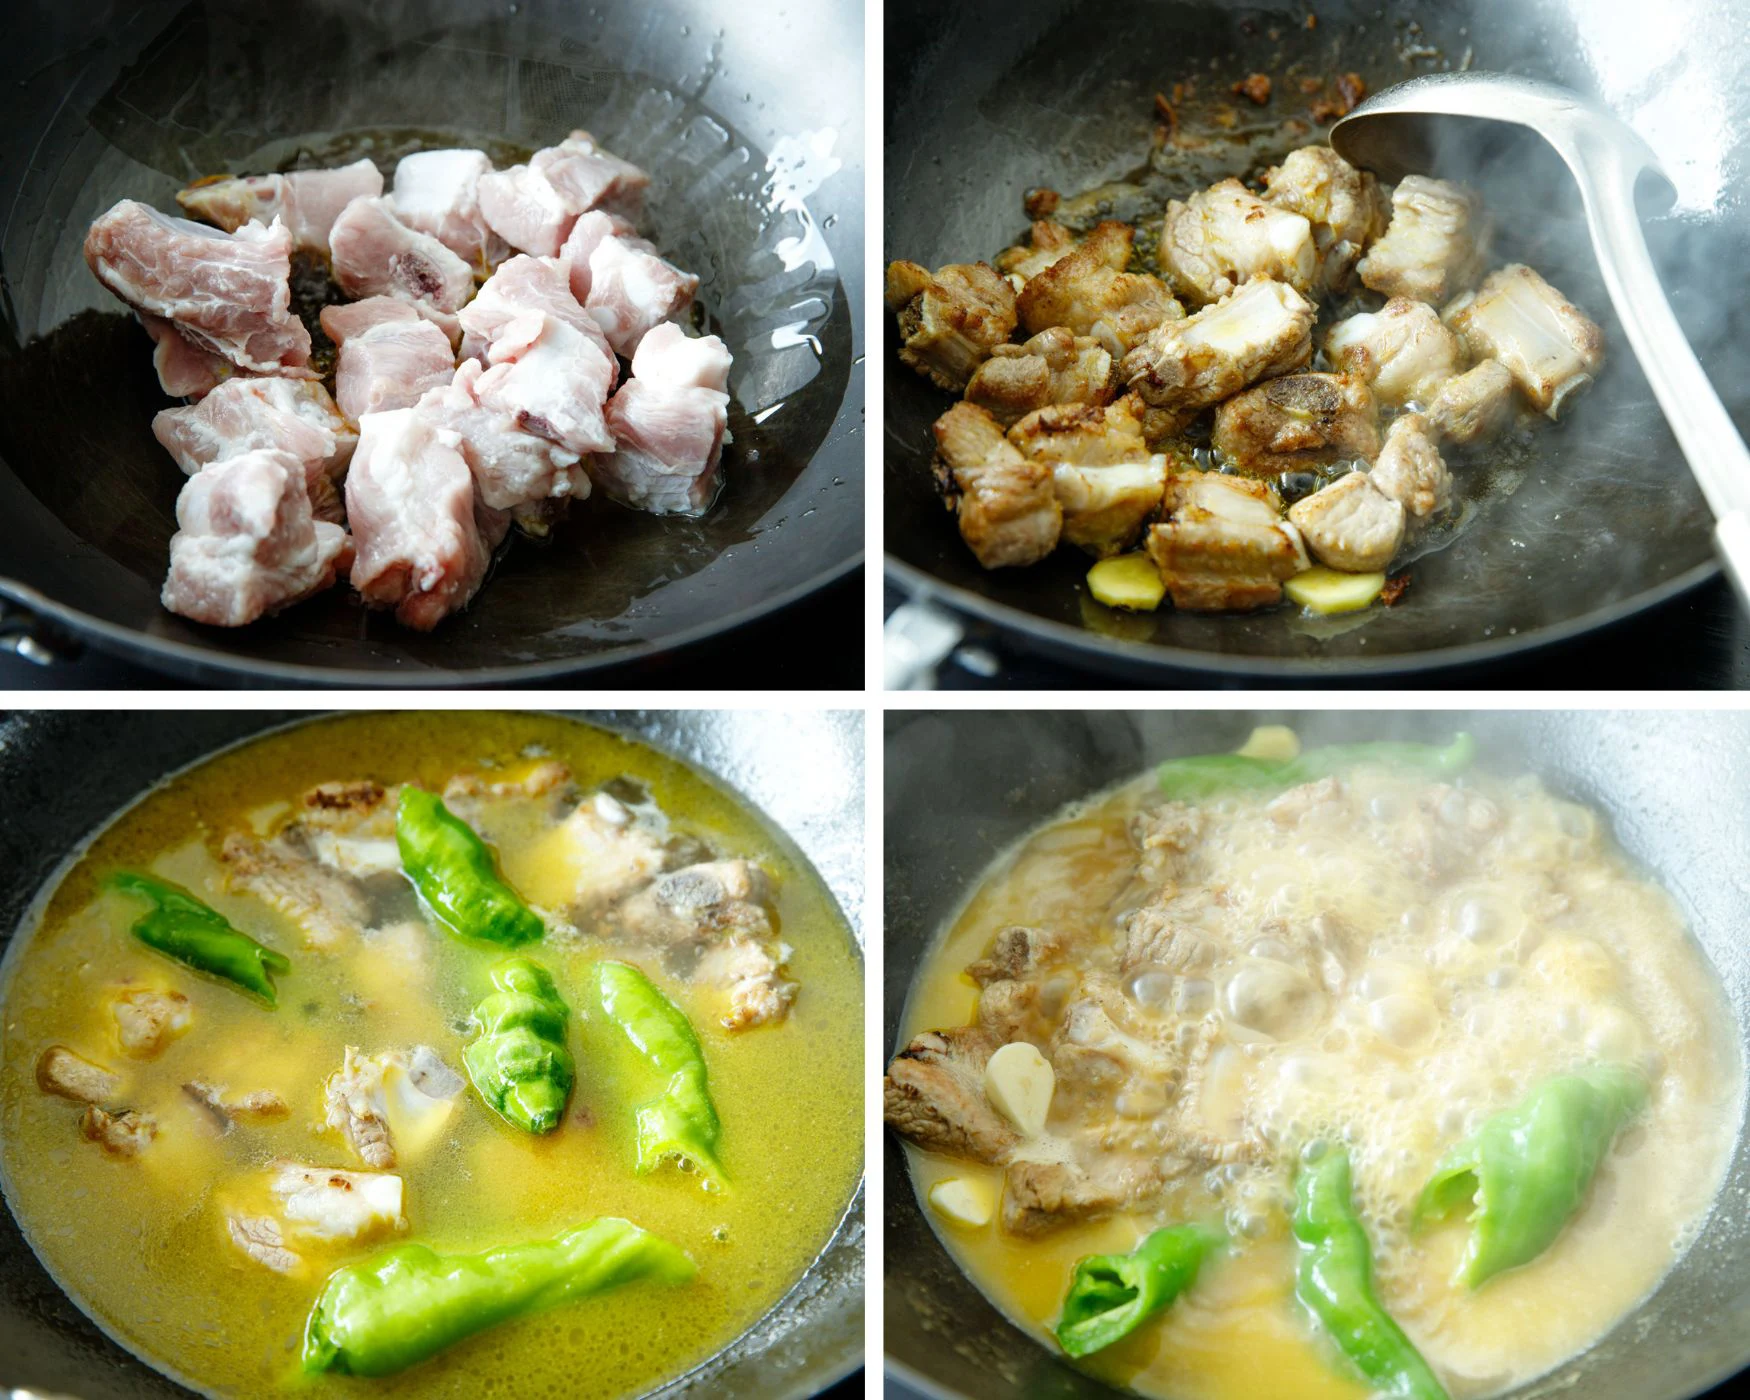
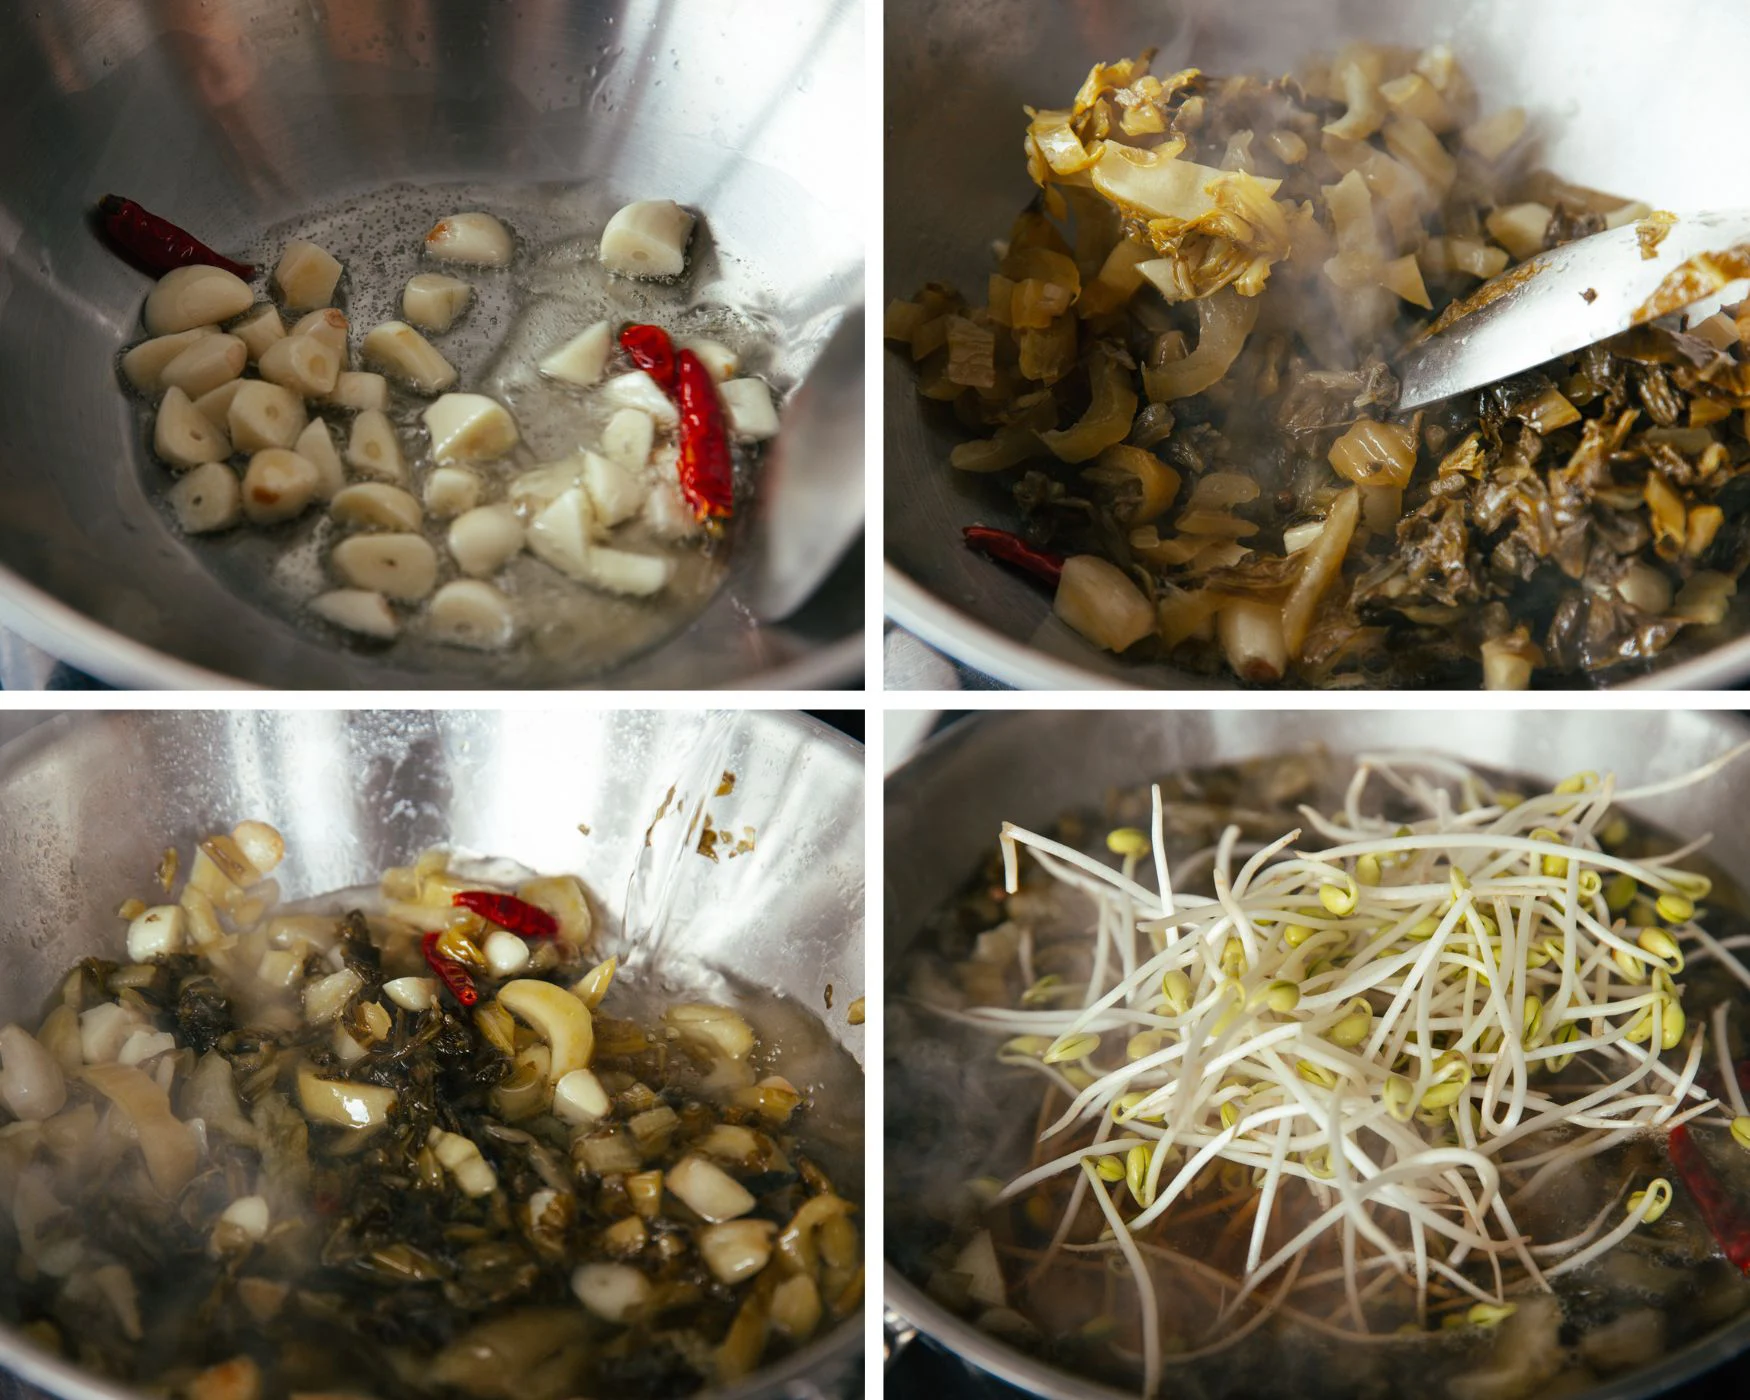
- Let’s make the soup base, add oil, and fry garlic and dried chili pepper until aromatic. If you get any animal fat, like lard or chicken fat, use it.
- Slightly squeeze the pickled mustard greens before adding them to the wok, and fry until the moisture disappears and you can smell their aroma. This may take some time, and it is the key step for the great flavor.
- Then add water, bring to a boil, add light soy sauce, and simmer for about 10 minutes to let the flavors meld into a soup base. If you make your own pickled mustard greens, add some pickled liquid.
- You can add some vegetables as a base- tofu, bean sprouts, or golden needle mushrooms.
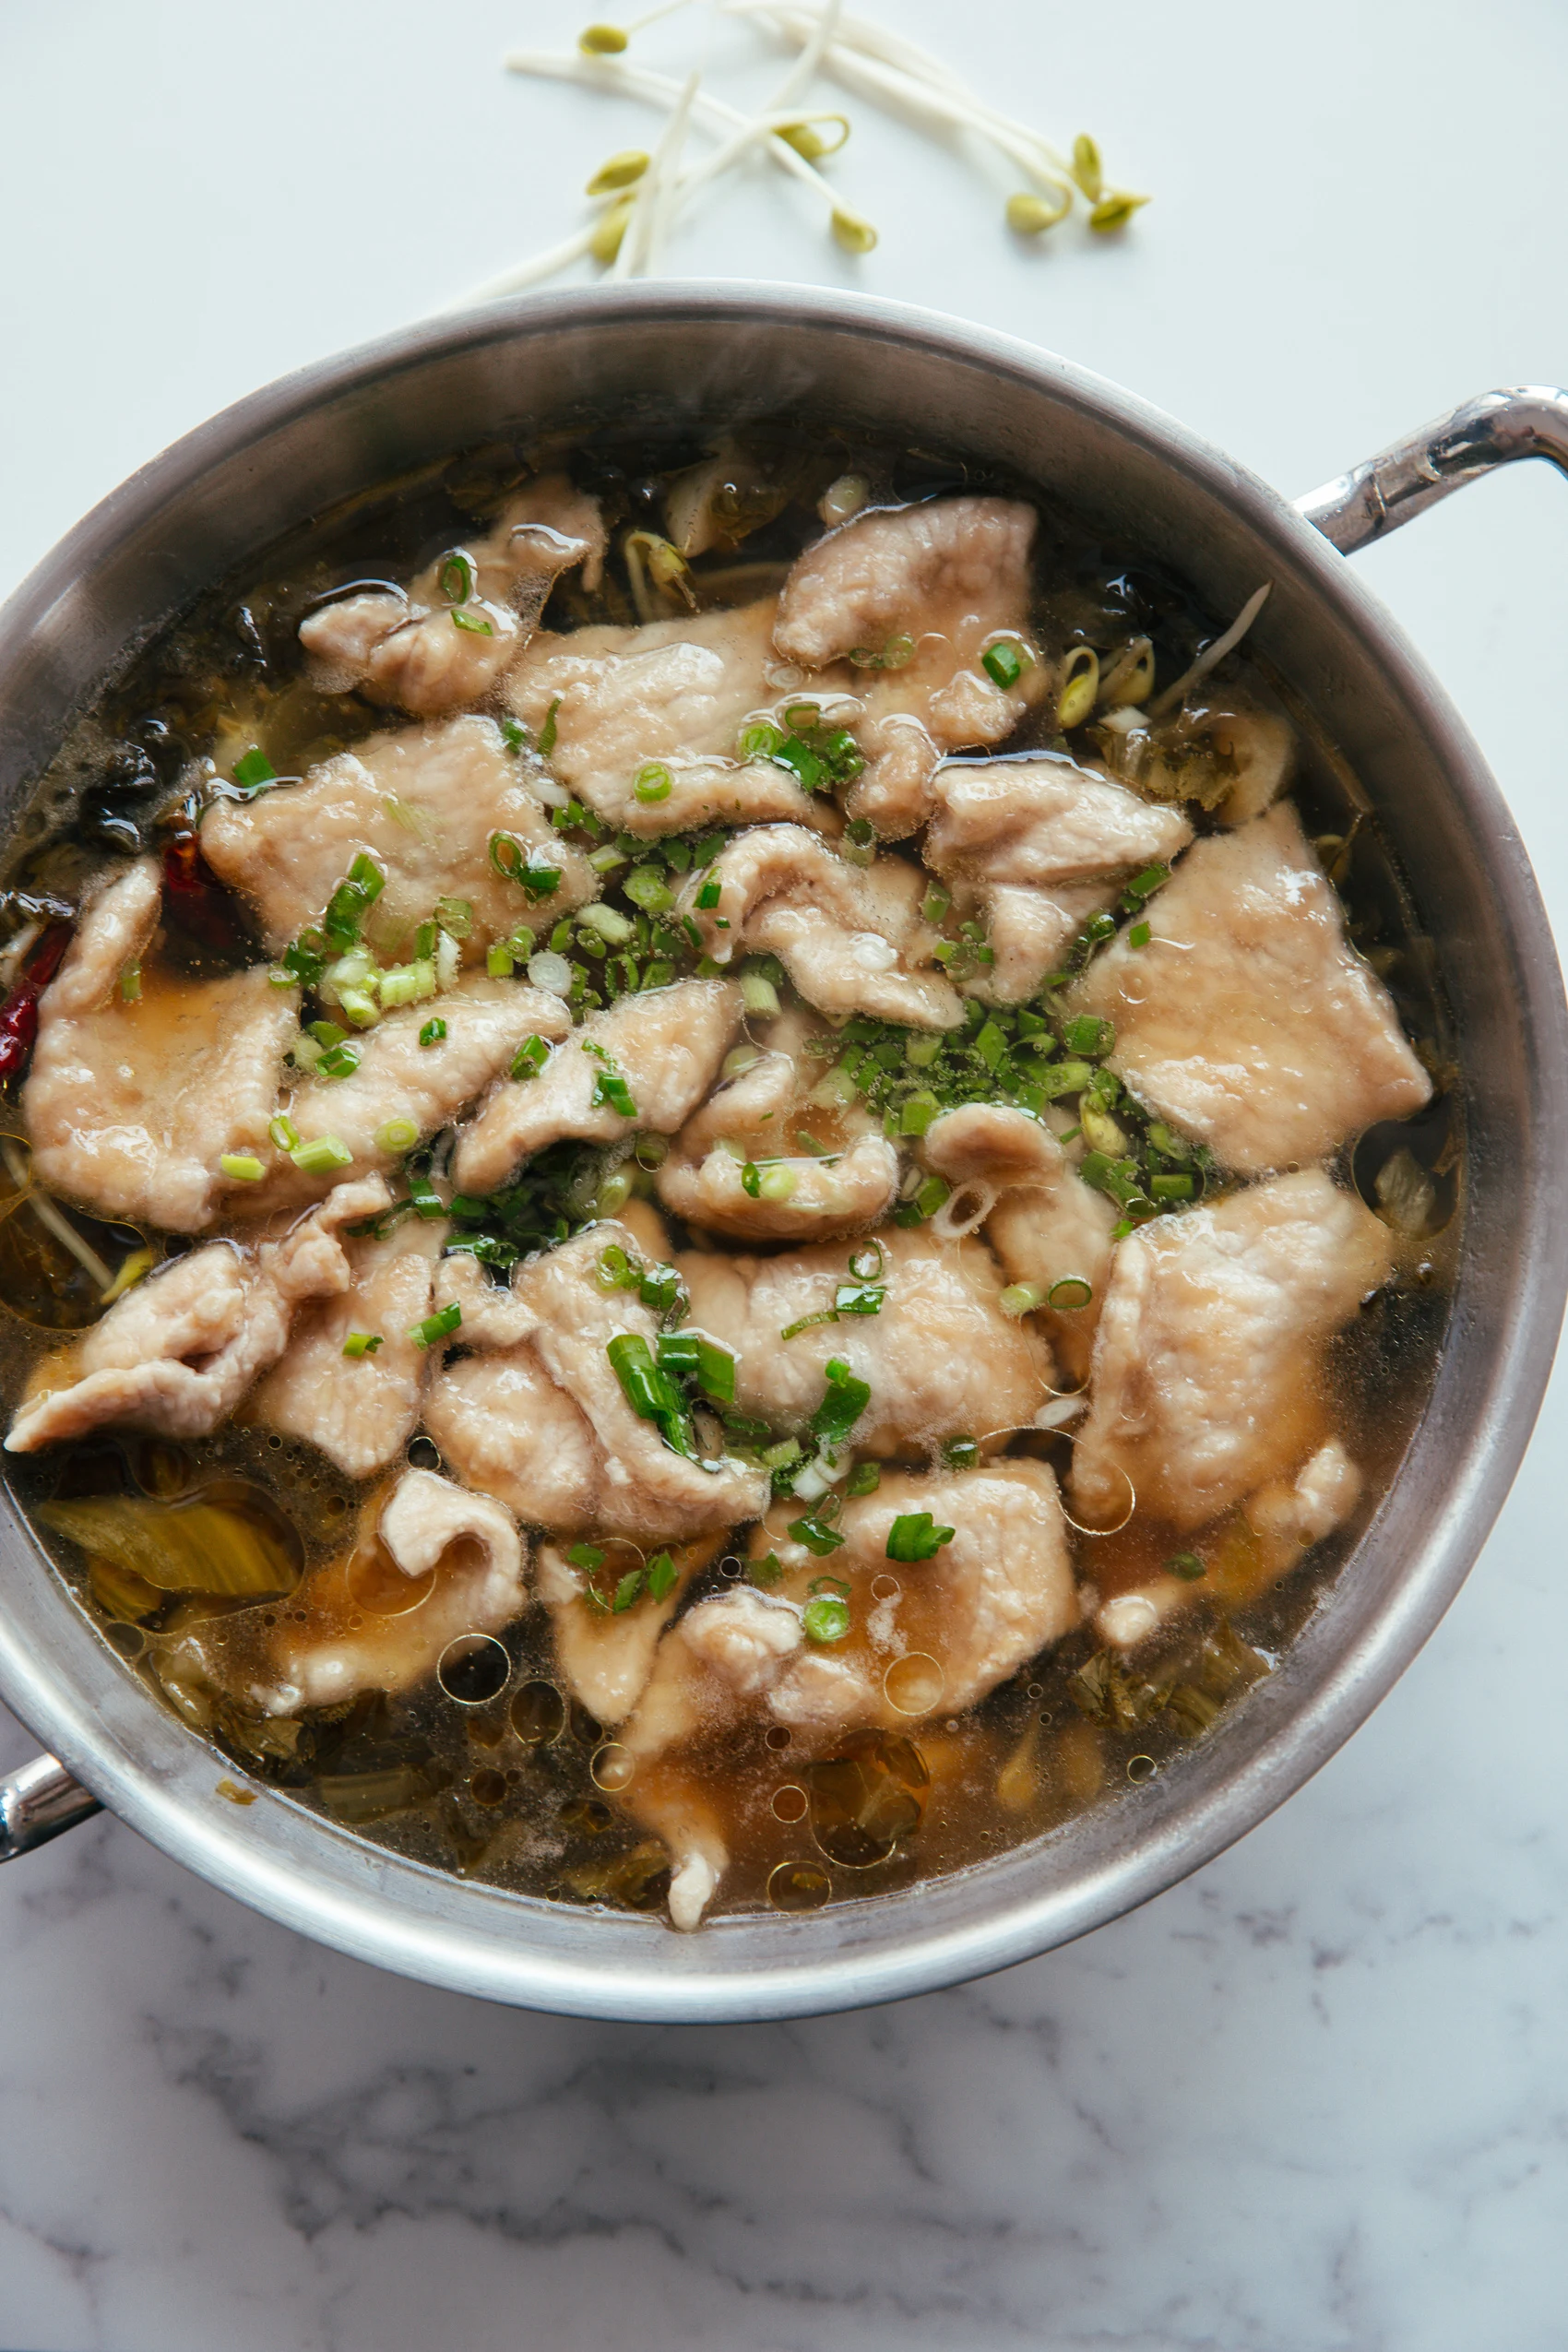
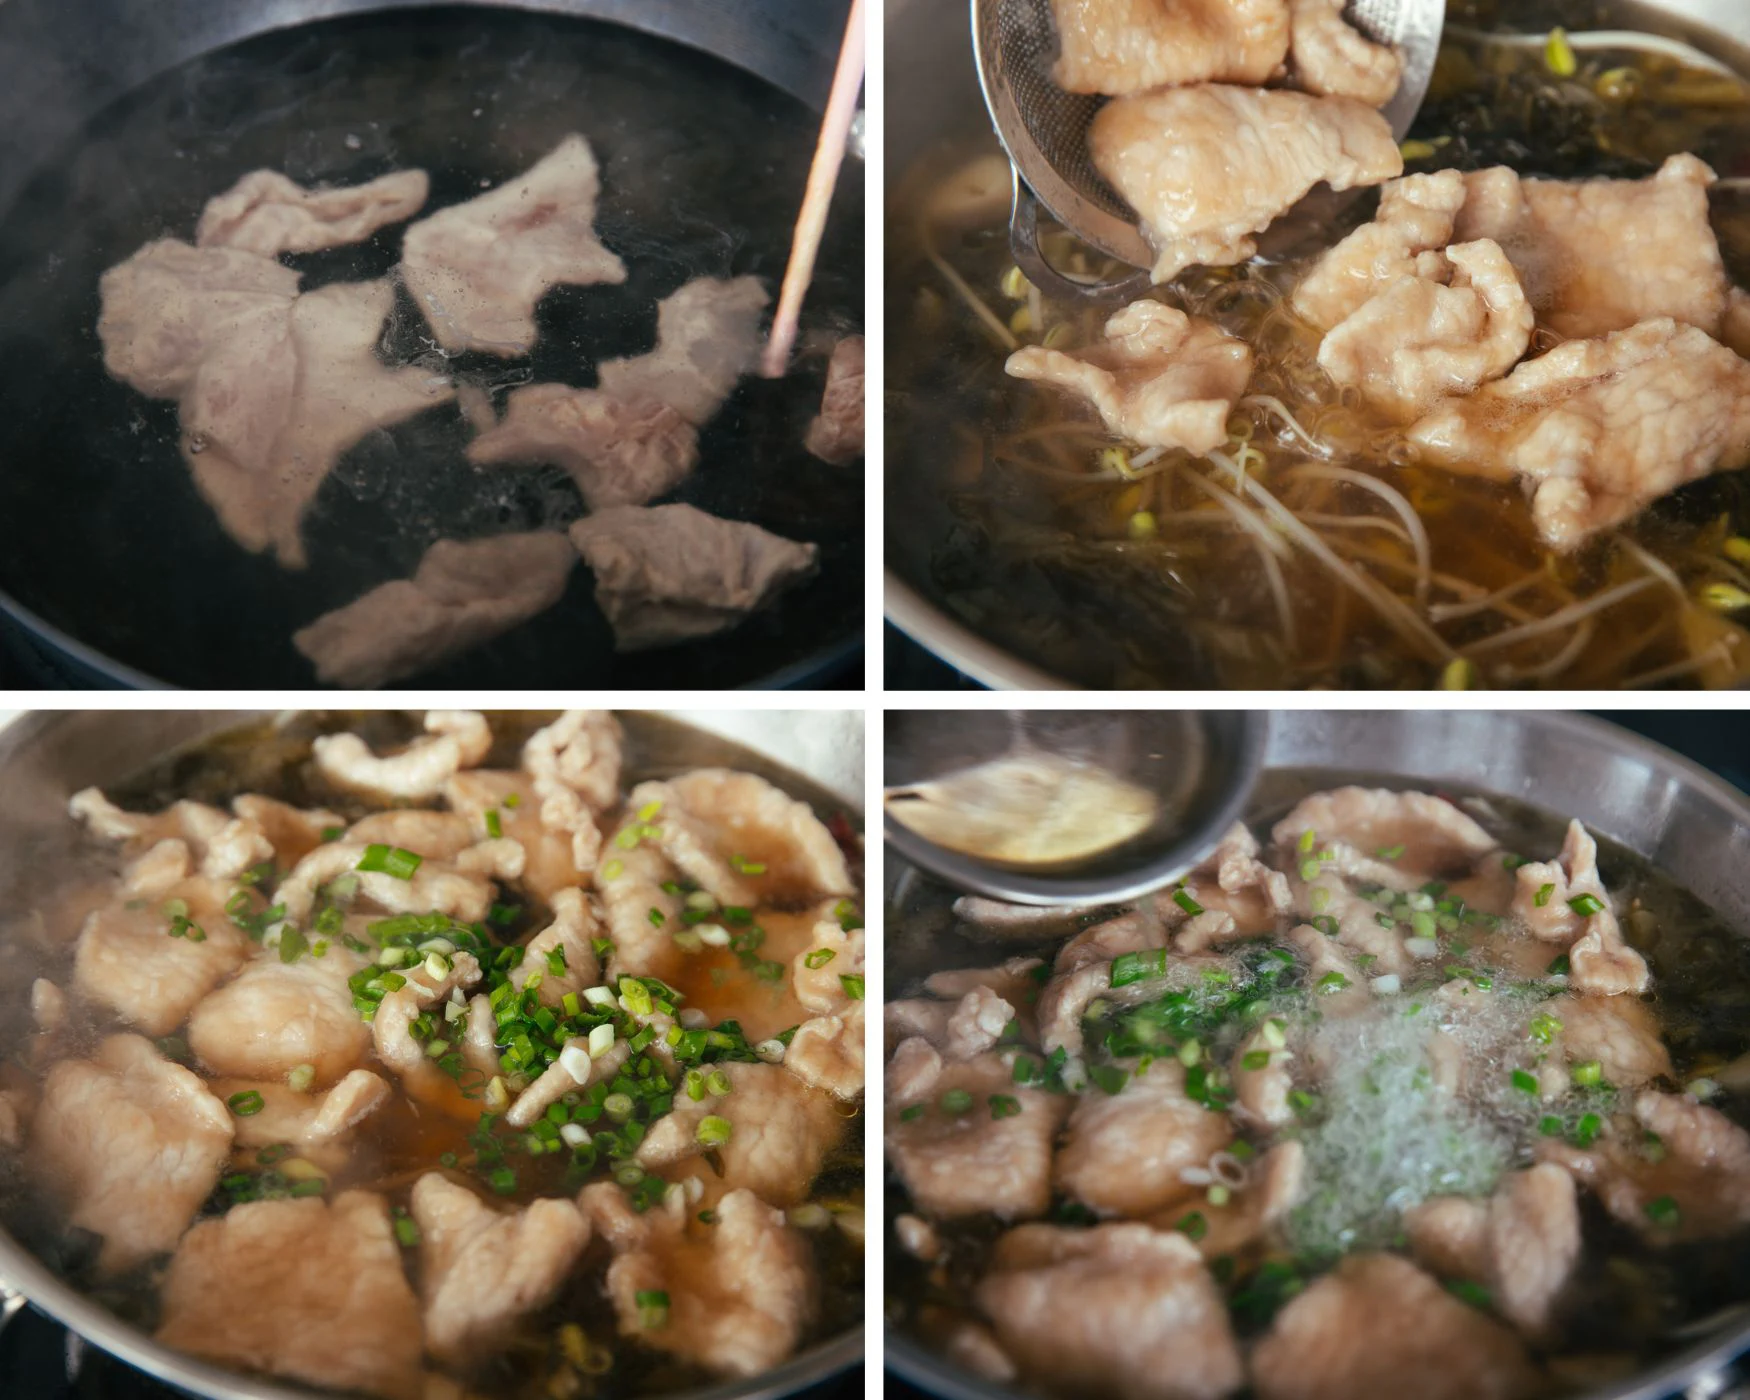
- In the meantime, add a pot of water to a boil. Then, turn the fire to the slowest setting and add the pork slices individually.
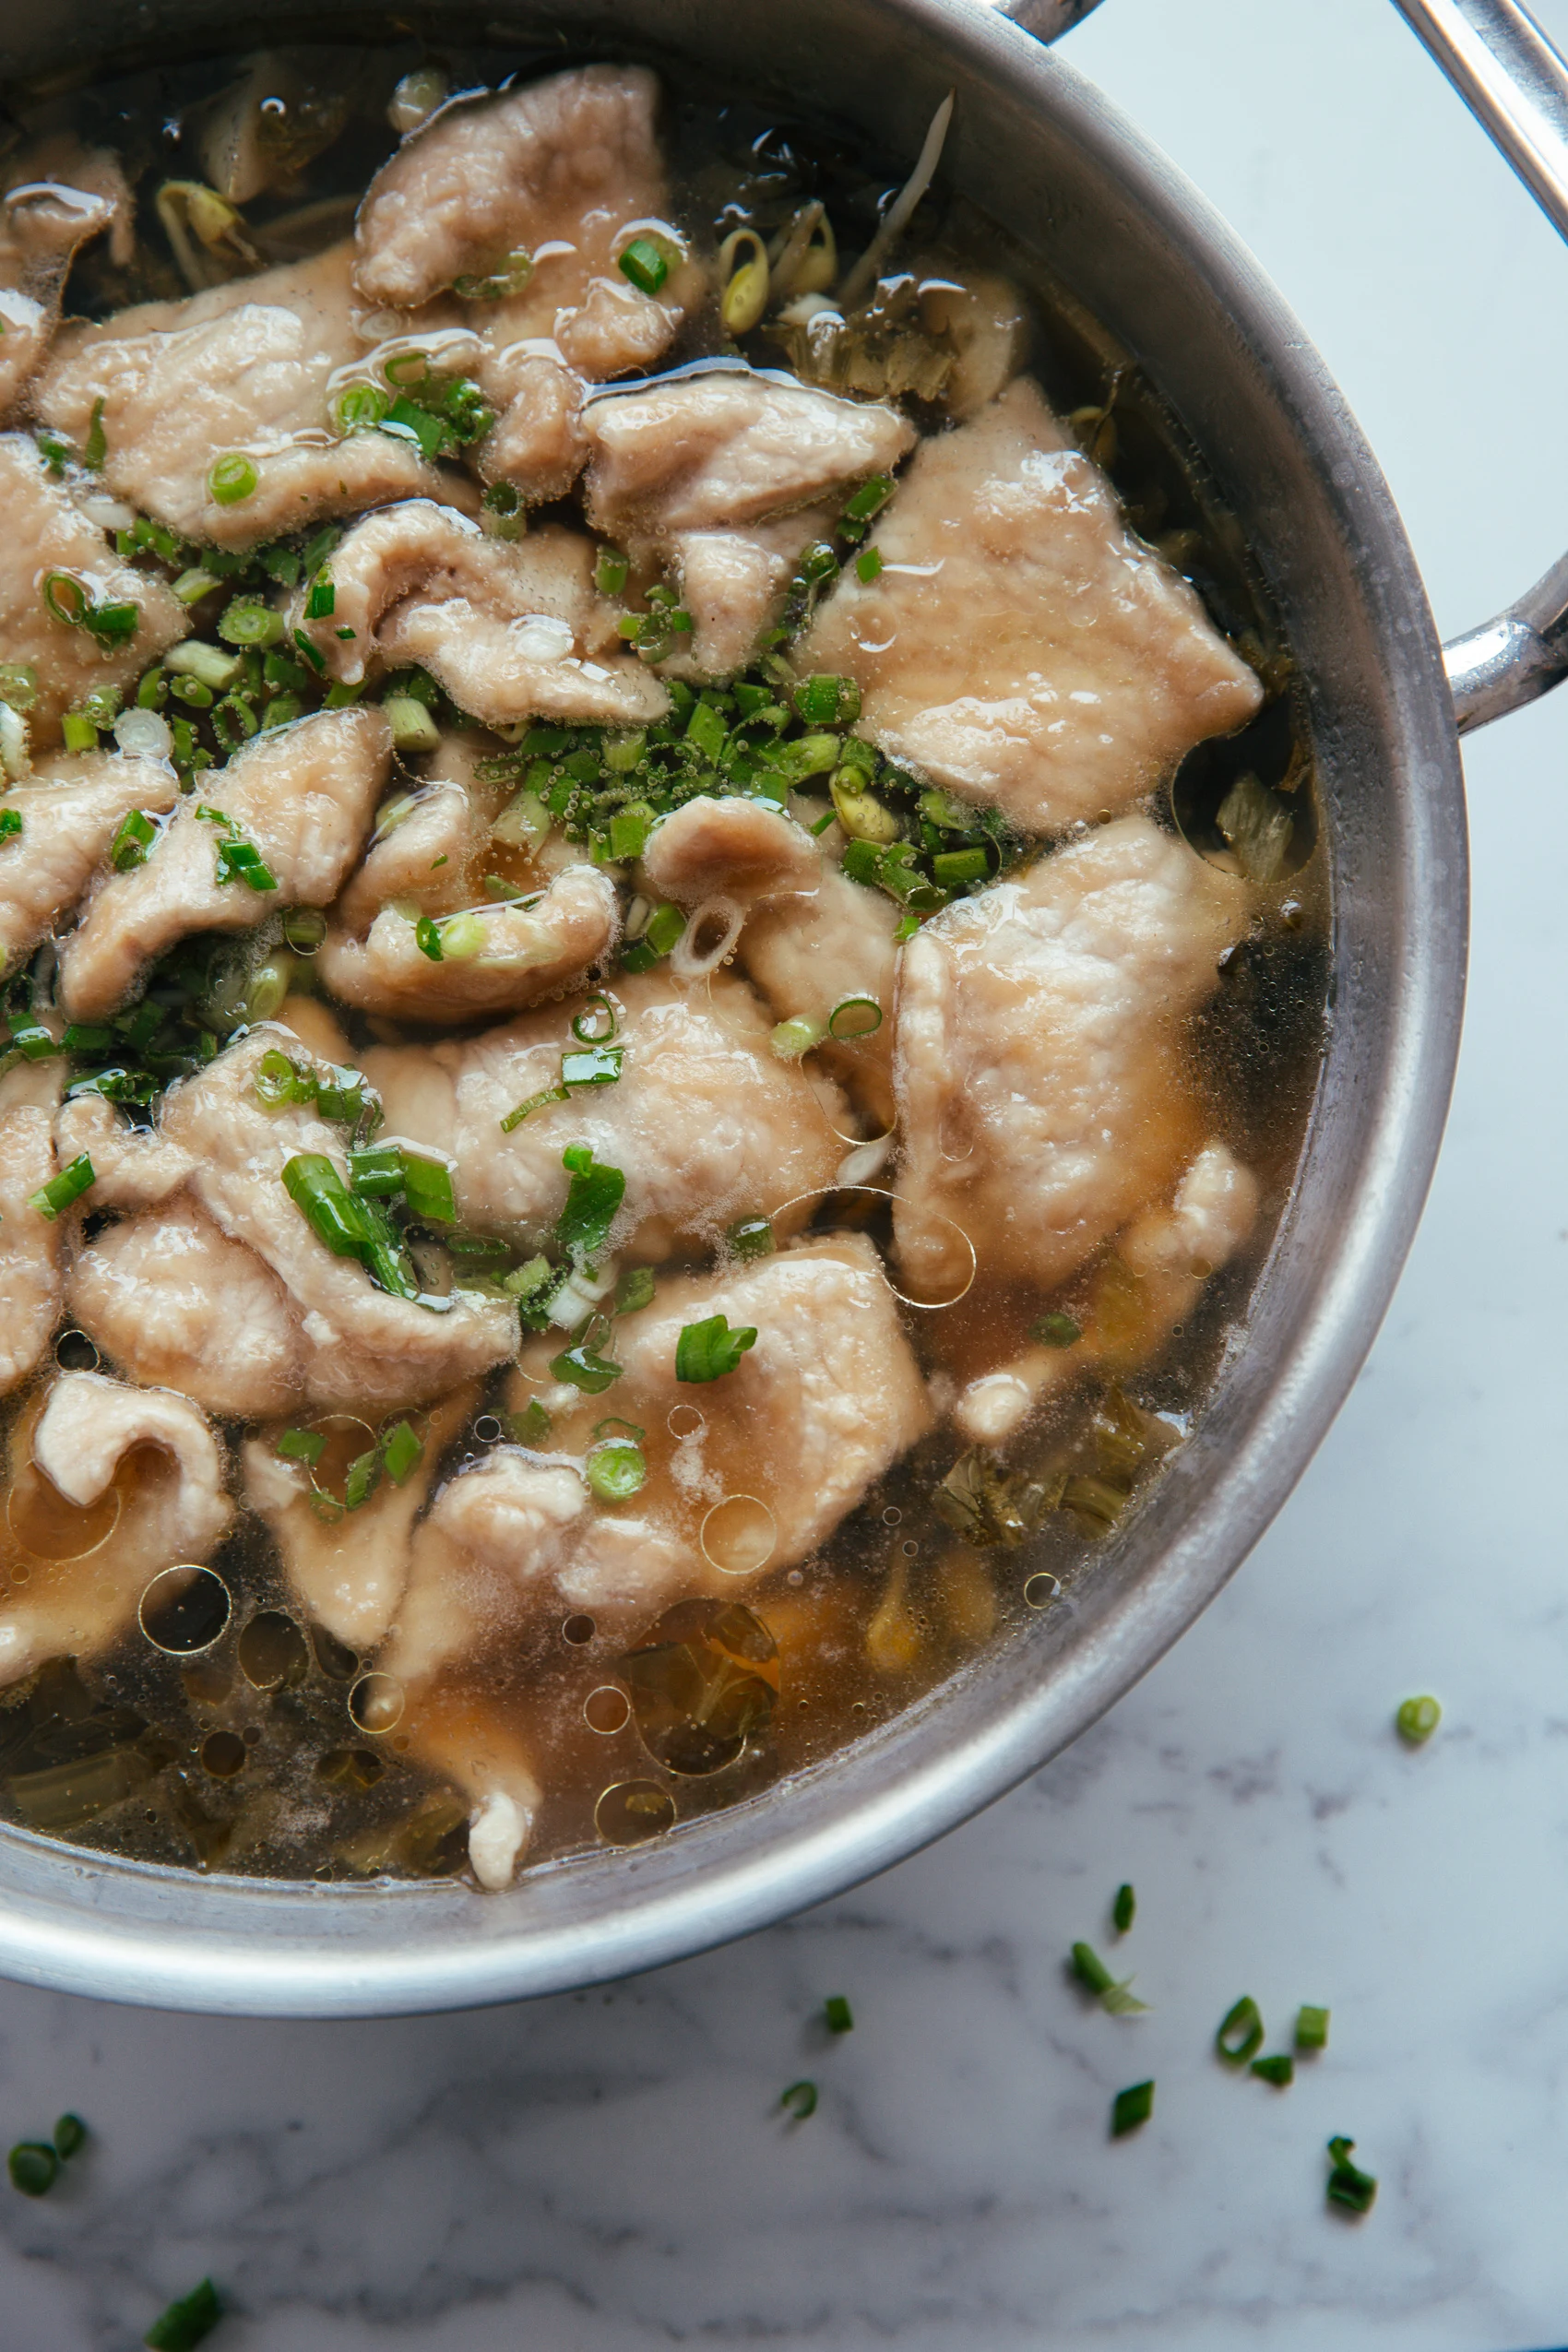
- Transfer all the cooked pork slices to our soup base. Continue simmering for around 2 minutes.
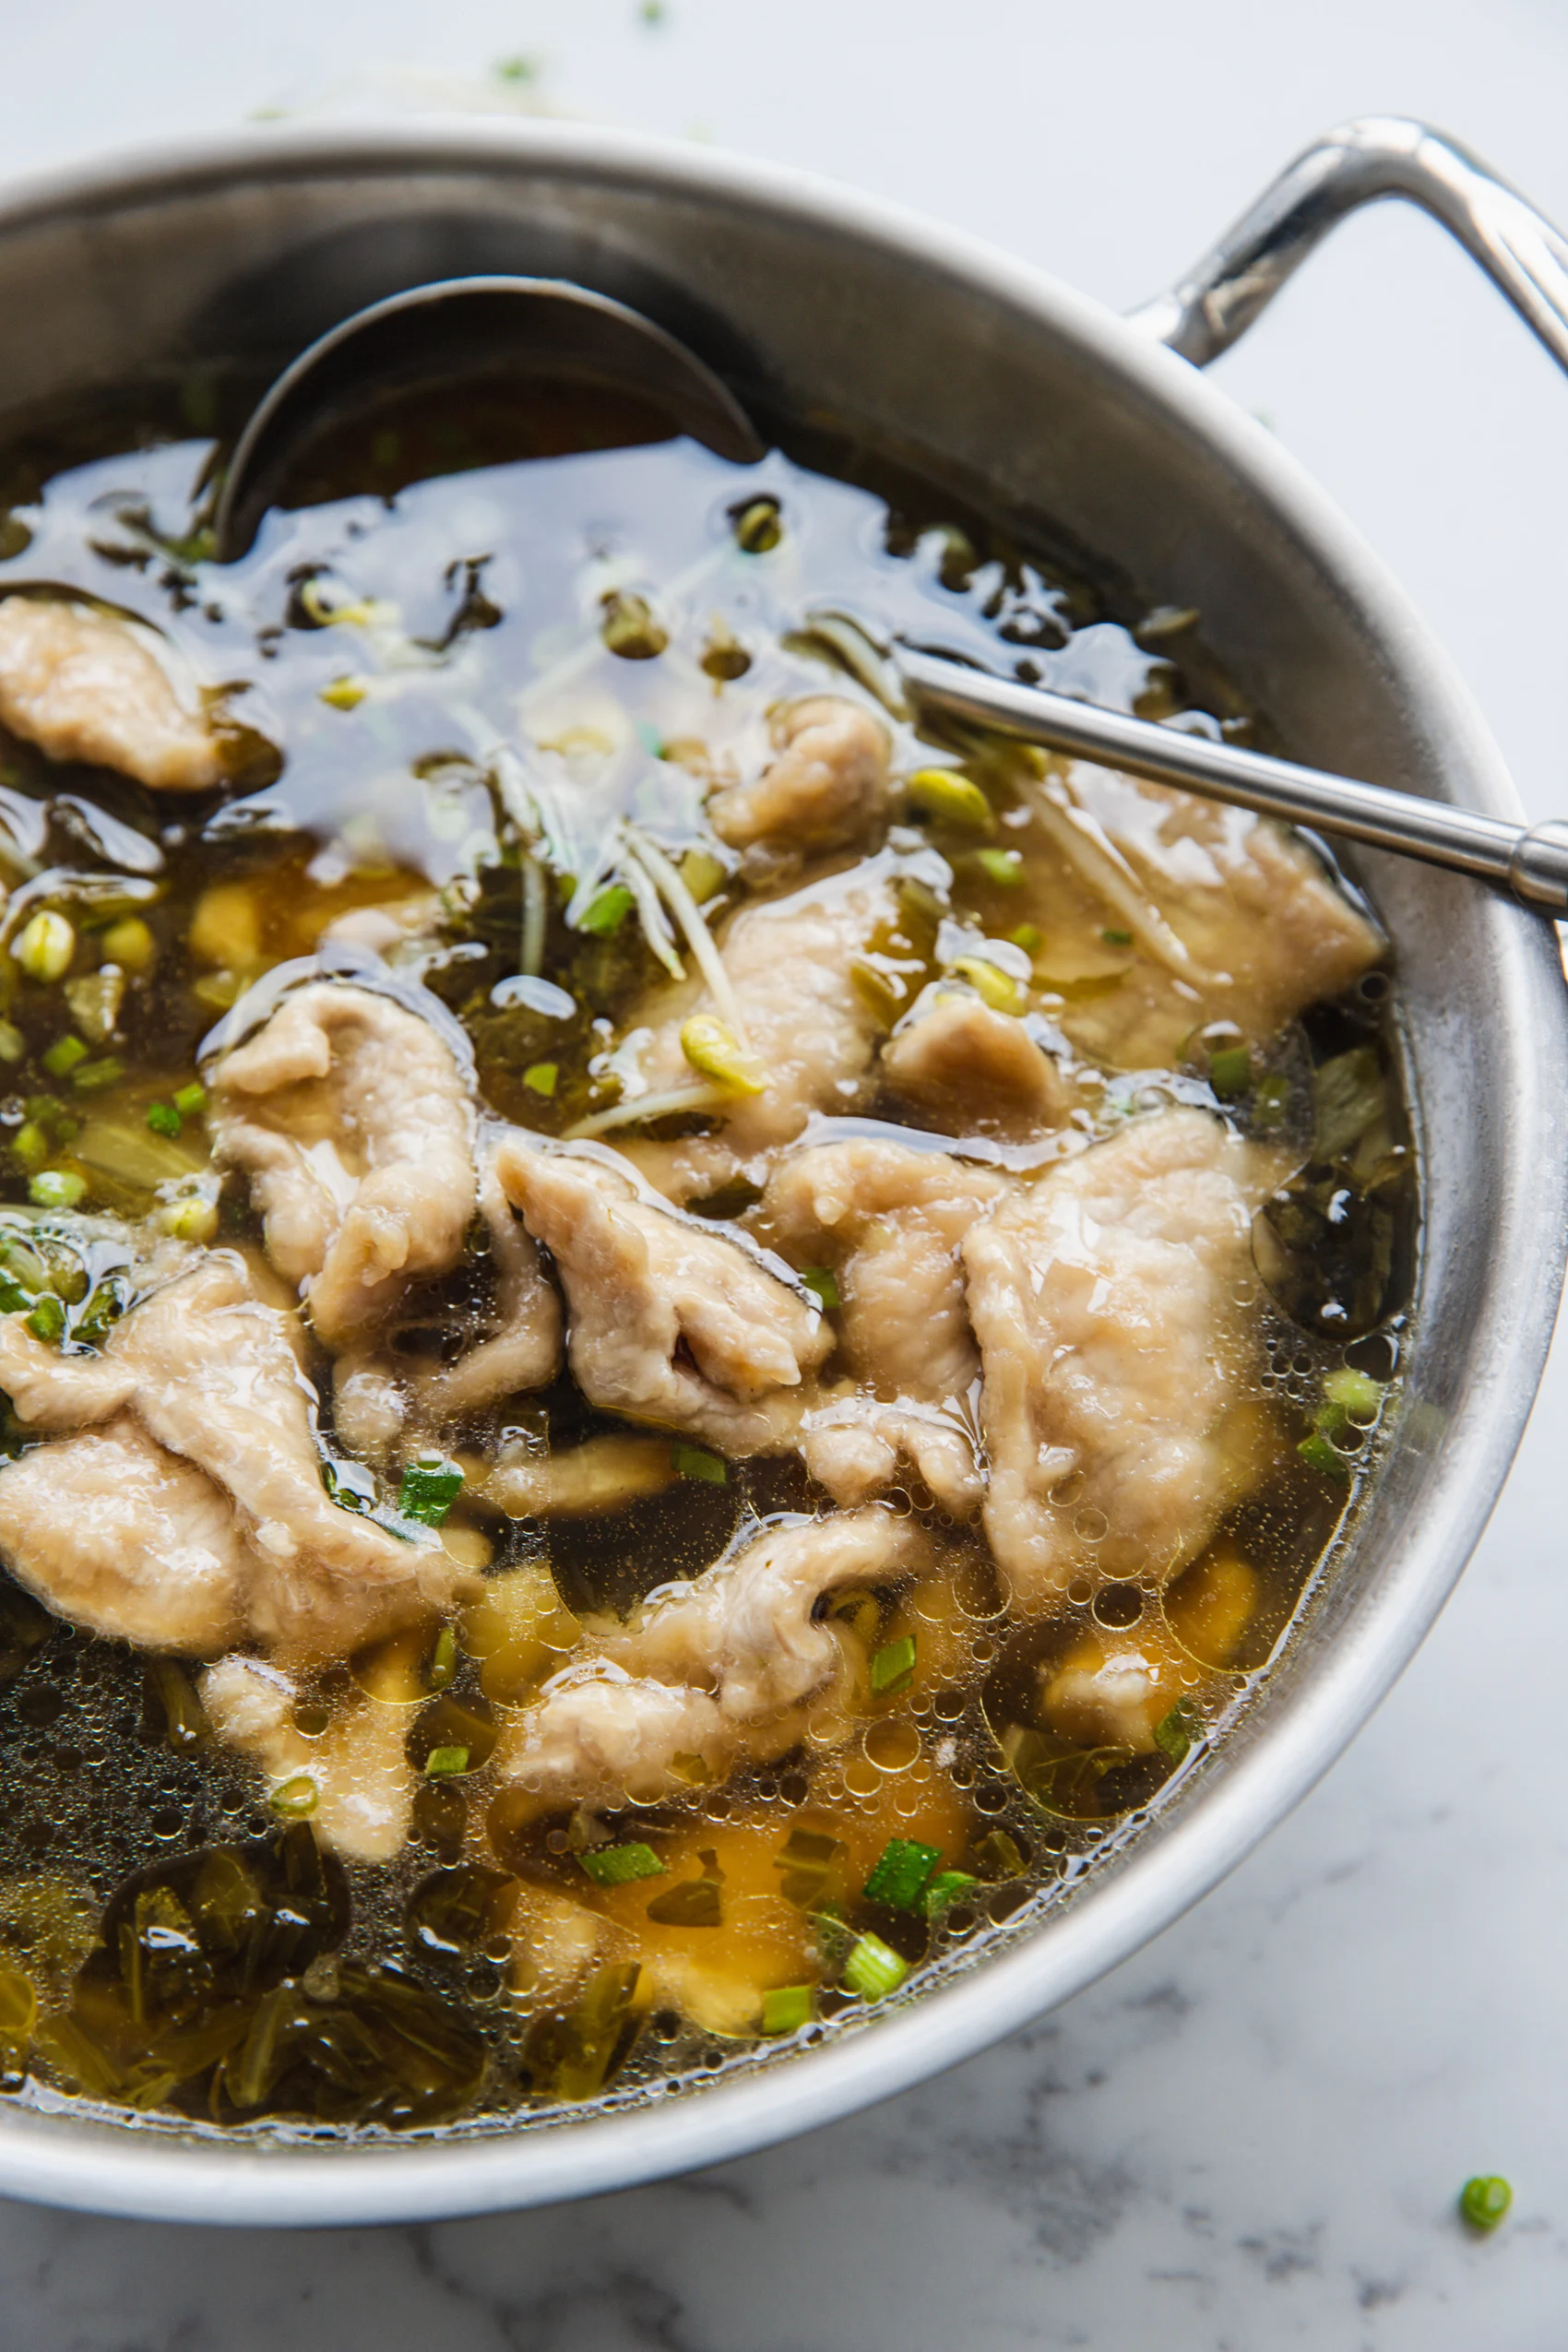
- Garnish with some chopped green onions. You can serve in this way, or if you want to take it up a notch, you absolutely can finish the bowl the shuǐ zhǔ way.
- Add sliced scallion, then pour 3 tablespoons of smoking-hot oil on top. It won’t be the traditional version anymore. But it will be very, very good.
#wprm-recipe-user-rating-1 .wprm-rating-star.wprm-rating-star-full svg * { fill: #ffffff; }#wprm-recipe-user-rating-1 .wprm-rating-star.wprm-rating-star-33 svg * { fill: url(#wprm-recipe-user-rating-1-33); }#wprm-recipe-user-rating-1 .wprm-rating-star.wprm-rating-star-50 svg * { fill: url(#wprm-recipe-user-rating-1-50); }#wprm-recipe-user-rating-1 .wprm-rating-star.wprm-rating-star-66 svg * { fill: url(#wprm-recipe-user-rating-1-66); }linearGradient#wprm-recipe-user-rating-1-33 stop { stop-color: #ffffff; }linearGradient#wprm-recipe-user-rating-1-50 stop { stop-color: #ffffff; }linearGradient#wprm-recipe-user-rating-1-66 stop { stop-color: #ffffff; }
Ingredients
- 150 g pickled mustard green
- 100 g bean spouts
- 8 cloves garlic
- 3 dried chili peppers
- 3 tbsp. cooking oil
- 1 tbsp. light soy sauce
- 1500 ml hot water
- 3 tbsp. hot oil , smoking-hot oil
- 2 chopped scallion
Pork and Marinating
ul.wprm-advanced-list-2620 li:before {background-color: #000000;color: #ffffff;width: 18px;height: 18px;font-size: 12px;line-height: 12px;}
Instructions
-
Cut the pork into slices, about 1-2mm thick. The most recommended pork cut for this one is pork butt. You can also replace it with beef.
-
Marinating with shaoxin wine, salt, white pepper, and light soy sauce. Mix to combine all the flavors.
-
Add around 3 tablespoons of water to 3 tablespoons of starch. And you will get a running-water, starchy texture like this. This special stage is scientifically named a non-Newtonian fluid. In the previous bok choy and pork soup, I used 2 tablespoons and found it was not runny and hard to coat. So I added 3 tablespoons this time. Pour the starch water into the marinated pork. Mix well and make sure each piece is well coated.
-
Let’s make the soup base, add oil, and fry garlic and dried chili pepper until aromatic. If you get any animal fat, like lard or chicken fat, use it.
-
Place the chopped pickled mustard greens and fry until the moisture disappears and you can smell the aroma of the pickled vegetables. This may take some time, and it is the key step for the great flavor.
-
Then add water, bring to a boil, add light soy sauce, and simmer for about 10 minutes to let the flavors meld into a soup base. You can add some vegetables as a base- tofu, bean sprouts, or golden needle mushrooms.
-
In the meantime, add a pot of water to a boil. Then, turn the fire to the slowest setting and add the pork slices individually.
-
Transfer all the cooked pork slices to our soup base. Continue simmering for around 2 minutes.
-
Garnish with some chopped green onions. You can serve in this way, or if you want to take it up a notch, you absolutely can finish the bowl the shuǐ zhǔ way.
-
Add sliced scallion, then pour 3 tablespoons of smoking-hot oil on top. It won’t be the traditional version anymore. But it will be very, very good.