
A favorite red fruit salad, and arguably so much better
Loe edasi
Lemmik punane puuviljasalat, mis on vaieldamatult nii palju parem kui
Loe edasi
Reflecting on decades of recipes, this is the page to
Loe edasi

[gtranslate]
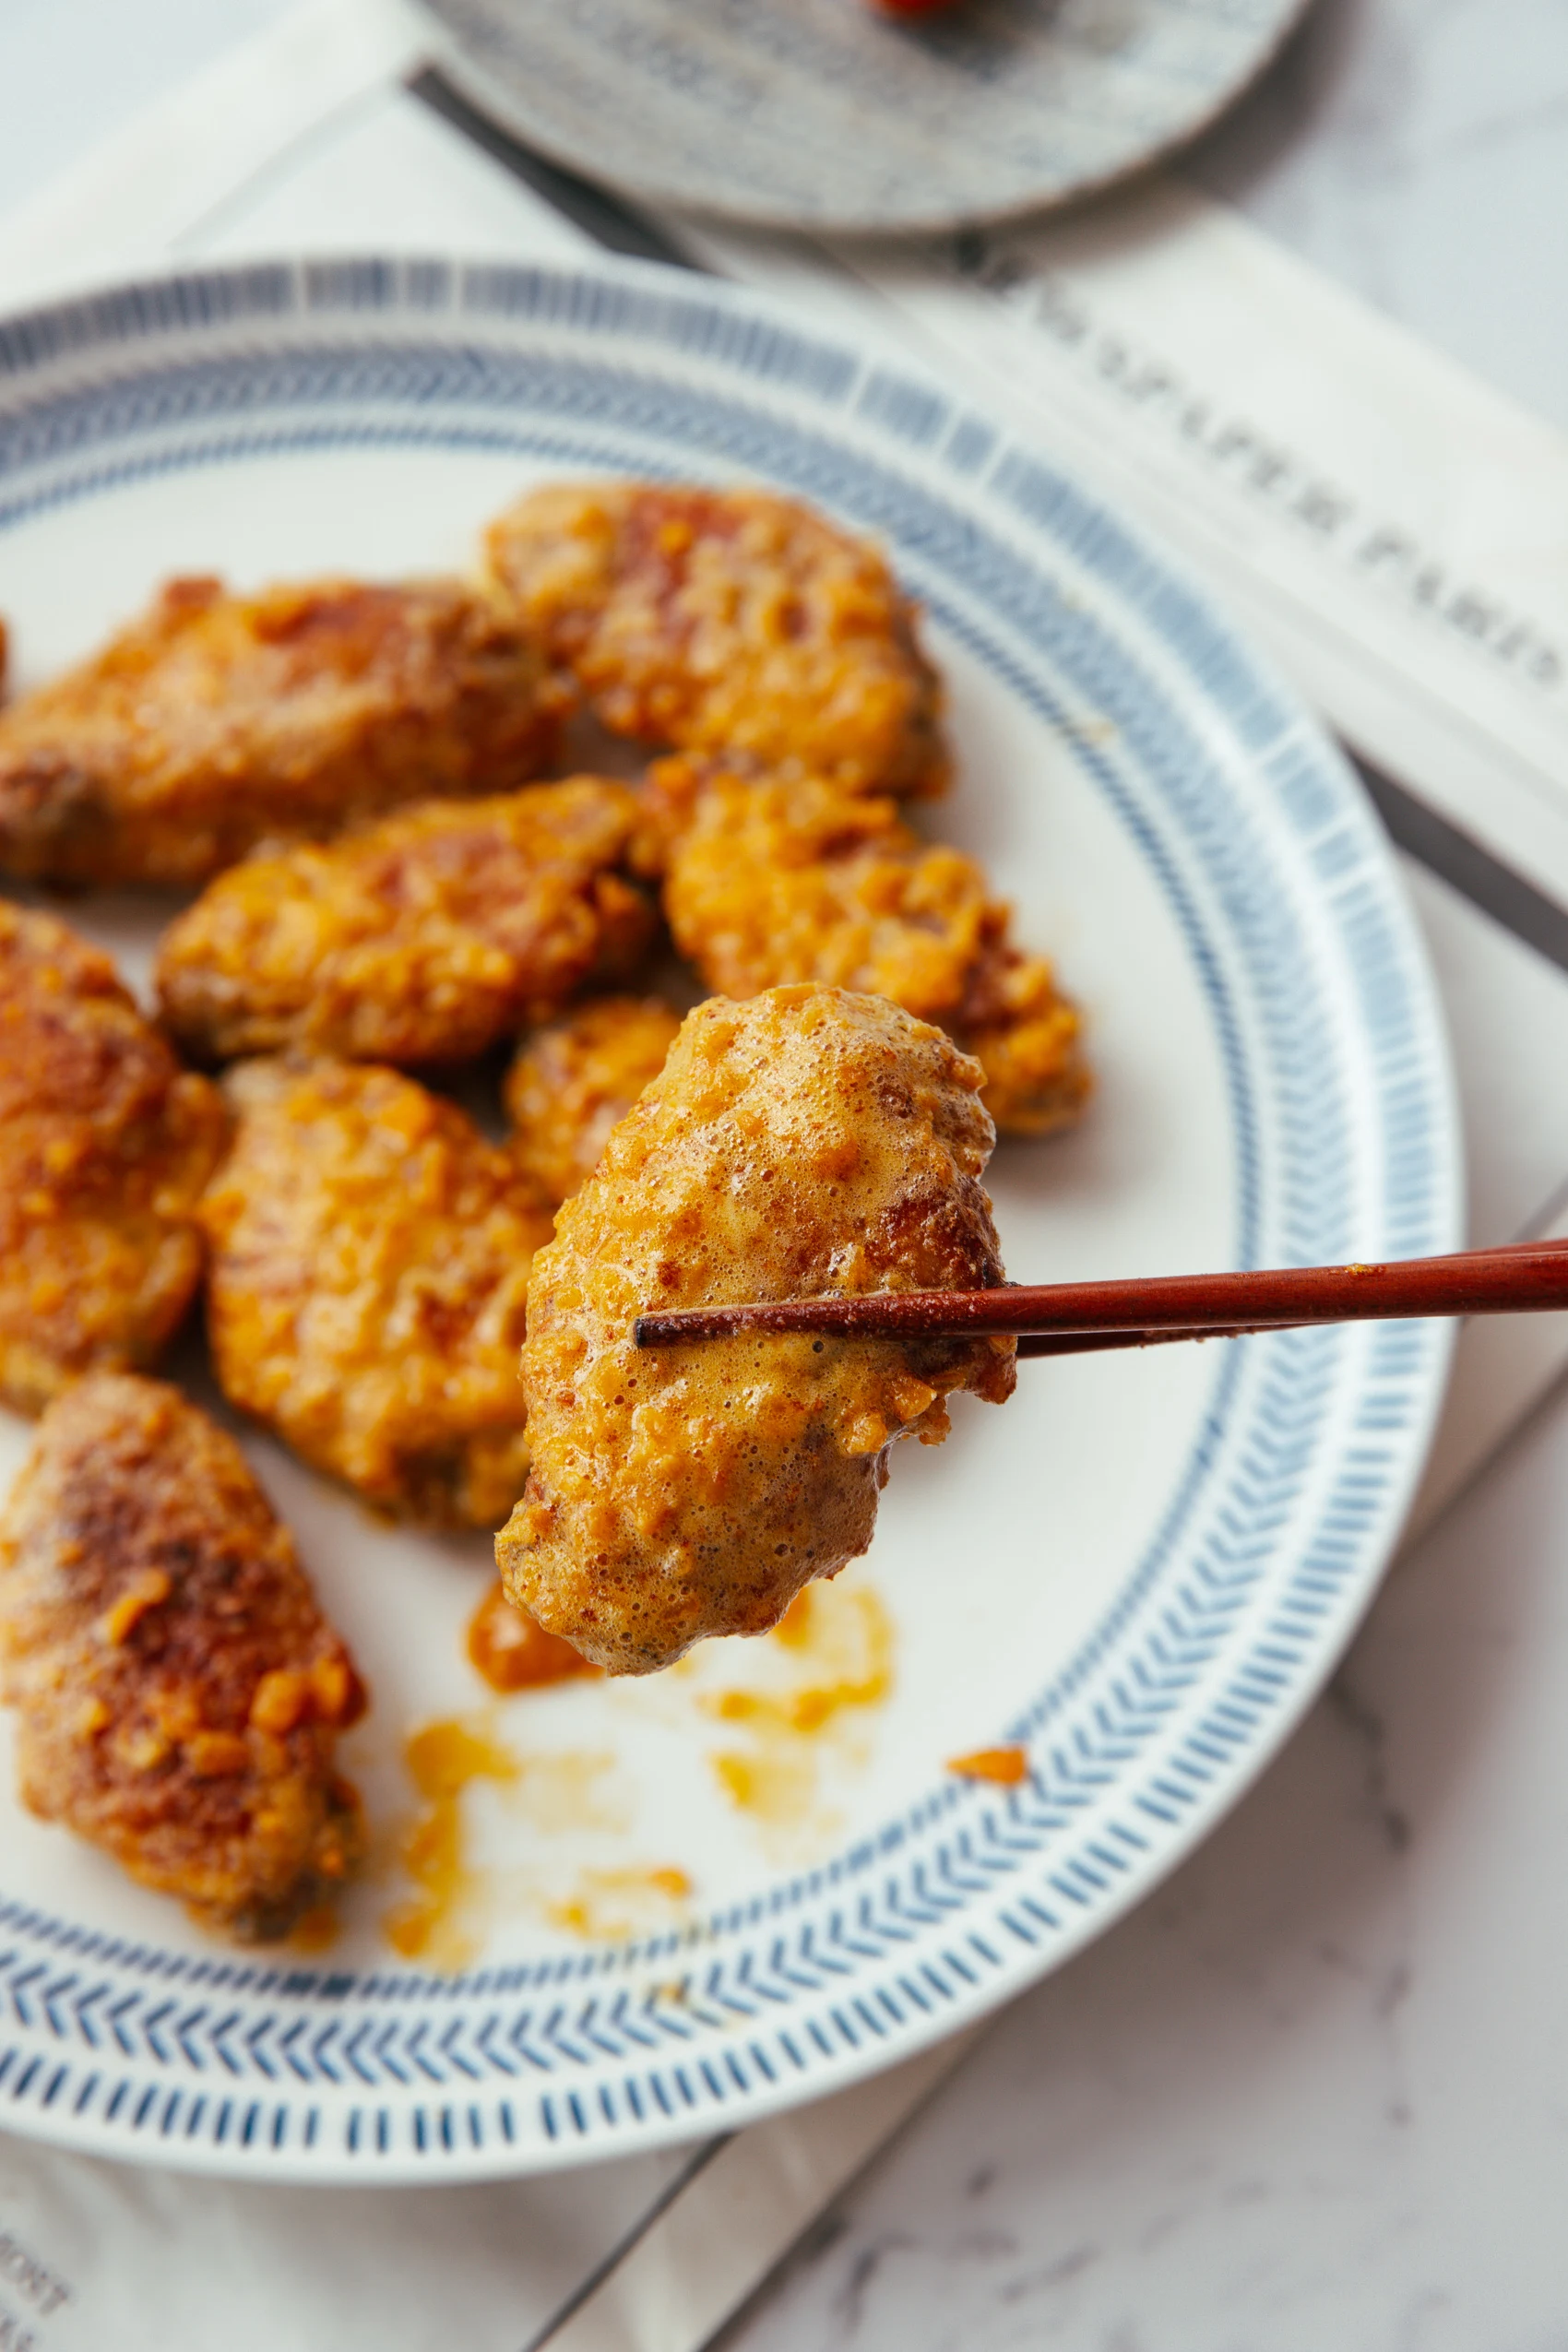
I shared my new way of making homemade salted egg yolk in super small batches. The beauty of this method is that I can have super-fresh, perfectly salted eggs whenever I need them.
The most traditional or classic way to use salted egg is as a filling, for example, in the center of a mooncake with salted yolk, in the center of sticky rice (zongzi), or as a flowing-out filling in a steamed custard bun.
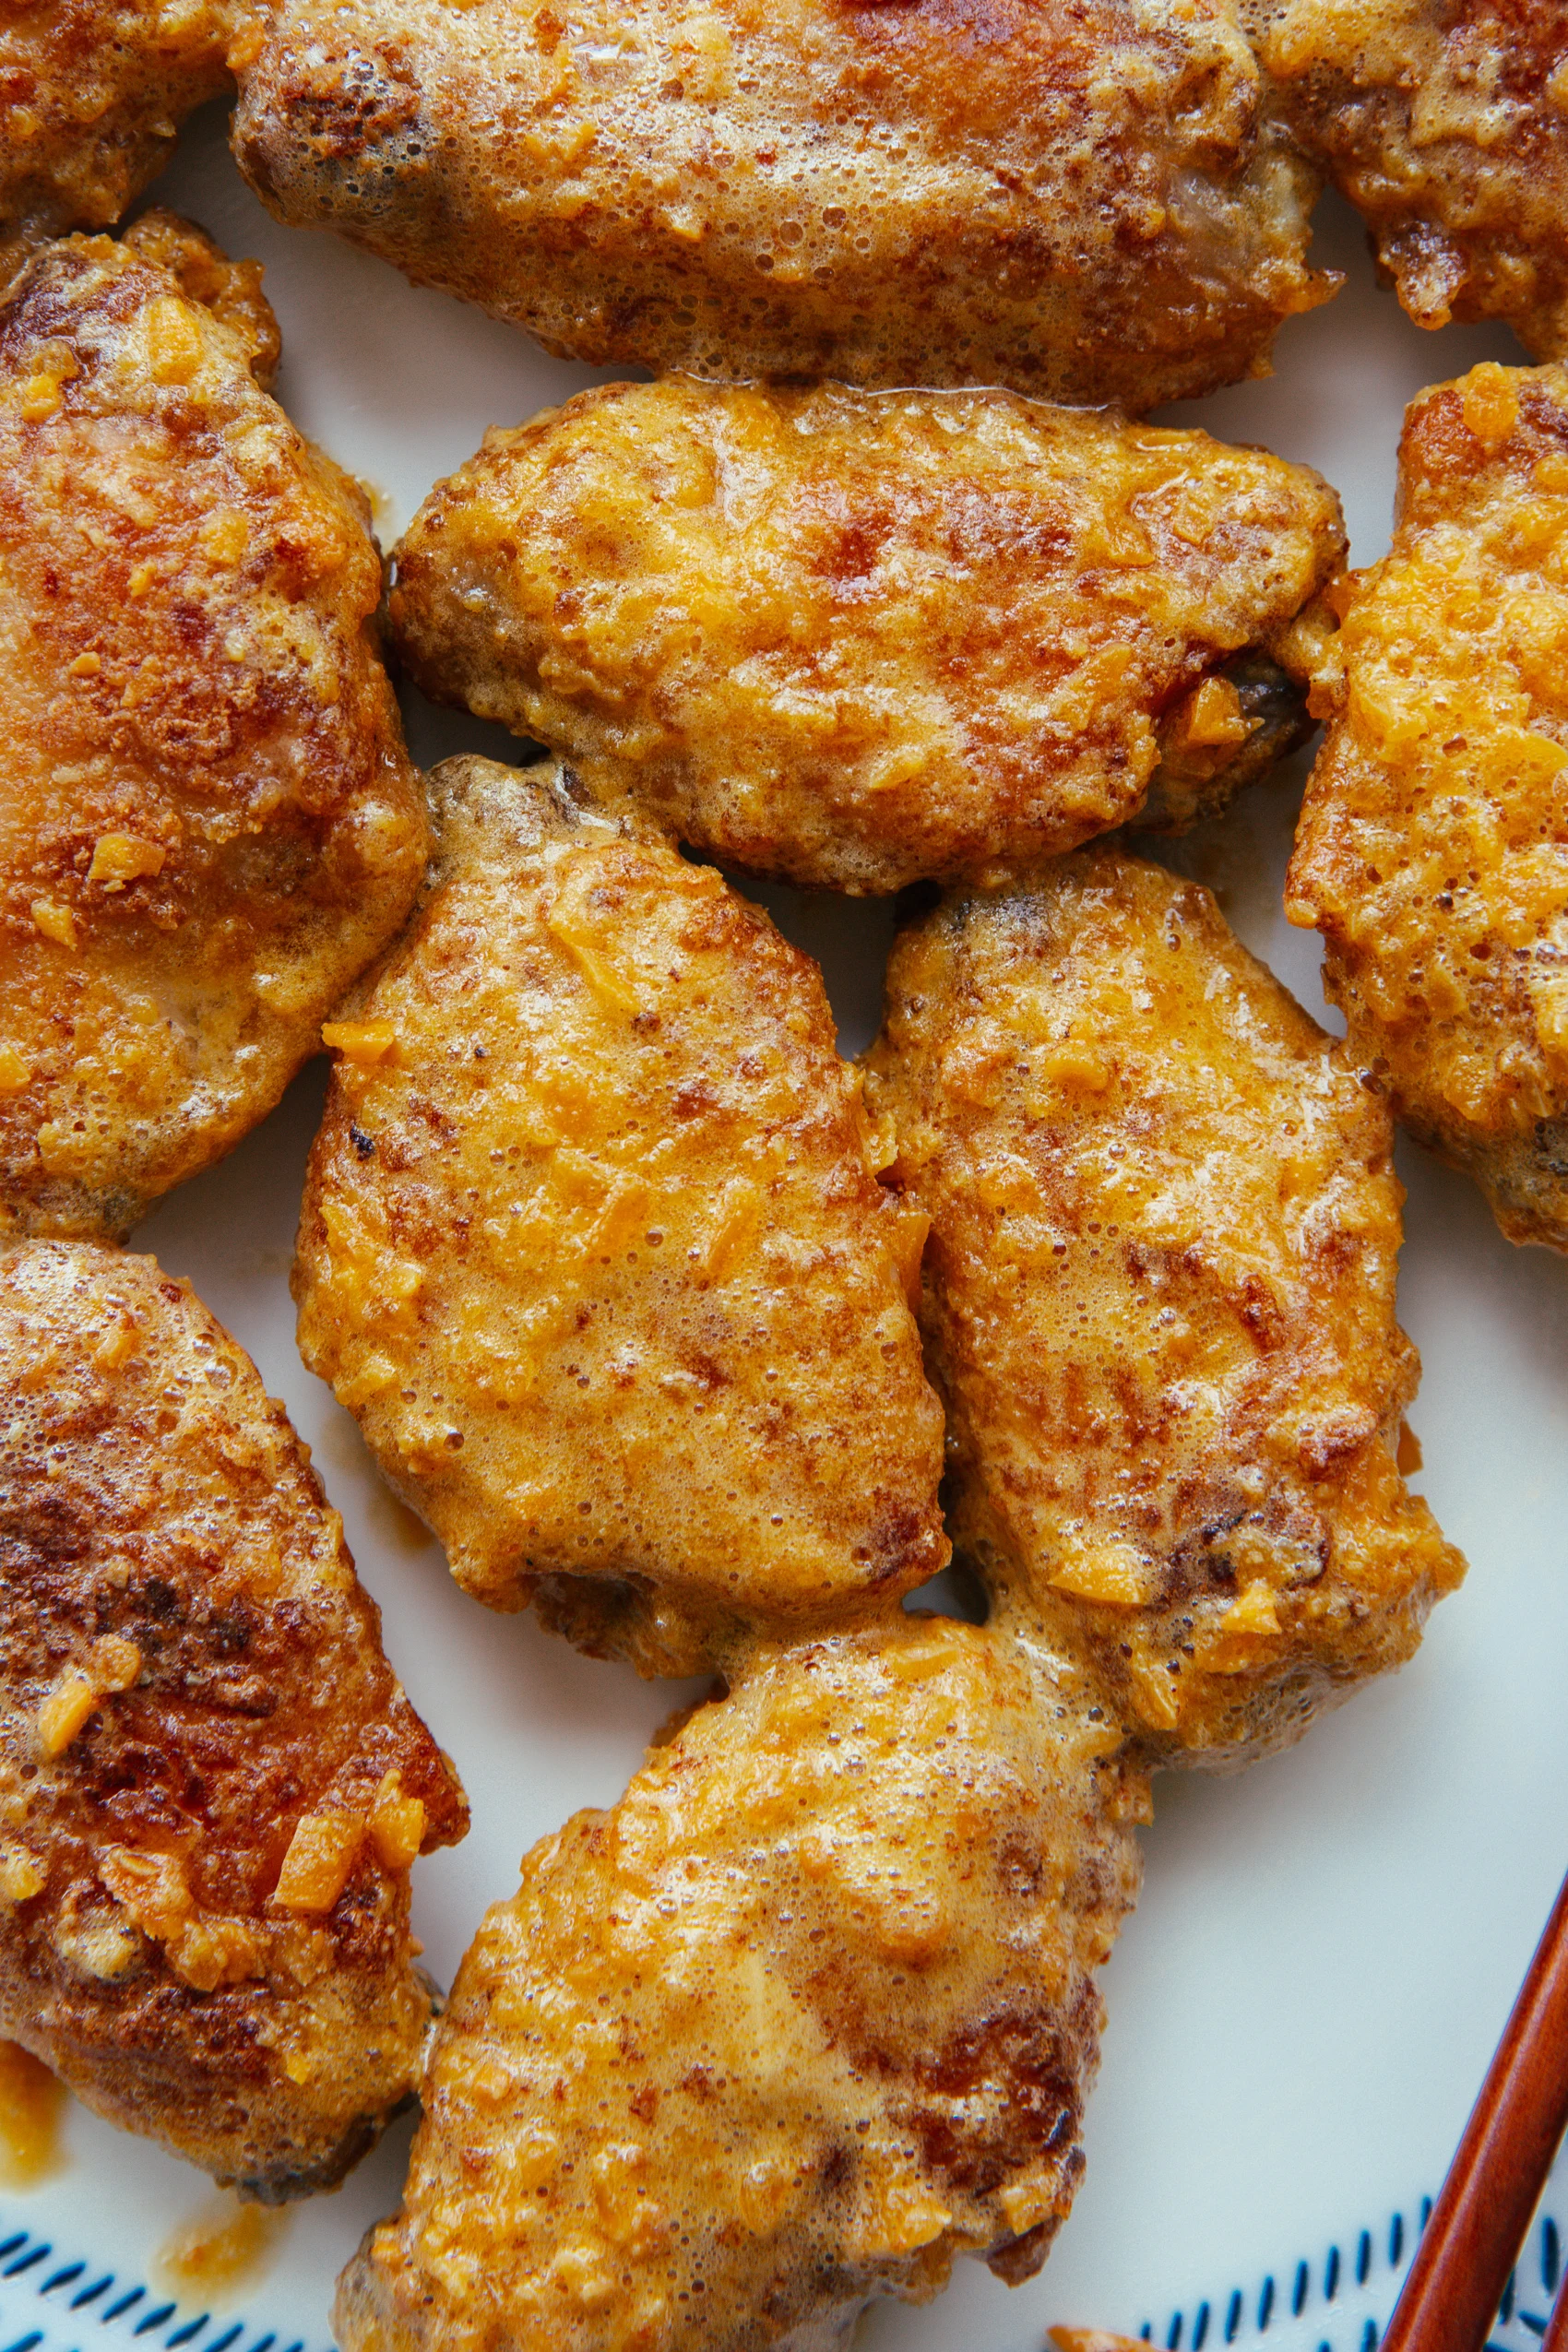
However, another popular new branch is the coating cooking method: we apply salted yolk, usually mashed, and then coat it onto ingredients that are already pan-fried or deep-fried. The cooking method is called “焗” in Chinese.
Ingredients
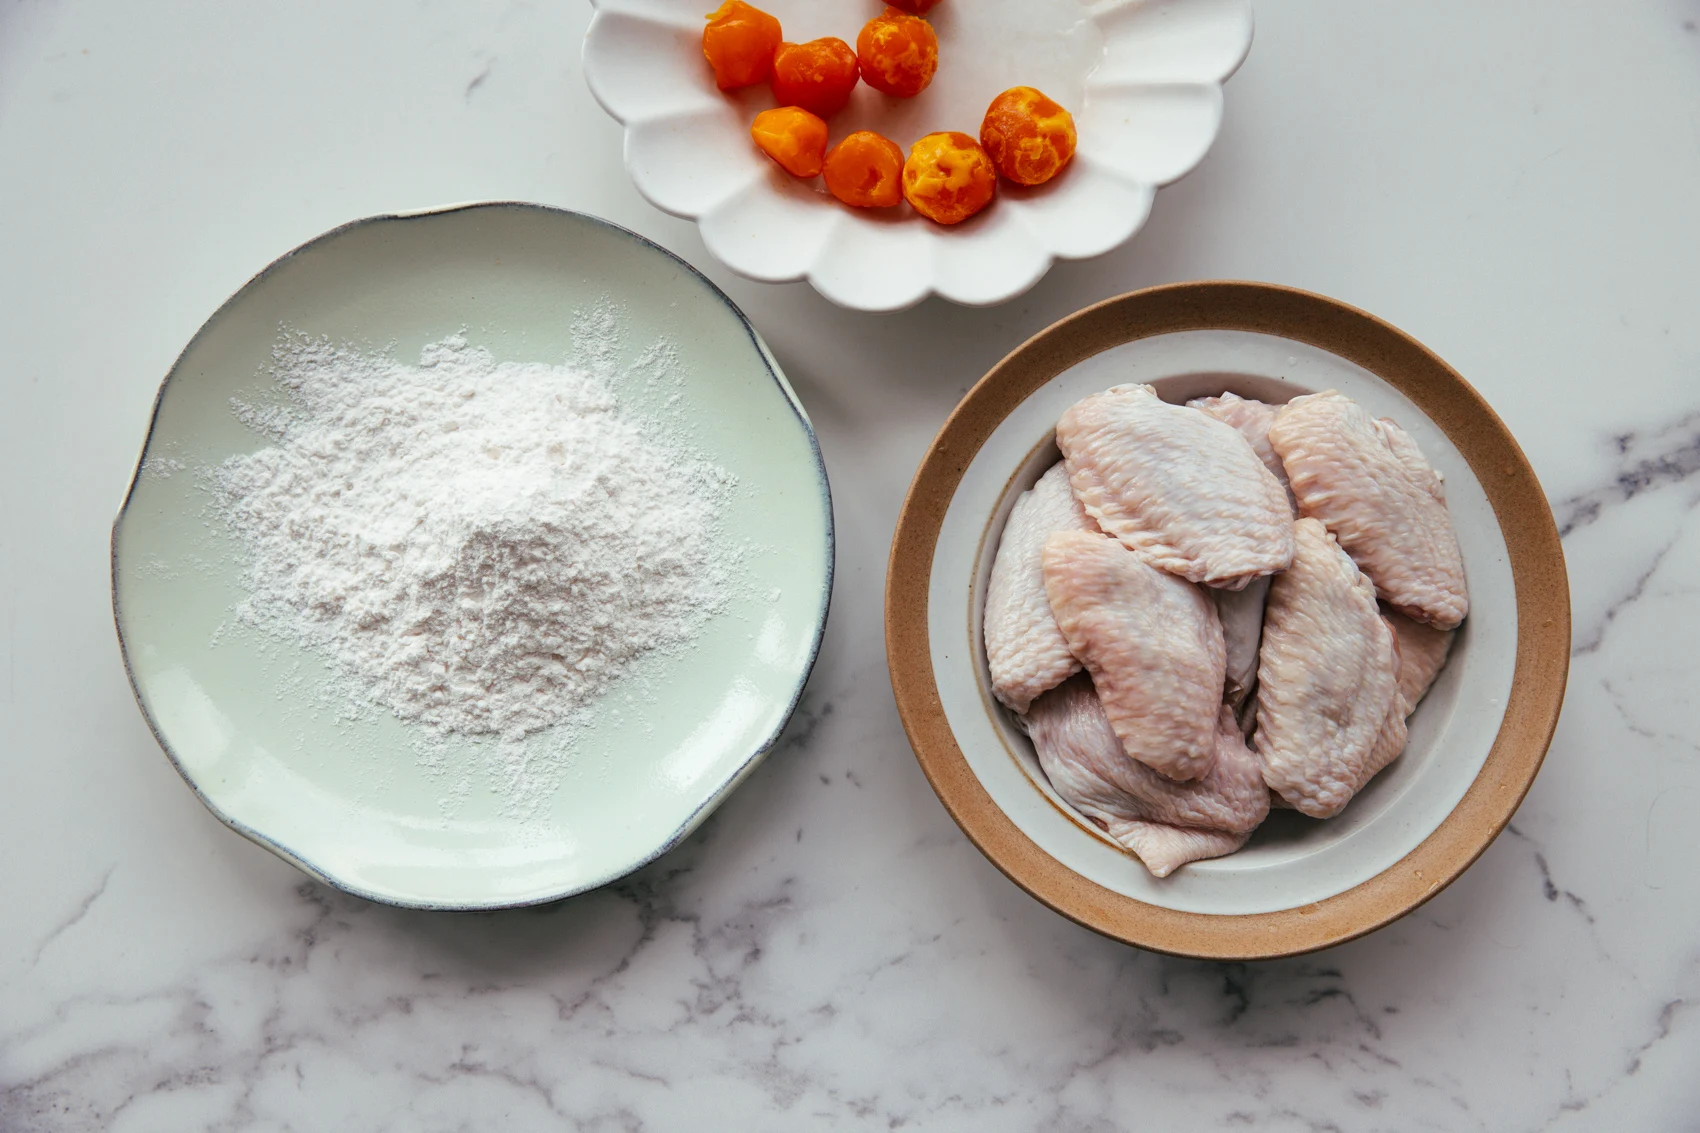
The ingredient list is super short- I use mid-section chicken wings, egg yolks, starch, and some common seasonings like salt, white pepper, oyster sauce, and light soy sauce.
Step-by-Step Instructions
We will first marinate the chicken wings to give them a basic flavor. To start, remember to pat dry the chicken wings so they can absorb the flavors better.
Poke some small holes in the chicken wings with a fork or toothpick. This is the second way of enhancing the flavors. Add salt, white pepper, and light soy sauce. Mix well and set aside for 15 minutes.
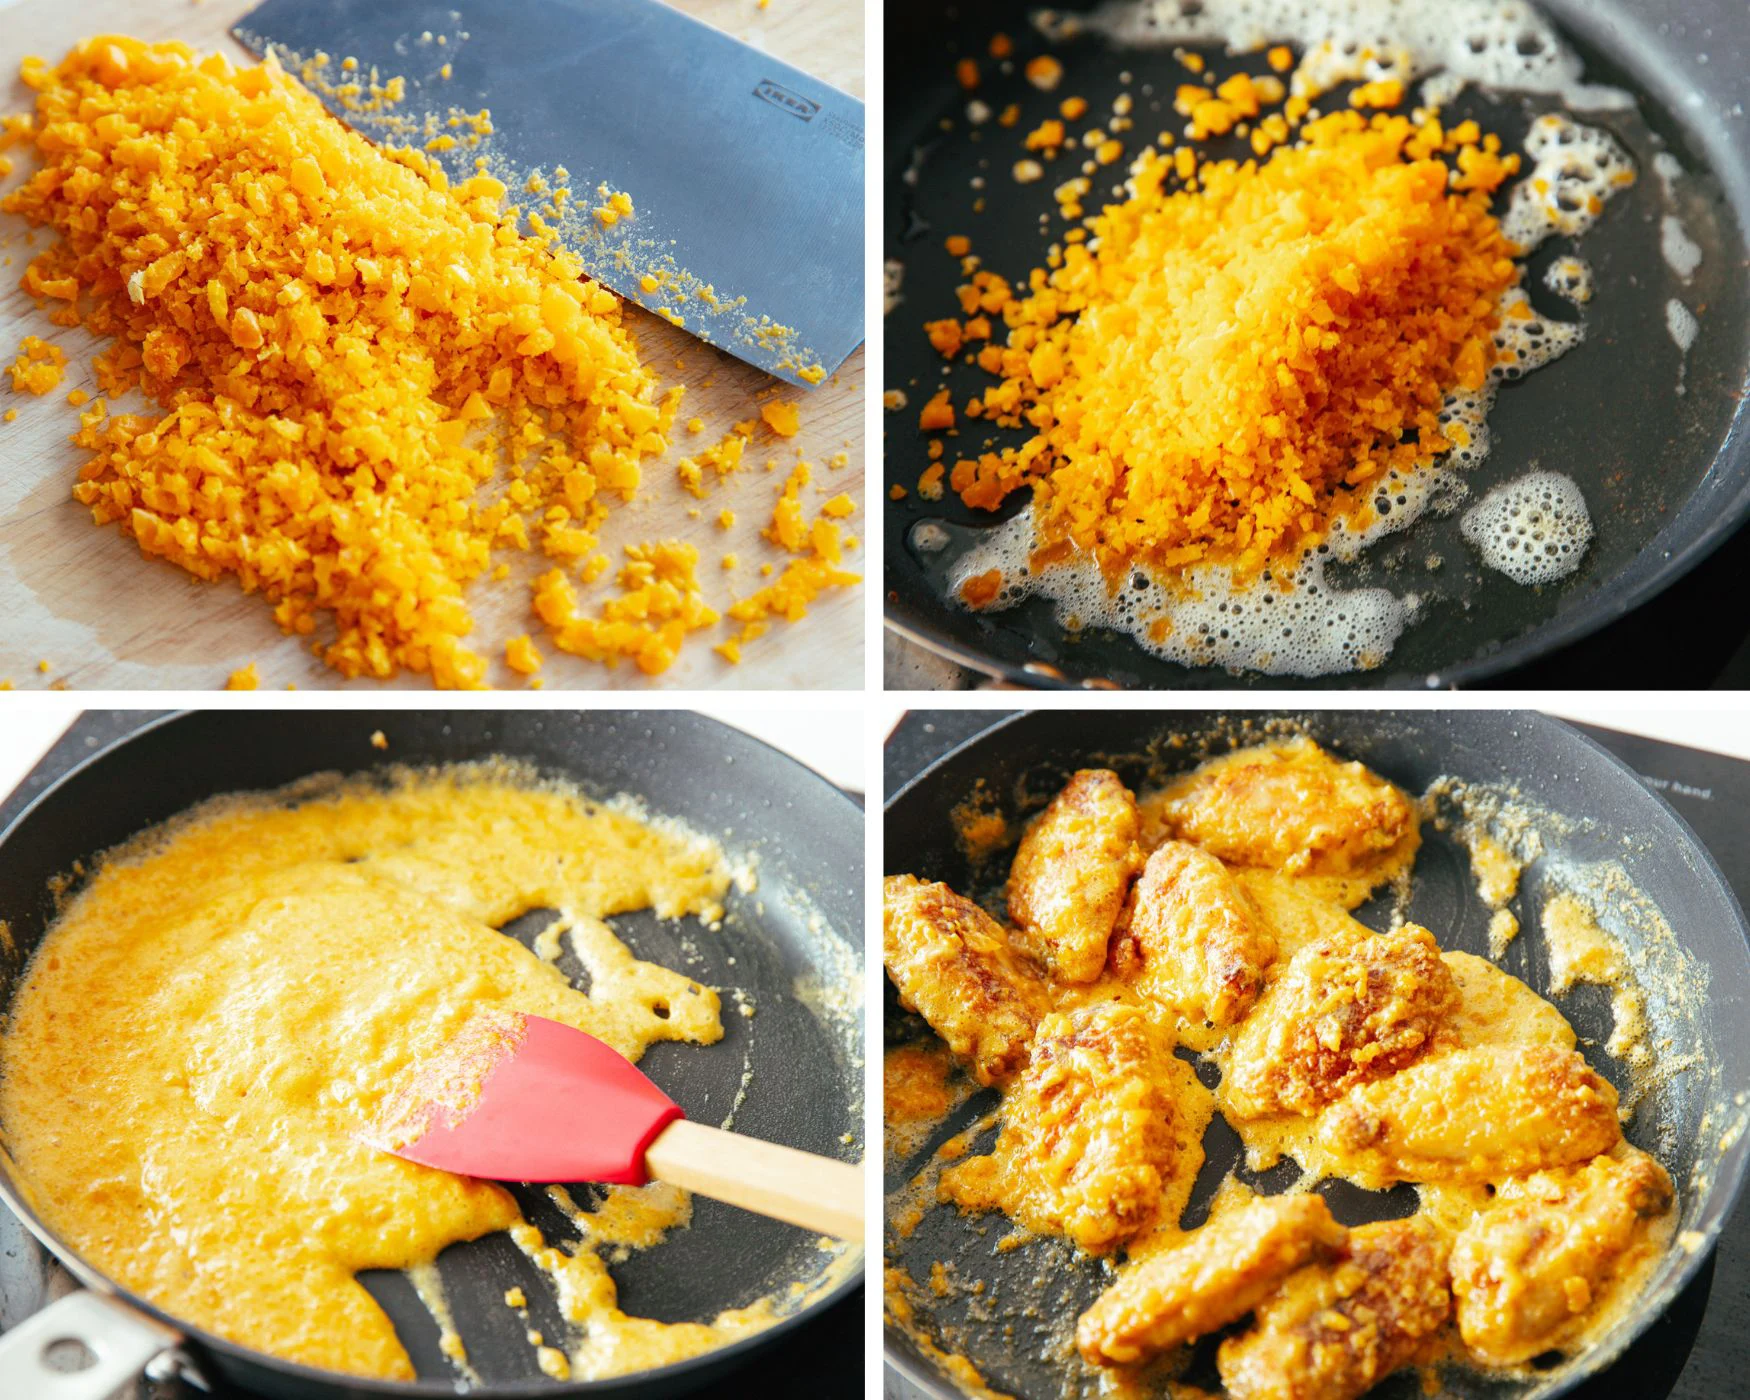
During marinating, finely chop the egg yolk.
Prepare a plate, then spread cornstarch on it. Dip the chicken wings in cornstarch to ensure each side is well coated.
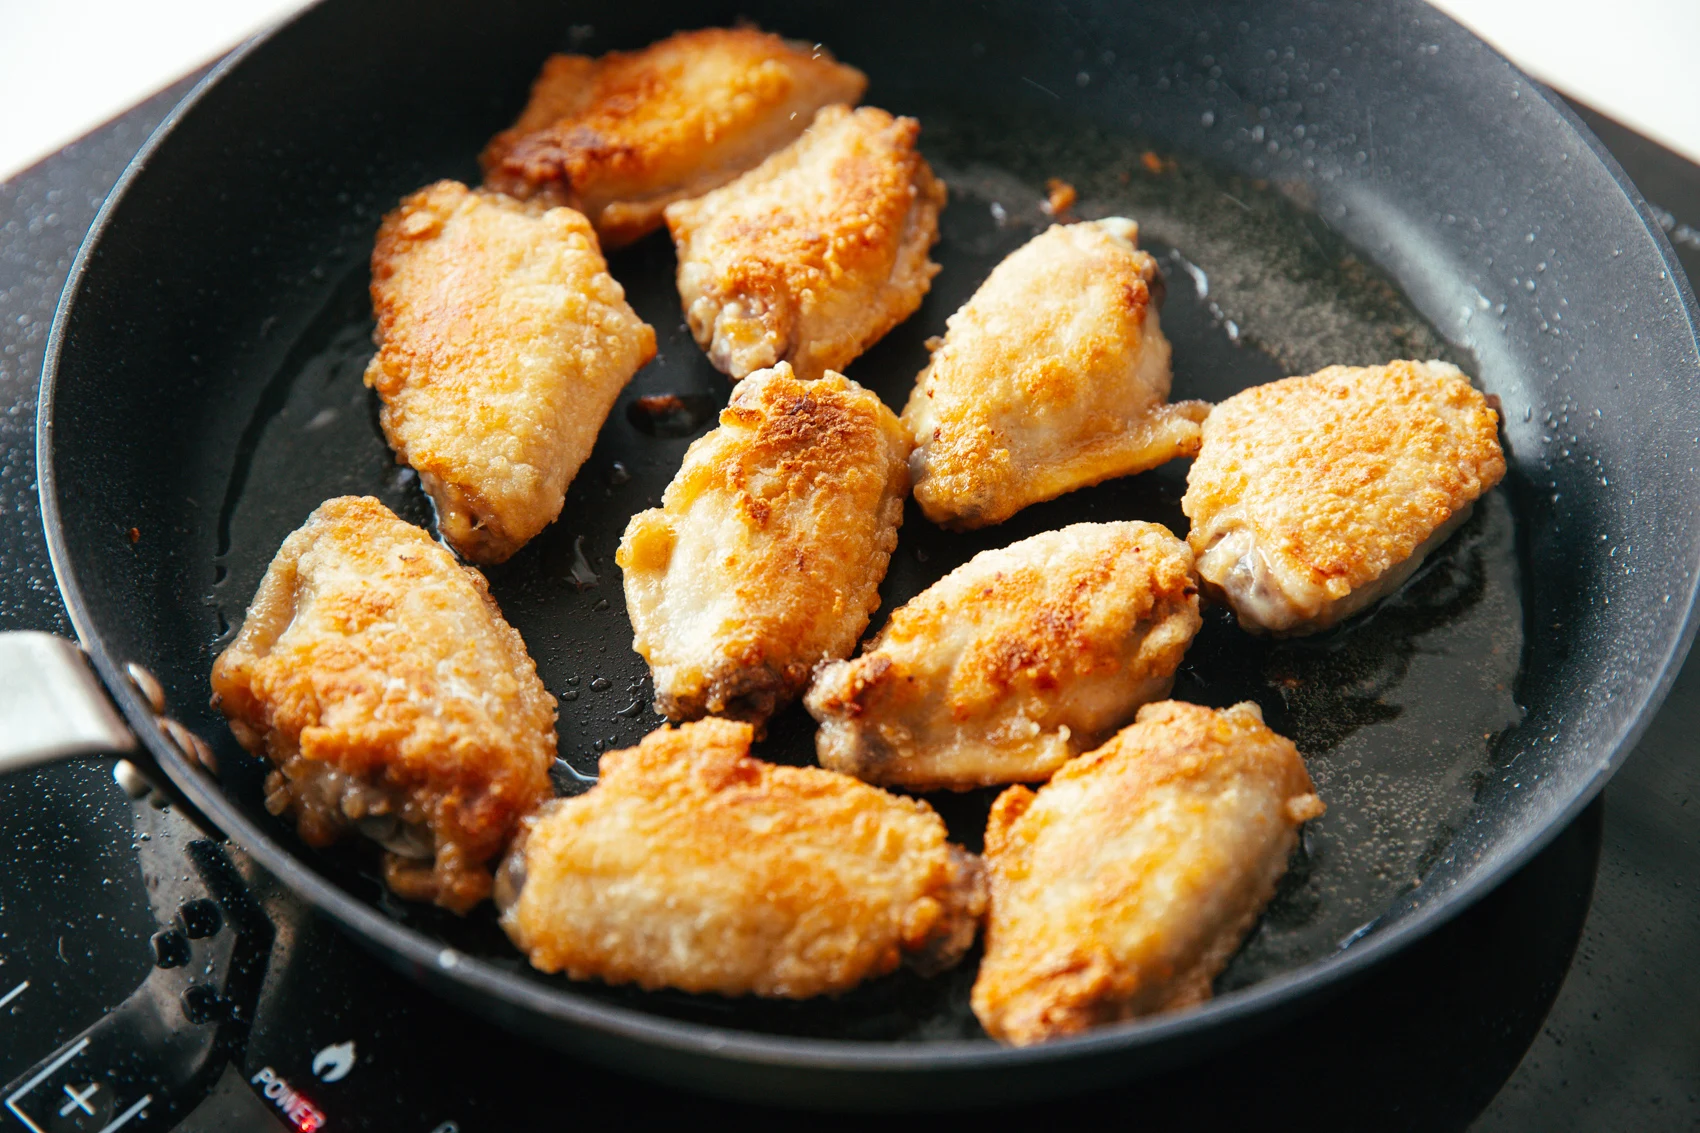
Add a little more oil to a pan, then shallow-fry the chicken wings until crispy.
Tips for pan-frying the chicken wings
- Shake off excess starch when coating. Because too much loose powder will fall off and get burnt.
- Leave them and don’t move until the crust develops. Still the same reason, too early movement may cause the coating to fall off. Flip them over to pan-fry the second side after the first side has a “saft” crust.
- Pan-fry for enough time at medium-low heat. We need a steady, low temperature and to pan-fry the chicken wings for around 8-10 minutes to make sure they are cooked completely.
- Flipping frequently at the last stage– after both sides have the safe crust, we will continue frying them until golden brown. At this stage, flip them frequently to avoid burning.
After pan-frying, there might be too much residual oil in the pan; scoop out the excess, leaving around 2 tablespoons of oil, to ensure the final dish is not greasy. I also wipe away the burnt starch fall-offs with a kitchen paper.
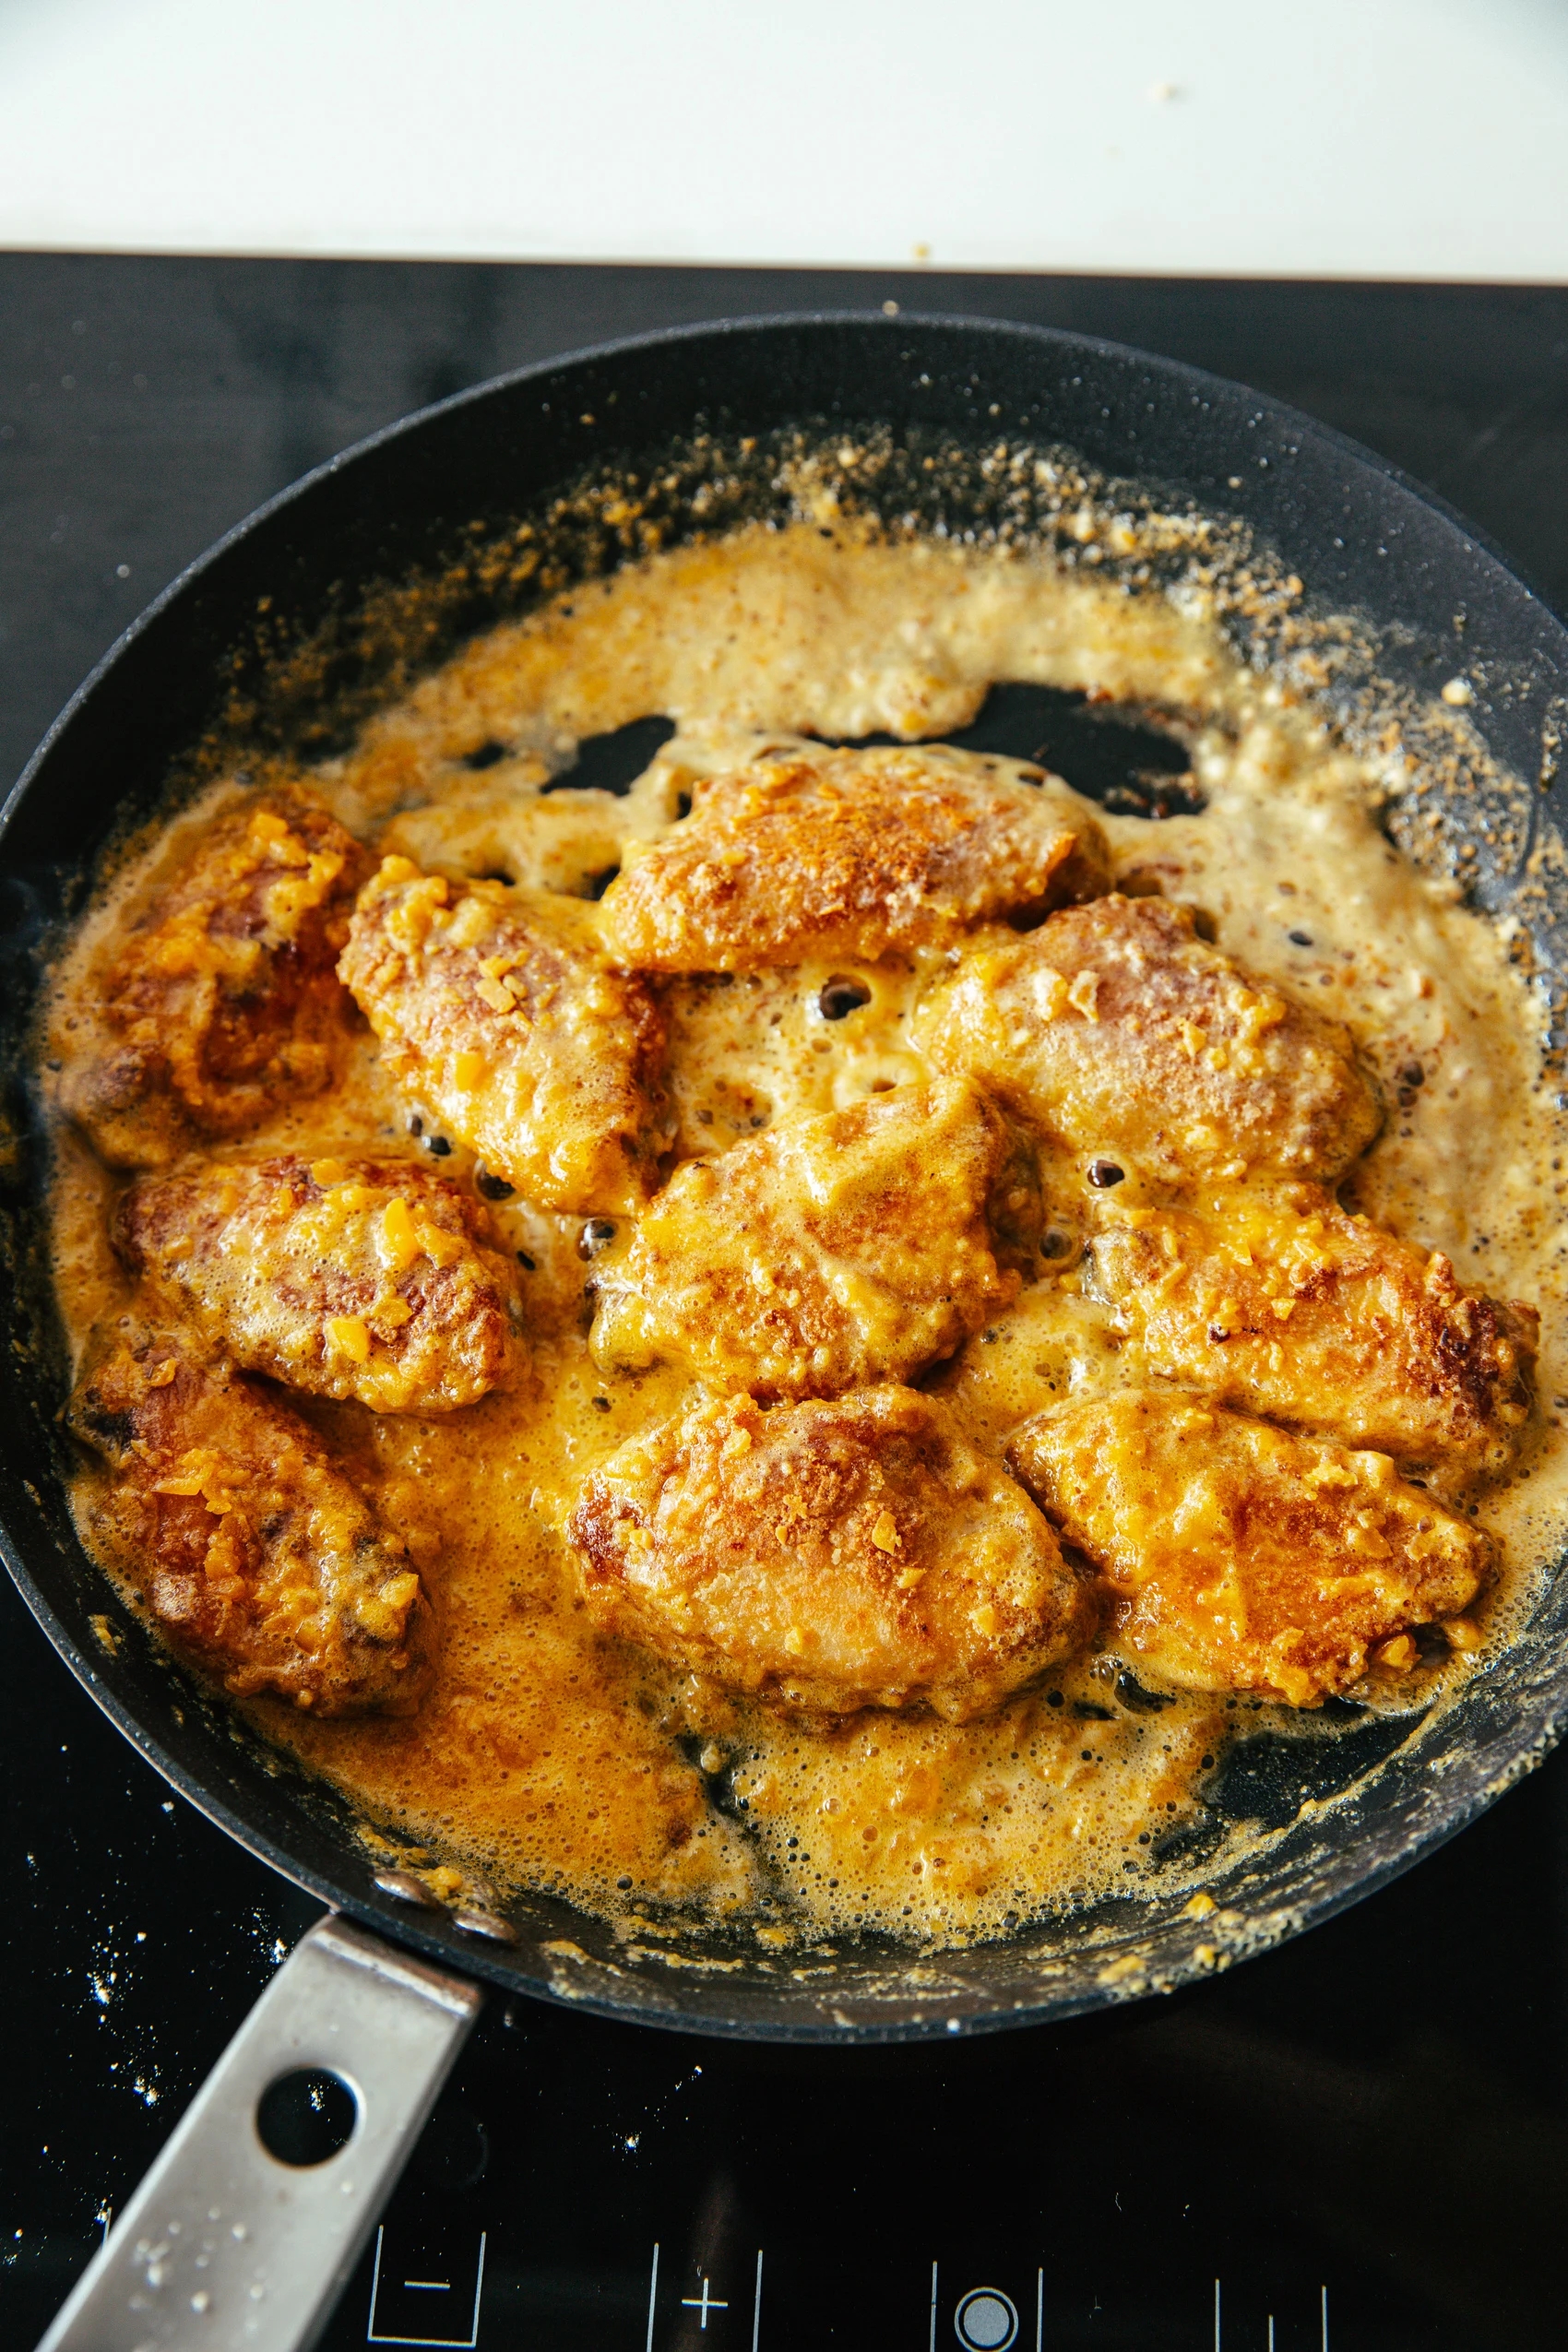
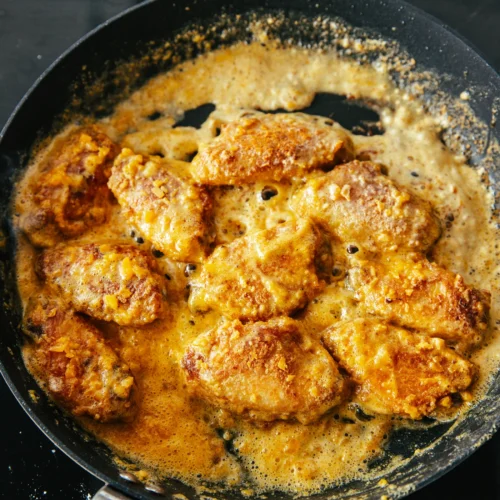
Add the yolks to the pan. Using a spatula, constantly stir and press down on the yolks. So we can achieve a fine, sandy texture.
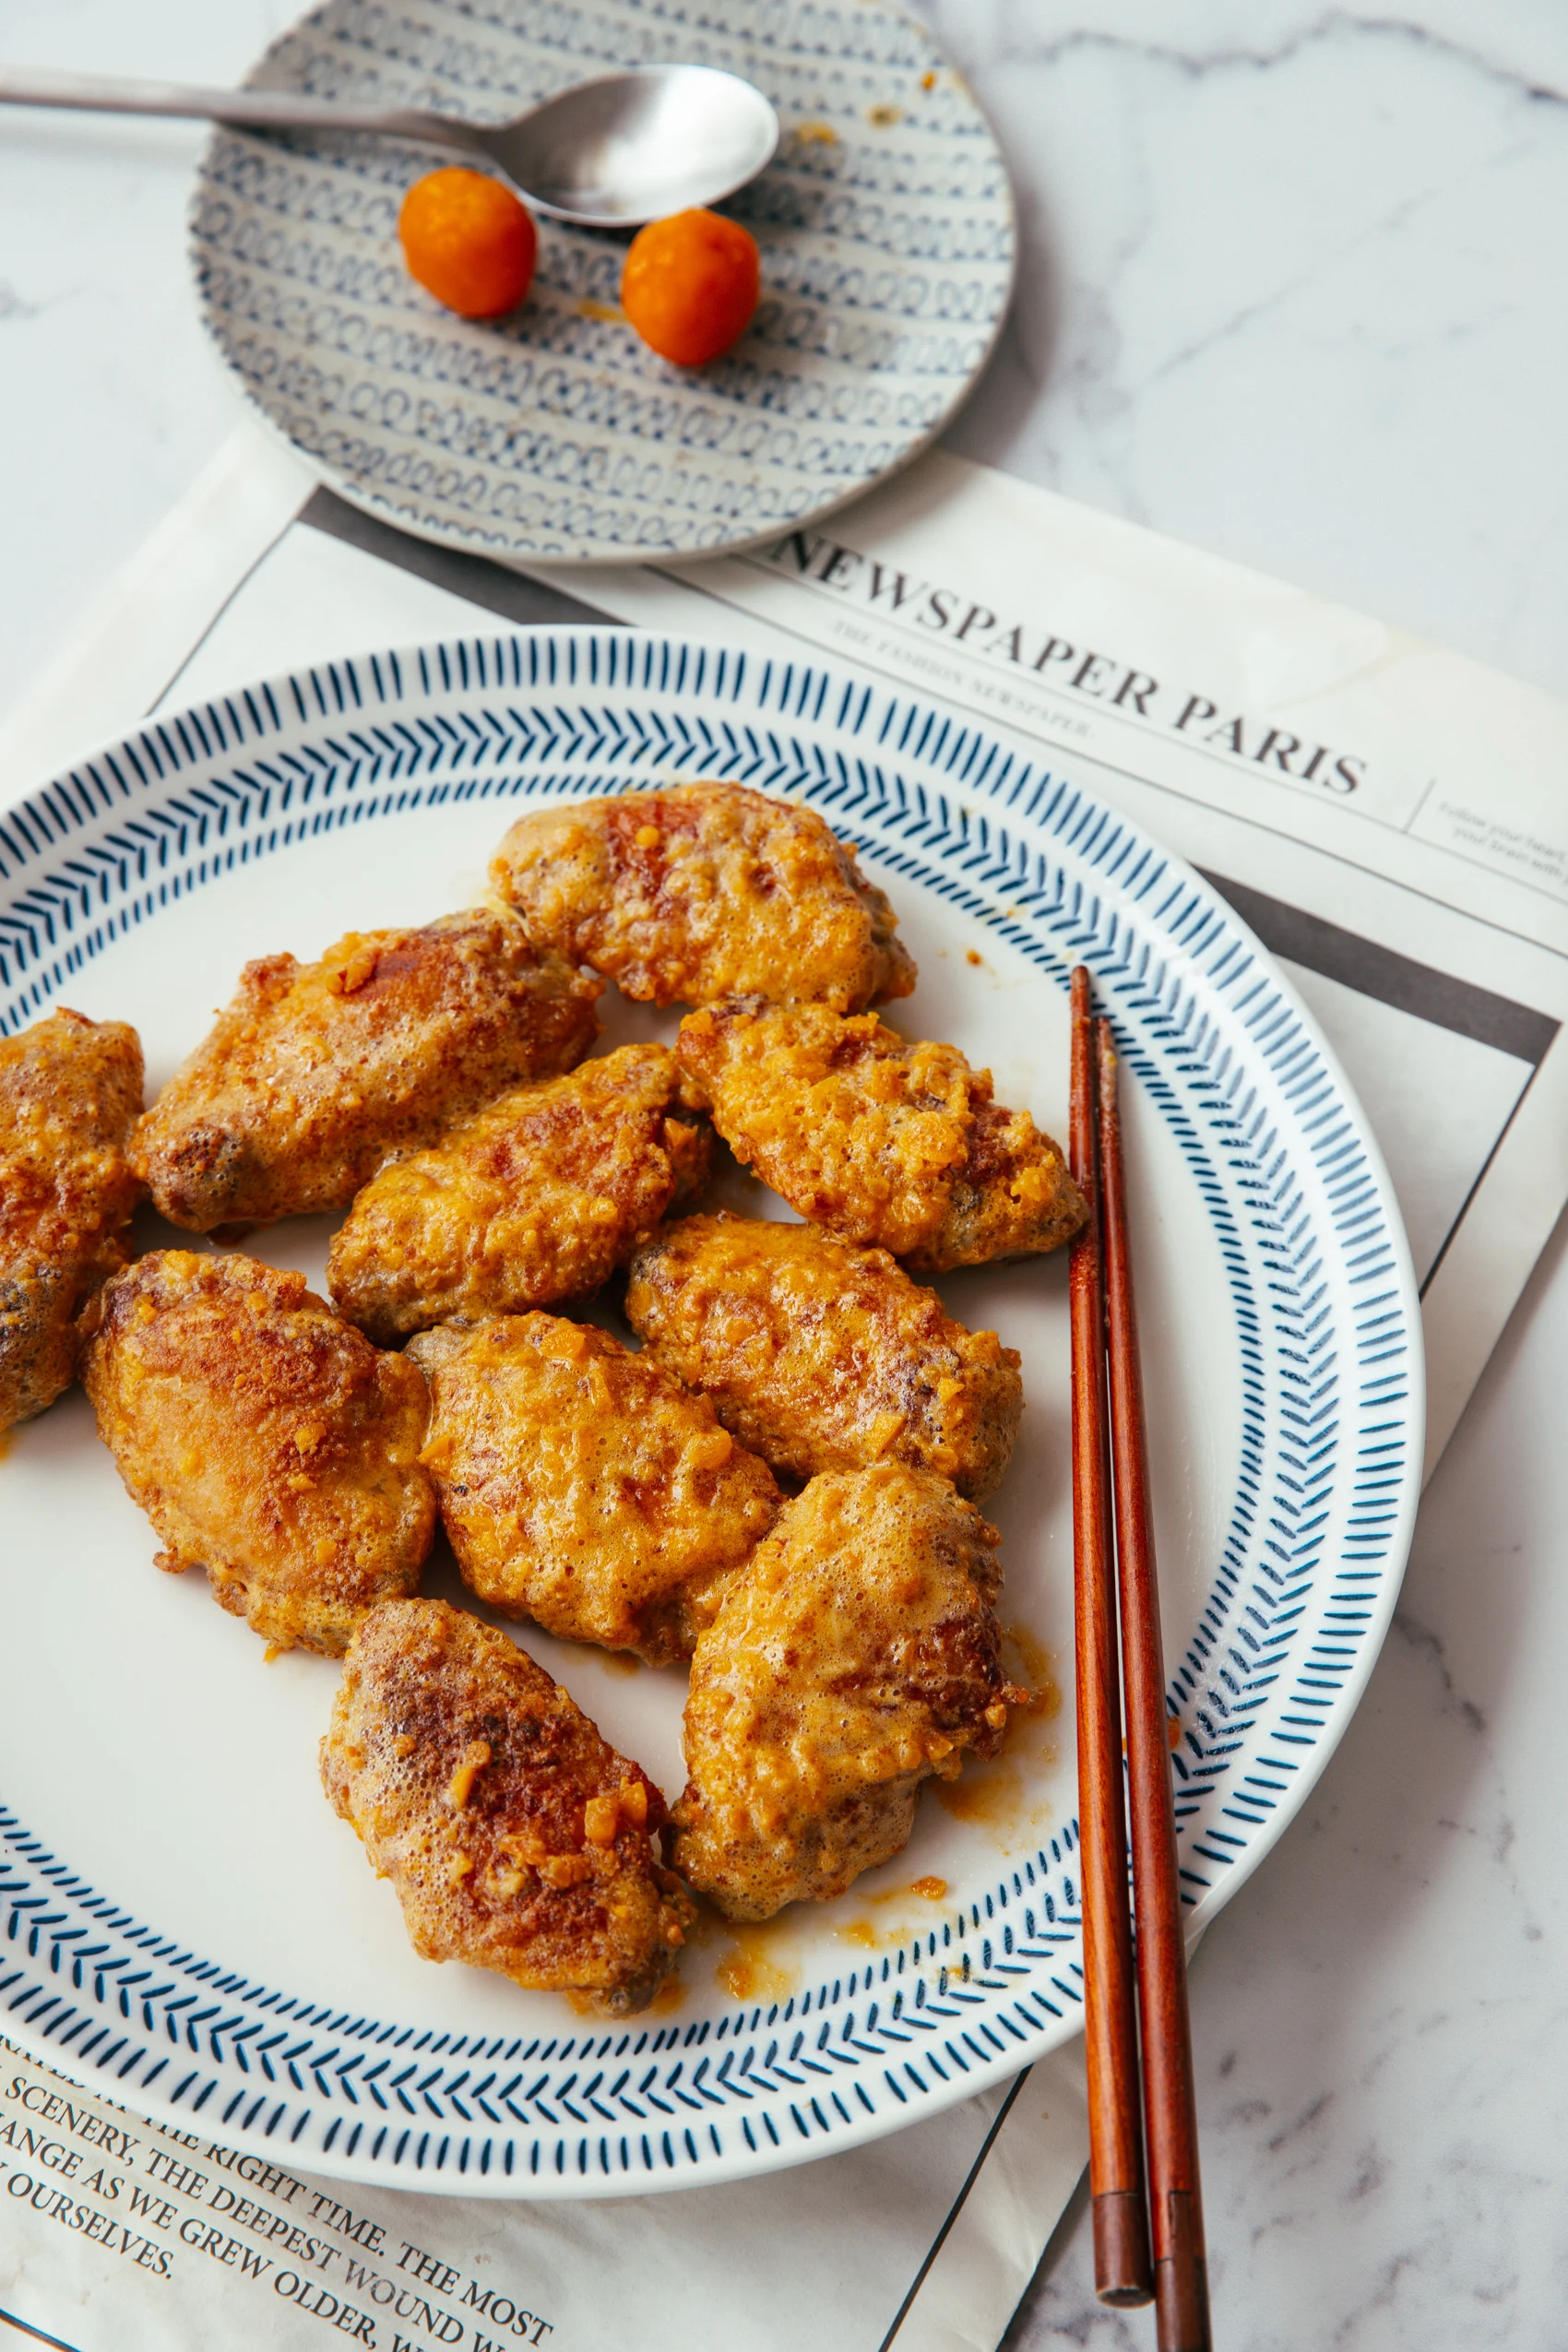
Continue stirring over low heat until the mixture begins to foam and develop large, airy bubbles. Now return the chicken wings, and the sandy egg yolk will adhere automatically. Serve hot!
Ingredients
- 10 mid-section chicken wings
- 1 tbsp. Cooking wine I use rice wine
- 1 tbsp. light soy sauce
- 1/4 tsp. salt
- dash of white pepper
- 1 tbsp. Oyster sauce
- cornstarch for coating
- 4 tbsp. Vegetable cooking oil
- 4-8 salted egg yolks depending on the size
Instructions
-
pat dry the chicken wings. Poke some small holes in the chicken wings with a fork or toothpick. Mix well and set aside for 15 minutes.
-
During marinating, finely chop the egg yolk.
-
Prepare a plate, then spread cornstarch on it. Dip the chicken wings in cornstarch to ensure each side is well coated.
-
Add a little more oil to a pan, then shallow-fry the chicken wings until crispy. Let it stay for a while until the crust is formed and then flip over and fry the second side. Use medium fire and fry the chicken wings for around 8-10 minutes until they are cooked completely. Flip frequently at the last stage.
-
Scoop extra oil and leave only 2 tablespoons. Wipe alway any fall-offs with a kitchen paper.
-
Add the yolks to the pan. Using a spatula, constantly stir and press down on the yolks. So we can achieve a fine, sandy texture.
-
Continue stirring over low heat until the mixture begins to foam and develop large, airy bubbles. Now return the chicken wings, mix and the sandy egg yolk will adhere automatically.


[gtranslate]
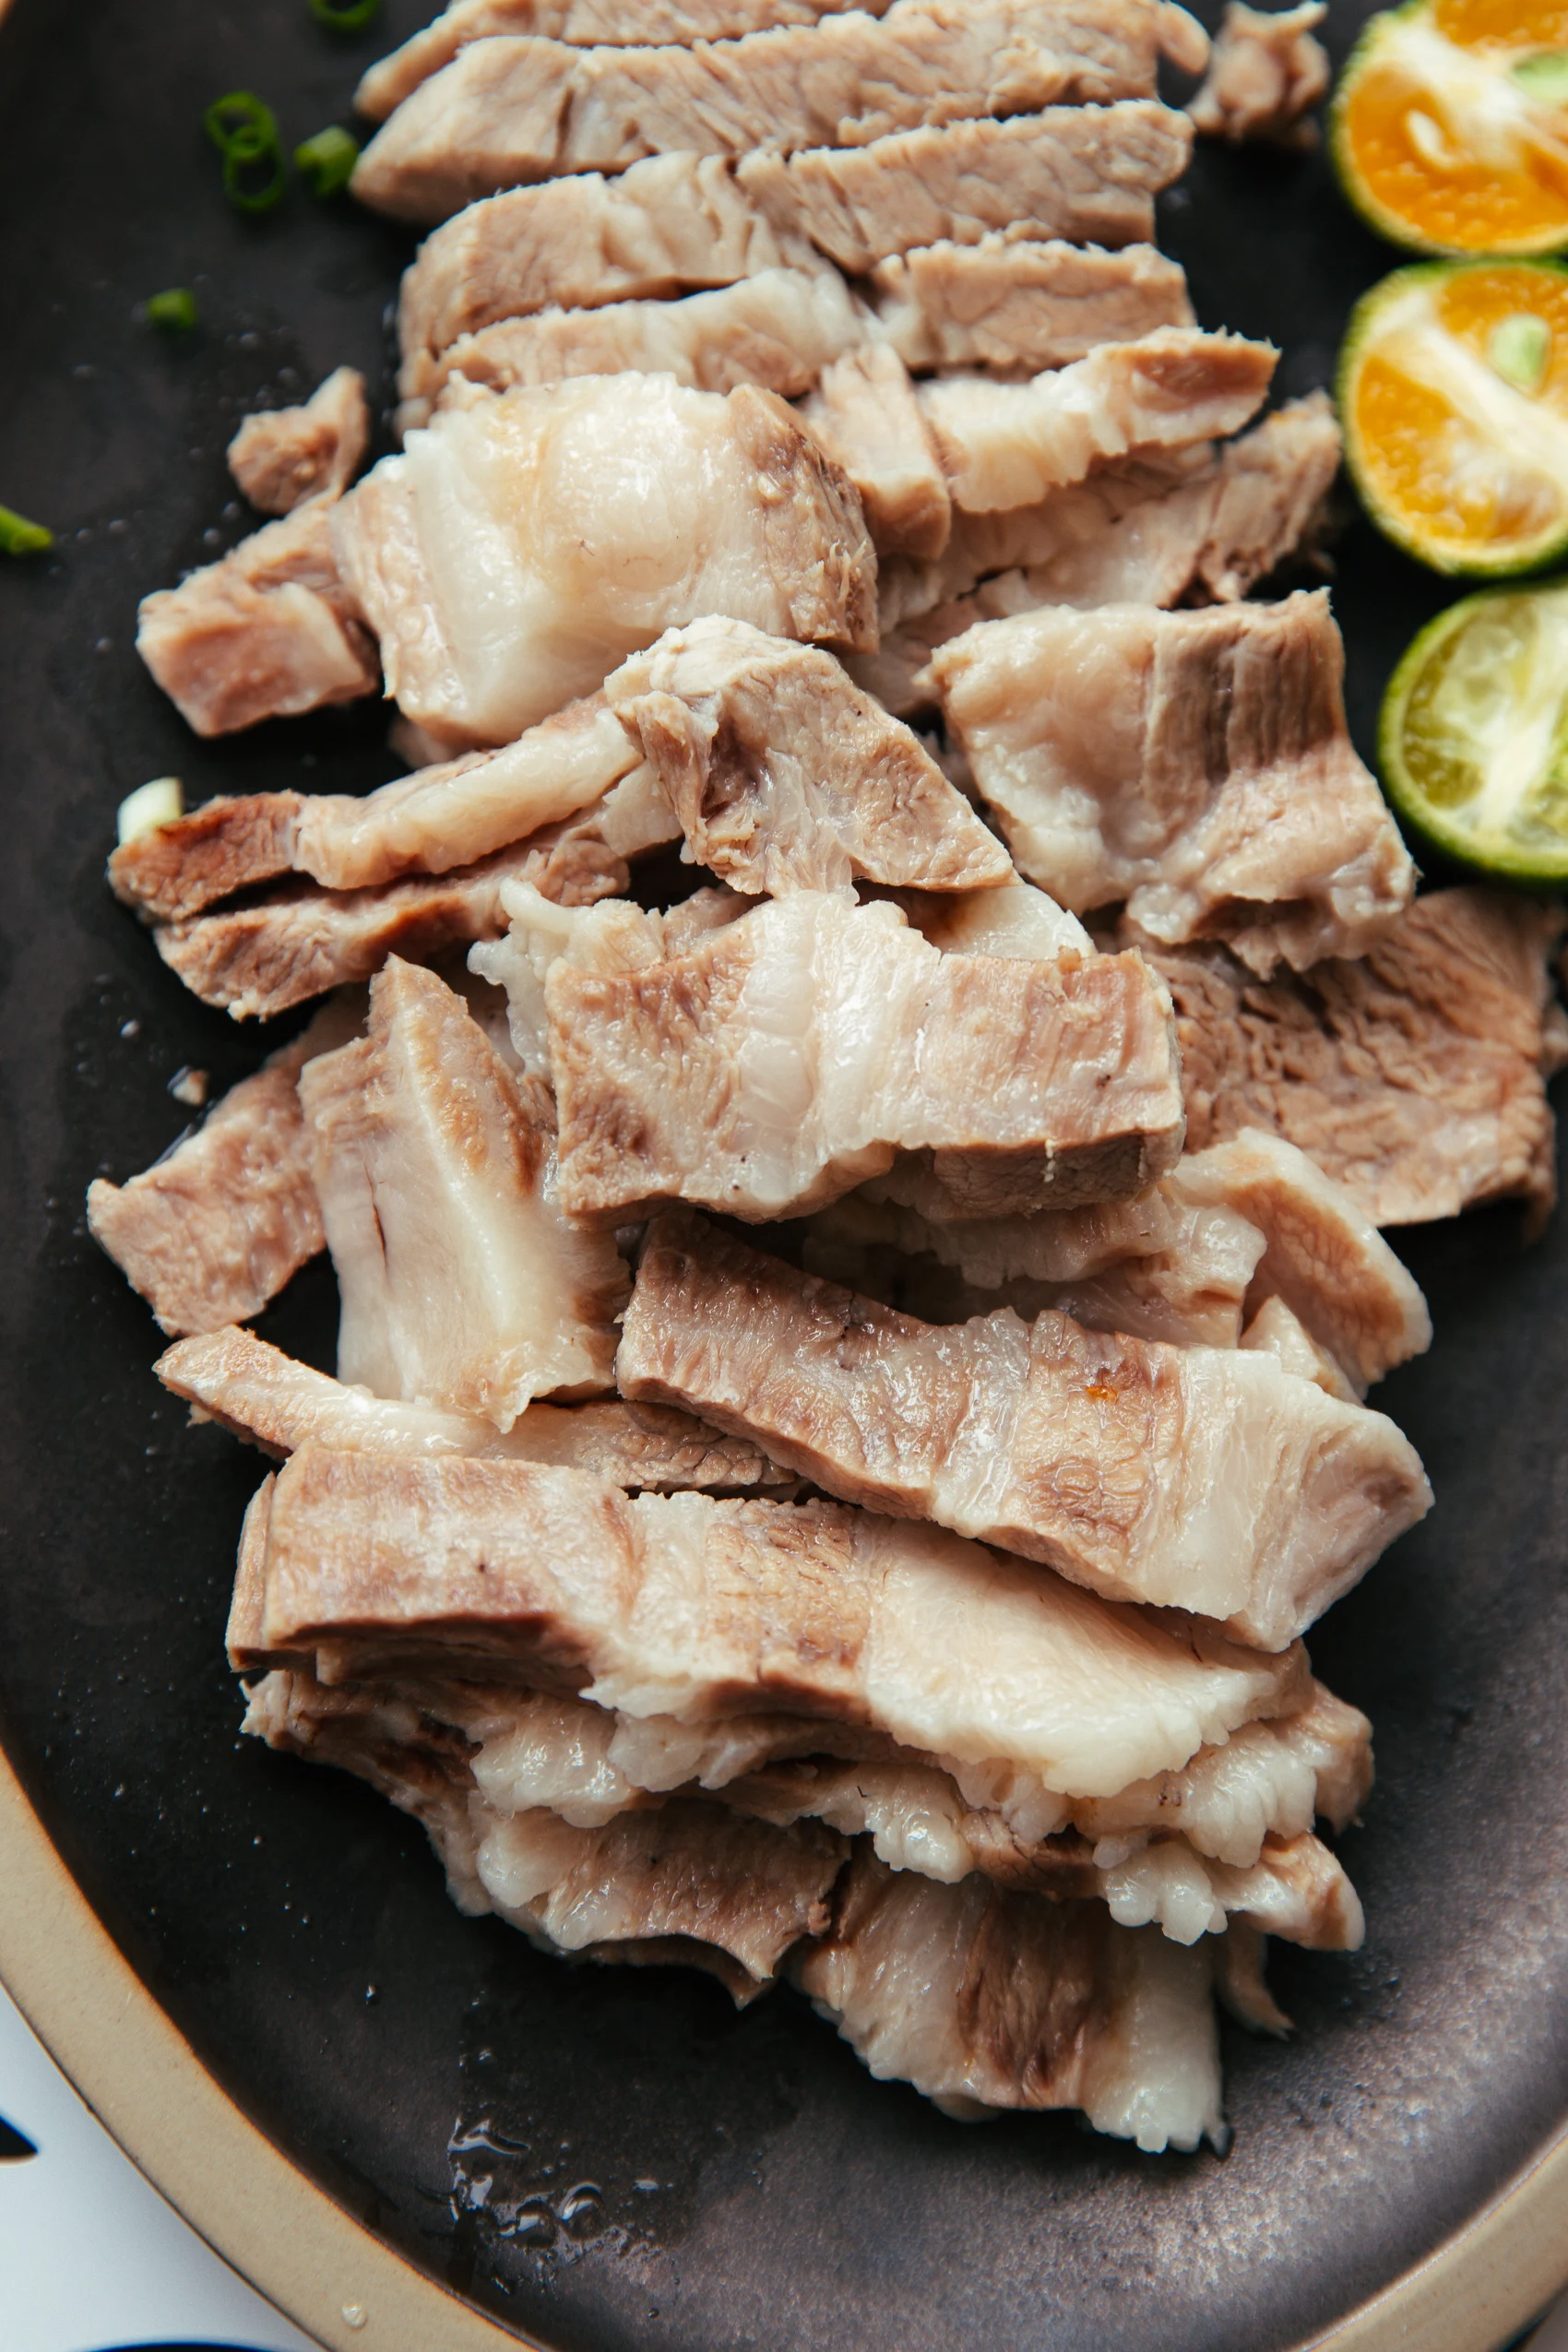
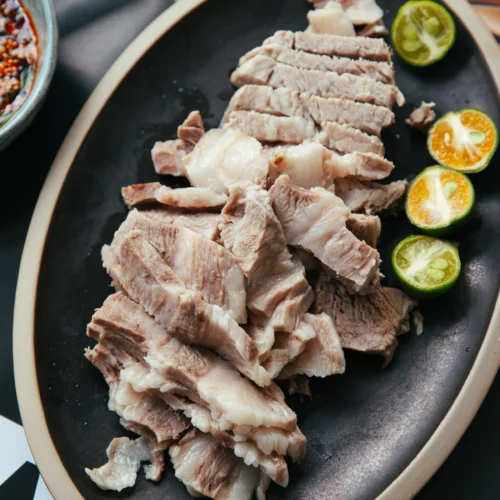
I would love to introduce you to a super-easy boiled pork, also called white cut pork. It is a classic Chinese dish celebrated for its simplicity, juicy and tender texture, and great flavor when served with a dipping sauce.
It is one of the top recommendations for beginners. Unlike braised or roasted pork dishes, we will use the lowest effort. No marinating, no pan-frying, turning over. A whole cut of pork butt, my favorite part, is gently simmered in broth until cooked through. Then we will cut it into thin slices and then served with a wonderful dipping sauce. It has a tender, juicy, silky, and melt-in-the-mouth texture that everyone in the family will love.

White cut is a widely used Chinese cooking method. It is about honest cooking — using the simplest method possible to reveal the best version of an ingredient. When cooking with different ingredients, we may choose different side ingredients or aromatics. I have shared similar white-cut lamb before. In that version, lots of spices are added because lamb carries what the Chinese call shanwei (膻味) — a strong, grassy, sometimes funky aroma. But for white-cut chicken, only white pepper, scallion, and ginger are used to preserve the original taste of high-quality chicken. But for pork, we will use daikon radish or winter melon.
A tip for the broth
Adding daikon radish or winter melon to the pot while the pork simmers is a game-changer. On the one hand, those two ingredients can help remove the faint raw taste; on the other hand, they can further lend the pork a gentle, vegetal sweetness. You can choose either type.
However, no matter which vegetables you choose, always use super-large chunks while simmering. Smaller ones may break and spoil the soup base.
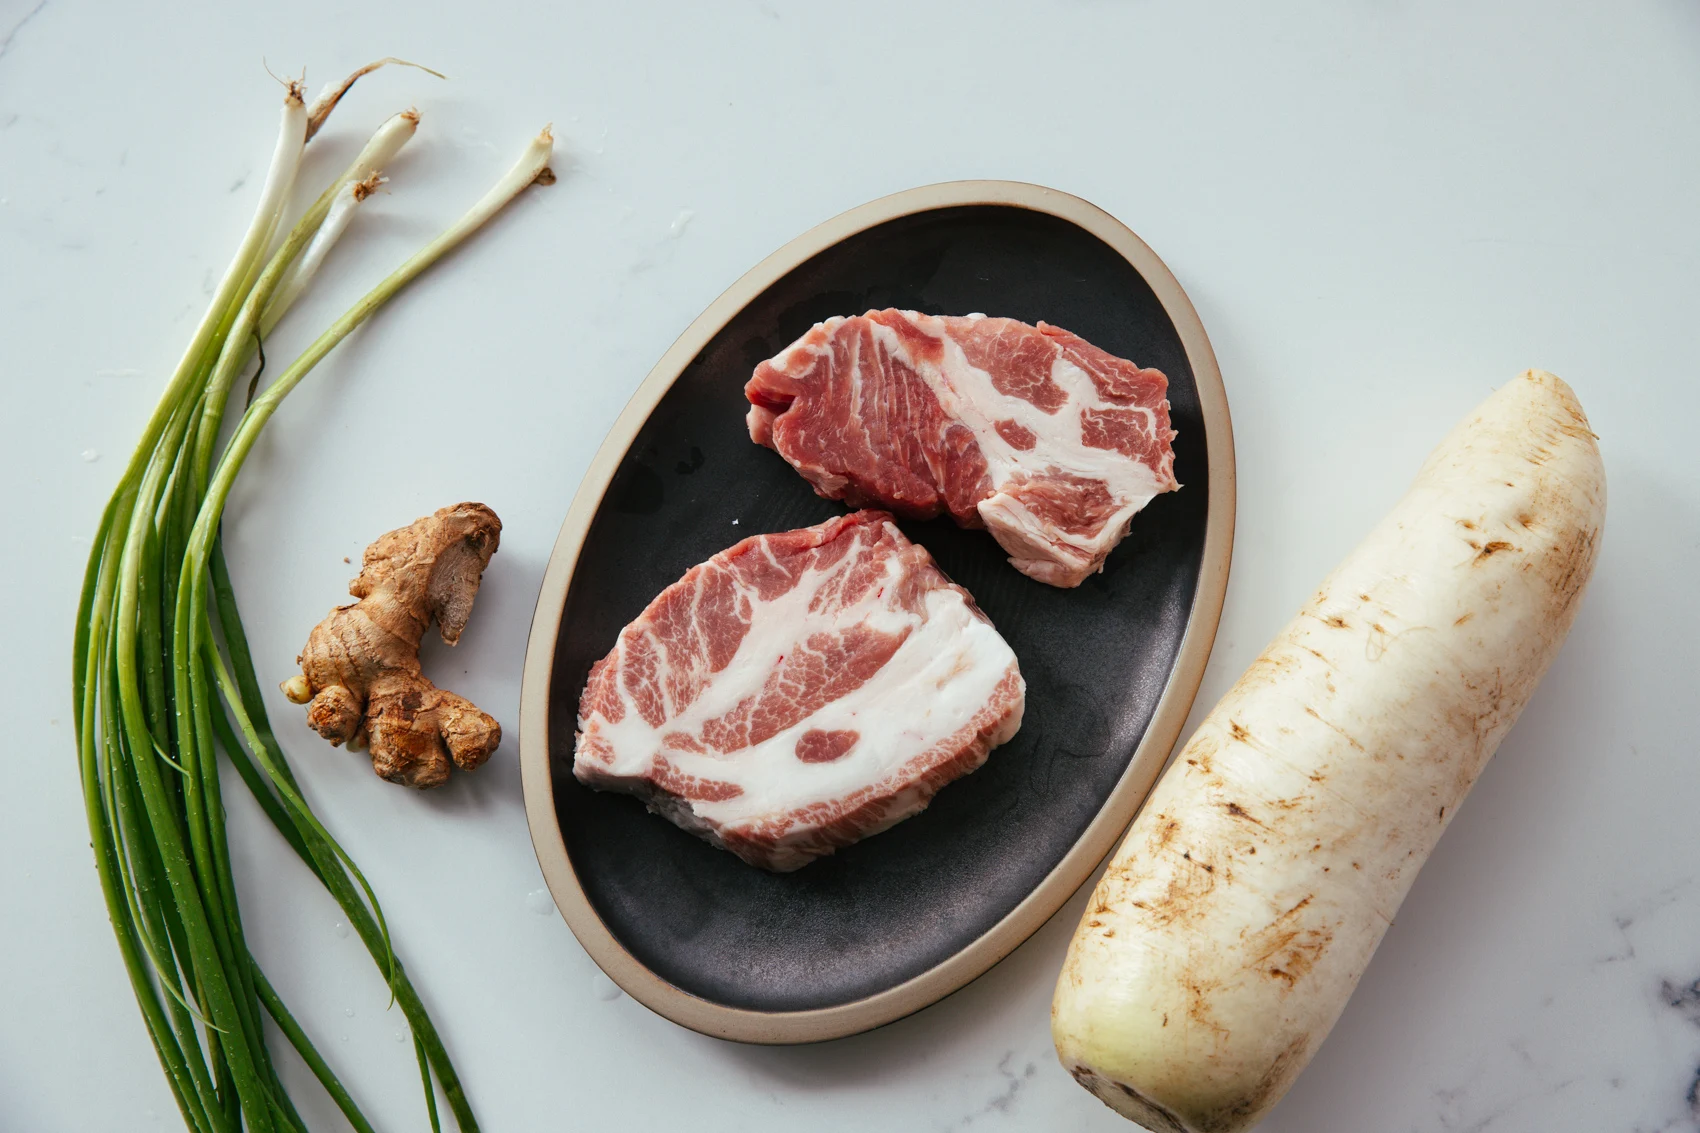
Which cut to use
The best cut for this recipe is pork butt. I love using this cut for all kinds of stir-frying. Pork butt (also called Boston butt) actually comes from the upper shoulder of the pig. A cut of high-quality pork will be marbled with intramuscular fat. But not as much as pork belly.
You can also try with pork tenderloin, which carries more lean meat. But the texture will be less juicy. Pork belly is another great option if you want a fattier cut.
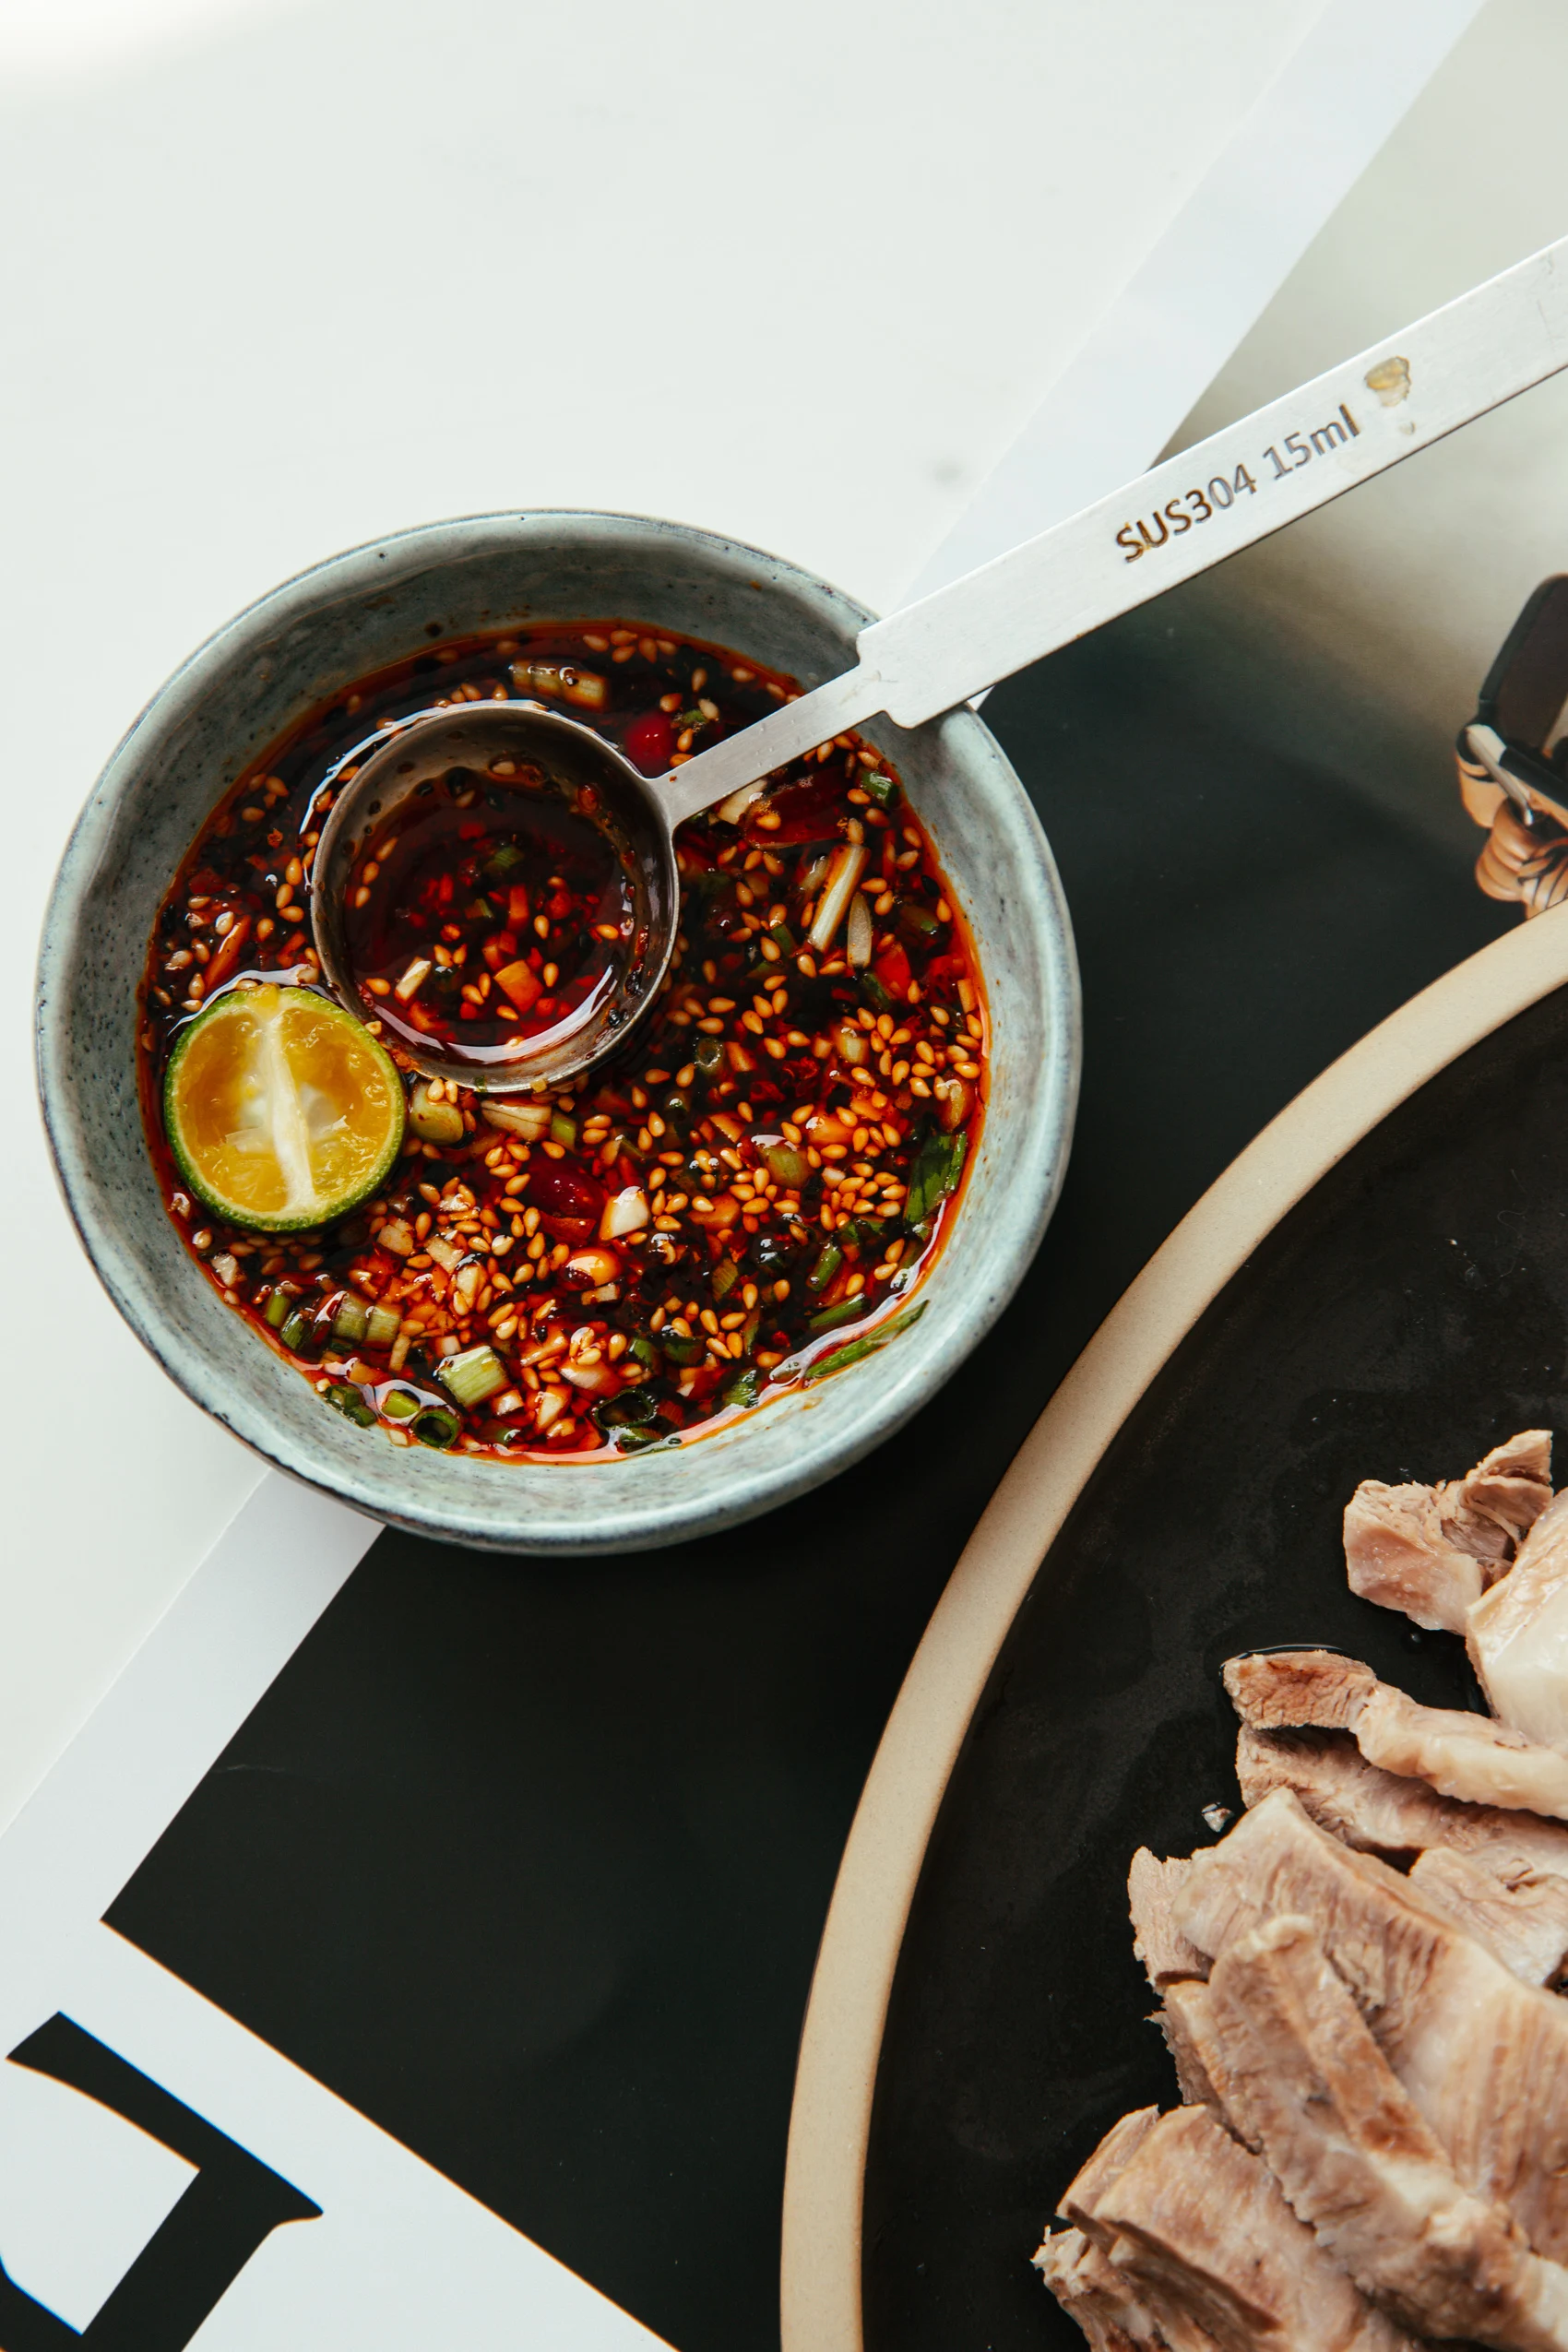
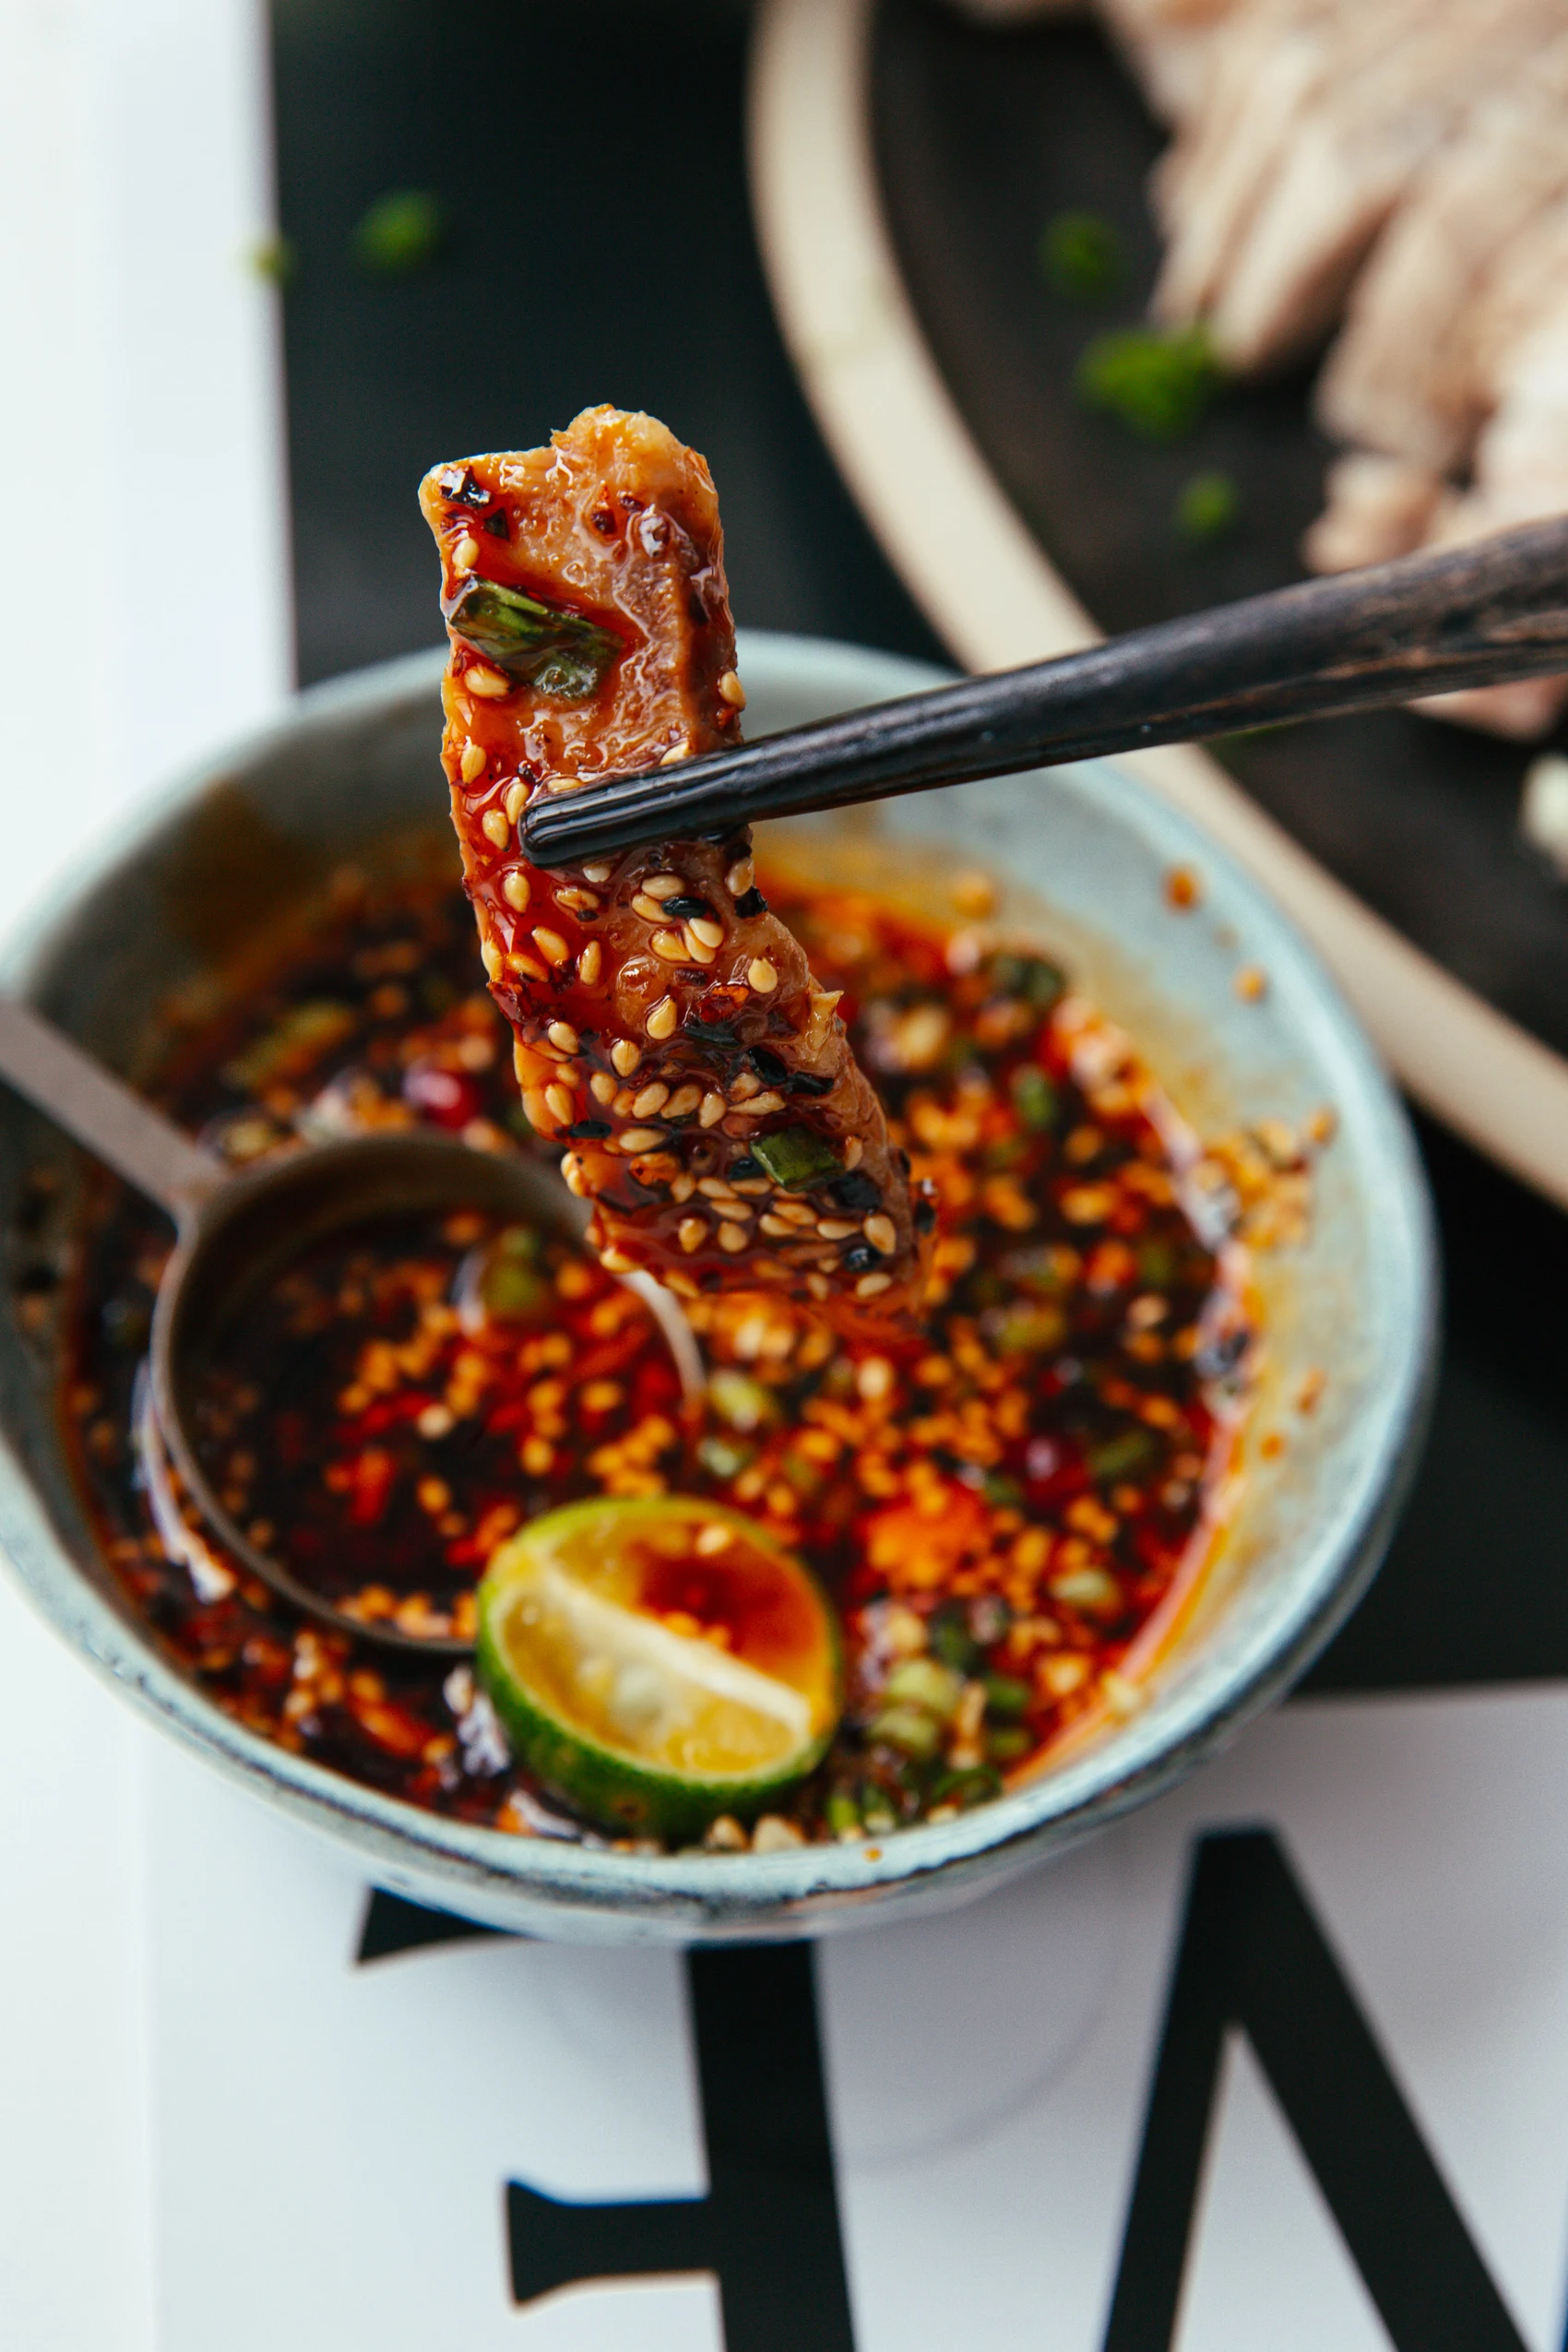
The magic of dipping sauces
All white cut dishes are served with one or two dipping sauces. For white-cut chicken, ginger-and-scallion sauce is the most popular. For pork, I will pair it with a spicy, savory dipping sauce. You can half-dip, keeping the other half to taste both and make comparisons.
Adding a little tiny ingredient like lime juice or white vinegar is my favorite way to highlight the white, cute pork butt or pork belly. A touch of acid will brighten it and remove the heaviness of fat.
Step by Step
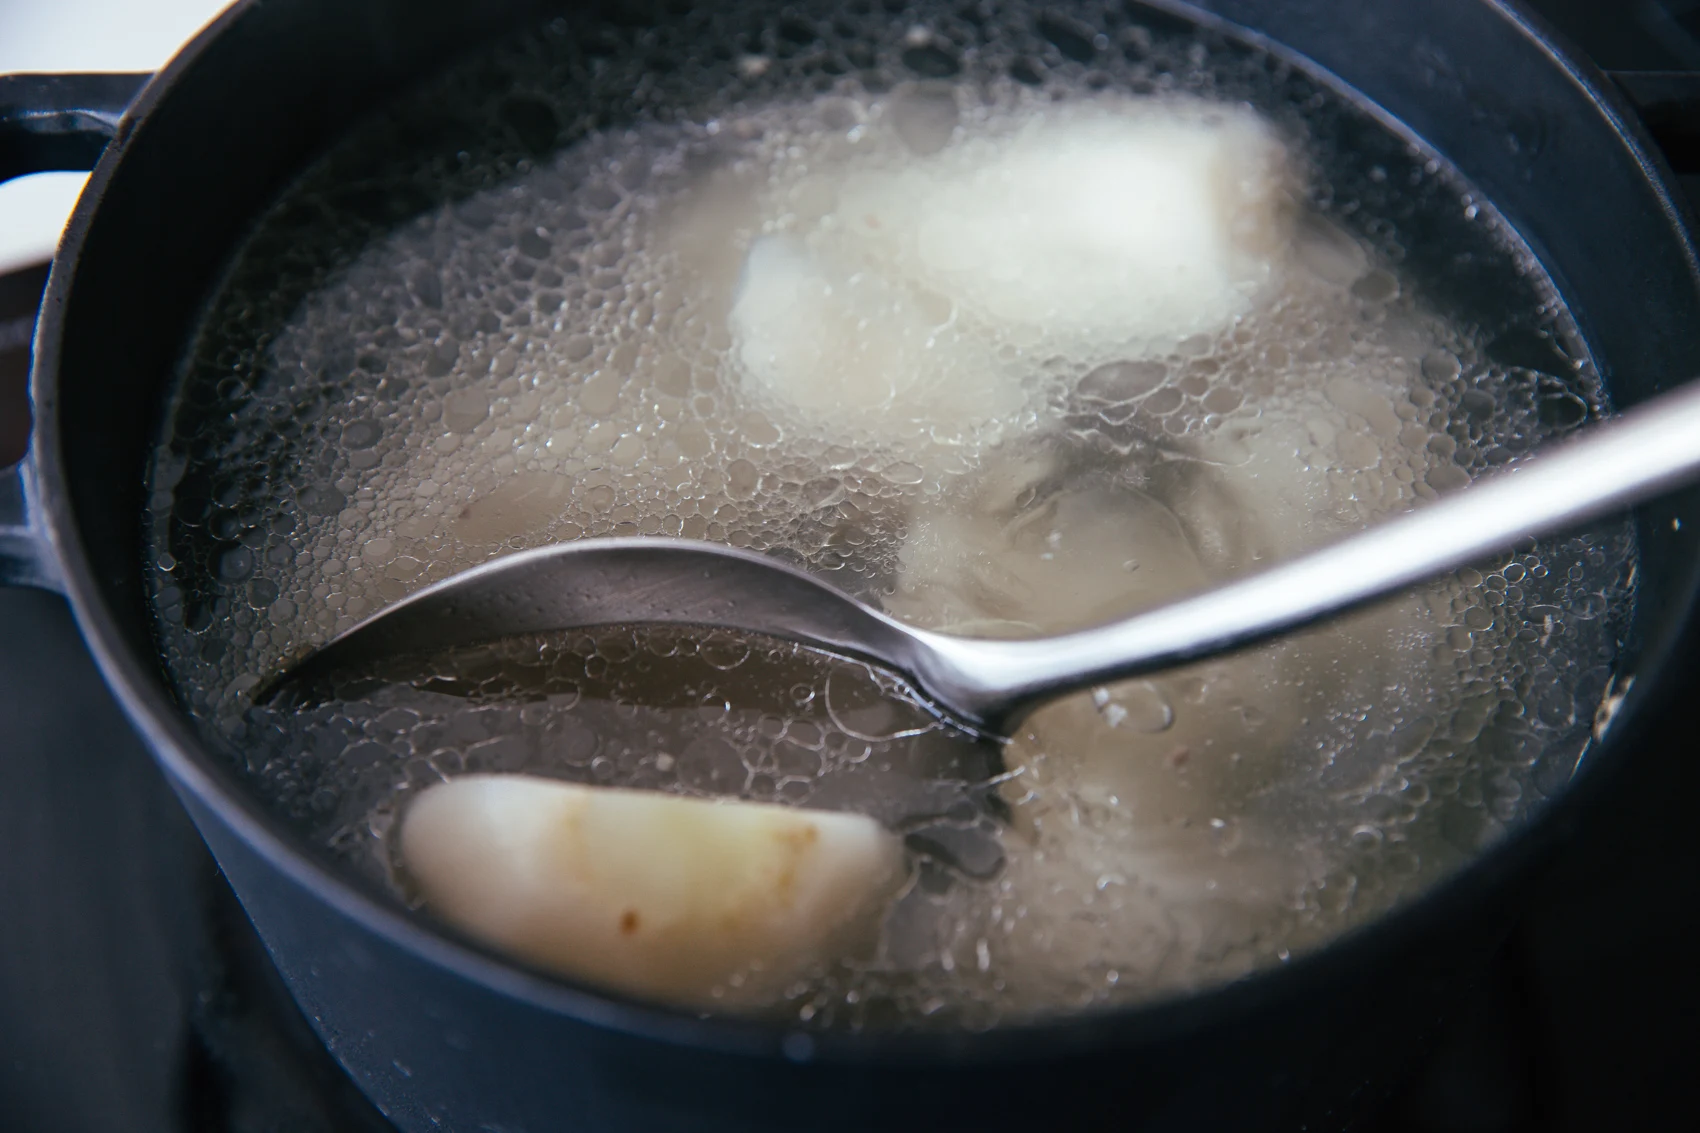
Clean the pork butt first, and then soak it in clean water for around 30 minutes. This helps to remove any raw taste.
Then prepare a large pot with clean water, add large daikon chunks, scallion, smashed ginger, and the pork.
Cover the lid and bring it to a boil; remove any floats after boiling.
Slow the fire to a simmer for 50 minutes.

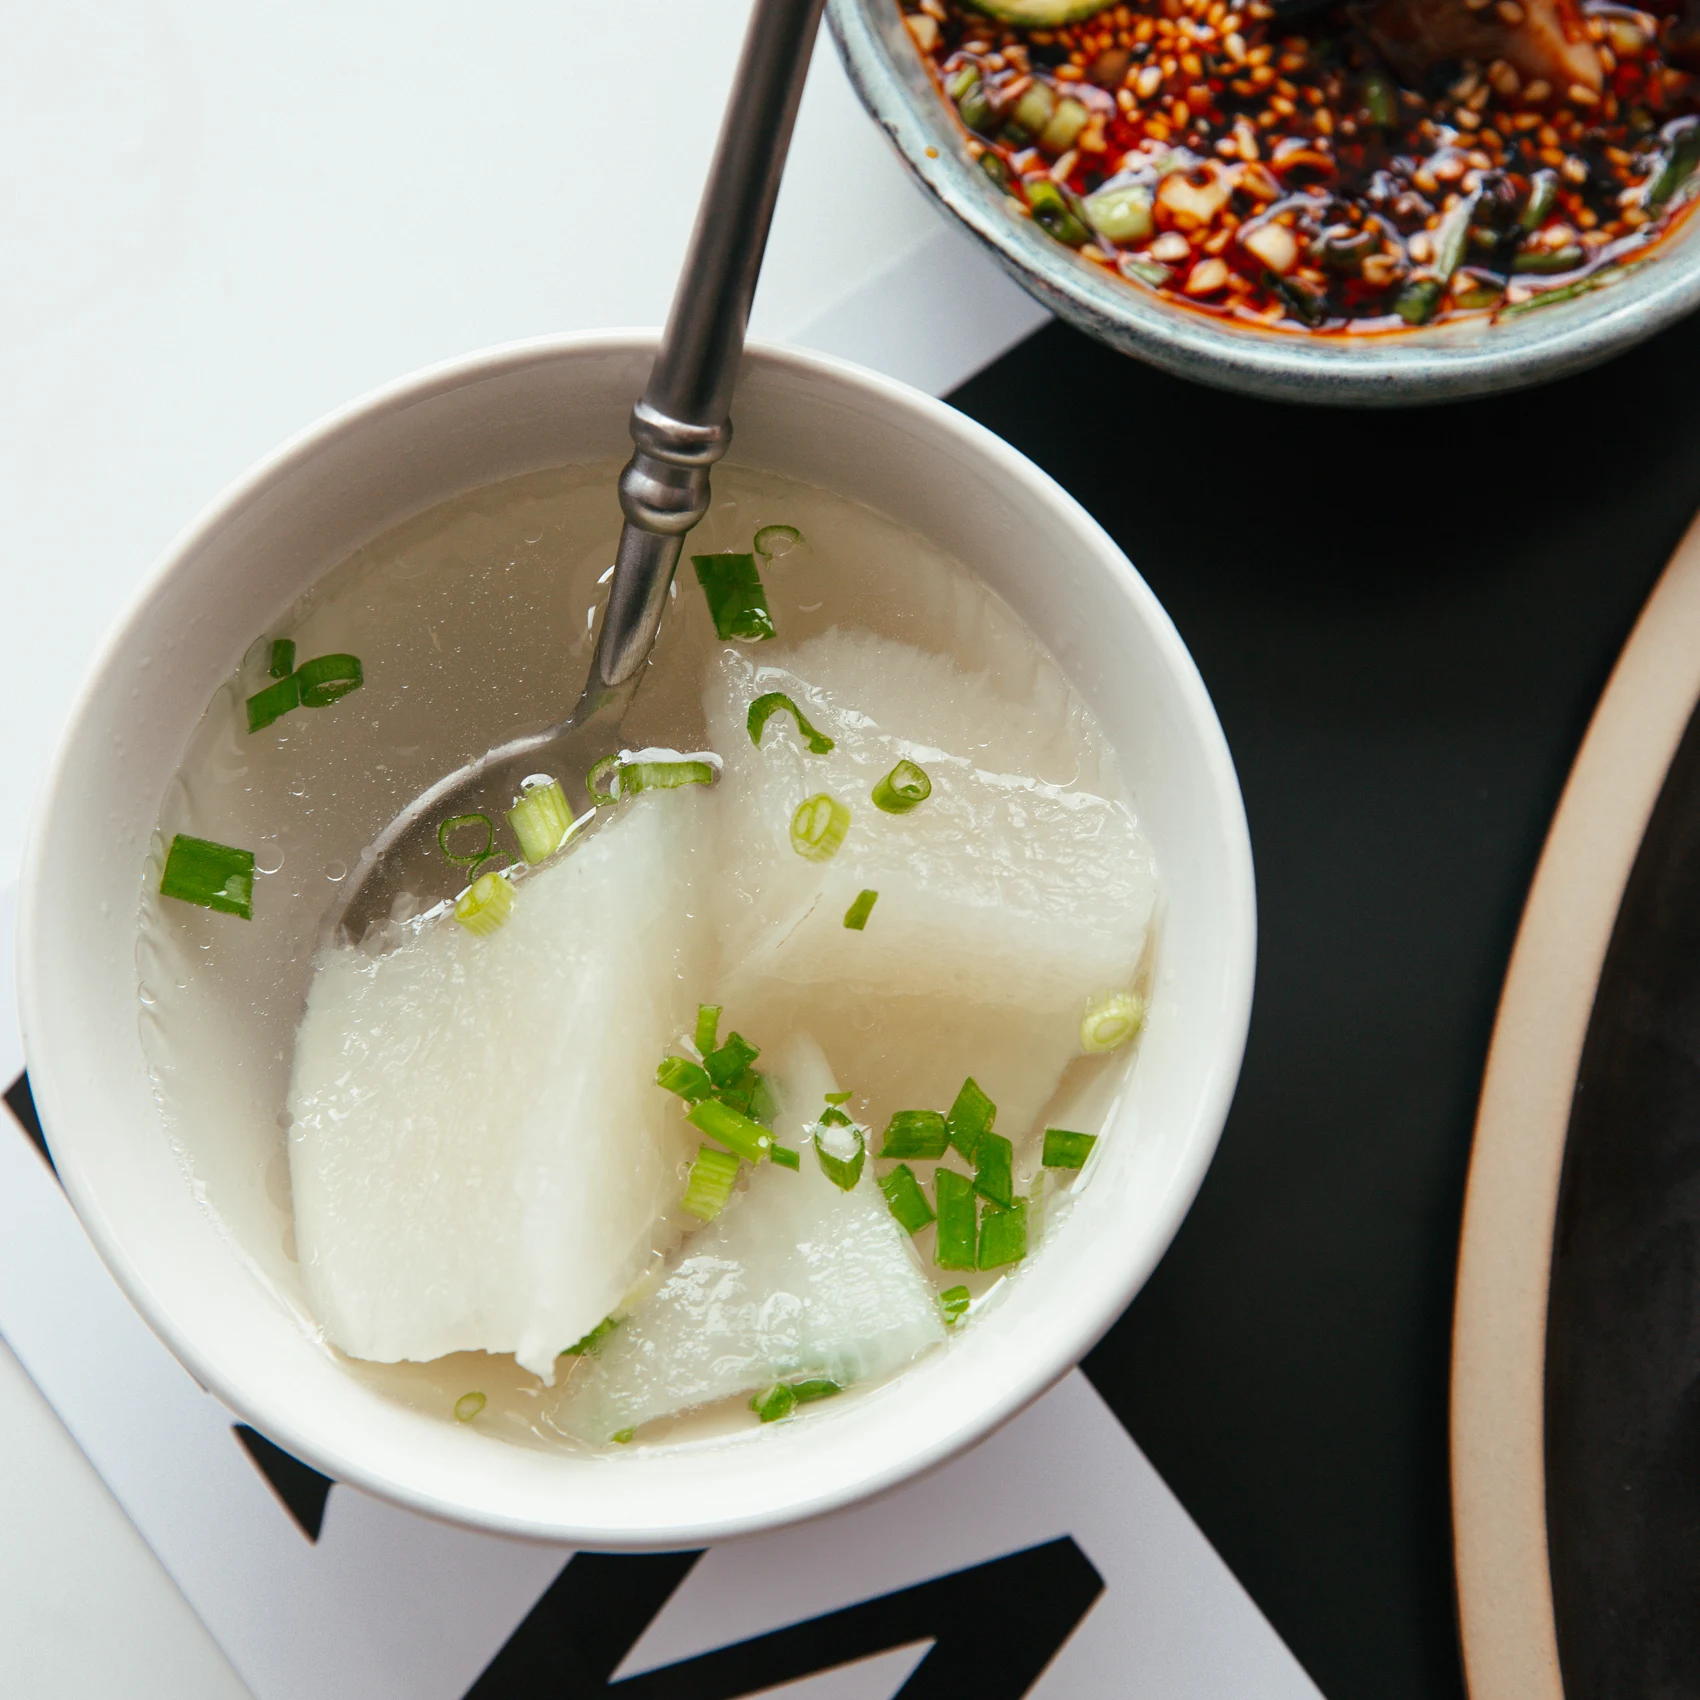
Take the pork out, cut it into slices, and then serve it with dipping sauces.
Break the daikon, add a small pinch of salt to the soup, and garnish with some chopped green onion. You get a lovely match of white, cute pork, and a delicious daikon soup.
Boiled Pork- White Cut Pork
A classic Cantonese boiled pork dish — clean, tender, and delicately sweet from daikon or winter melon, best enjoyed with a bold dipping sauce.
#wprm-recipe-user-rating-1 .wprm-rating-star.wprm-rating-star-full svg * { fill: #ffffff; }#wprm-recipe-user-rating-1 .wprm-rating-star.wprm-rating-star-33 svg * { fill: url(#wprm-recipe-user-rating-1-33); }#wprm-recipe-user-rating-1 .wprm-rating-star.wprm-rating-star-50 svg * { fill: url(#wprm-recipe-user-rating-1-50); }#wprm-recipe-user-rating-1 .wprm-rating-star.wprm-rating-star-66 svg * { fill: url(#wprm-recipe-user-rating-1-66); }linearGradient#wprm-recipe-user-rating-1-33 stop { stop-color: #ffffff; }linearGradient#wprm-recipe-user-rating-1-50 stop { stop-color: #ffffff; }linearGradient#wprm-recipe-user-rating-1-66 stop { stop-color: #ffffff; }
Ingredients
- 200 g pork butt
- 300 g daikon radish or winter melon
- 1 fresh ginger smashed
- 1 scallion
- 6 cups water
Sauce
- 2 tbsp. light soy sauce
- 1 tbsp. oyster sauce
- 2 garlic cloves minced
- 1 tbsp. chopped green onions
- 1 tbsp. chili oil optional
- 1 tbsp. roasted sesame seeds optional
- ½ tsp. salt
- ½ lime
ul.wprm-advanced-list-9116 li:before {background-color: #000000;color: #ffffff;width: 18px;height: 18px;font-size: 12px;line-height: 12px;}
Instructions
-
Clean the pork butt firstly and then soak in clean water for around 30 minutes. This helps to remove any raw taste.
-
Then prepare a large pot with clean water, add large daikon chunks, scallion, smashed ginger as well as the pork.
-
Cover the lid and bring it to a boil, remove any floats after boiling.
-
Slow down the fire and simmer for 50 minutes.
-
Take the pork out, cut into slices and then serve with dipping sauces.
-
Break the daikon, add a small pinch of salt to the soup and garnish some chopped green onion. You get a lovely match of white cute pork and a delicious daikon soup.
Video
[embedded content][embedded content]


Chickpeas are the ultimate pantry ingredient. A real culinary workhorse.
Loe edasi
This big-flavored farro salad was my contribution to a beautiful
Loe edasiView More